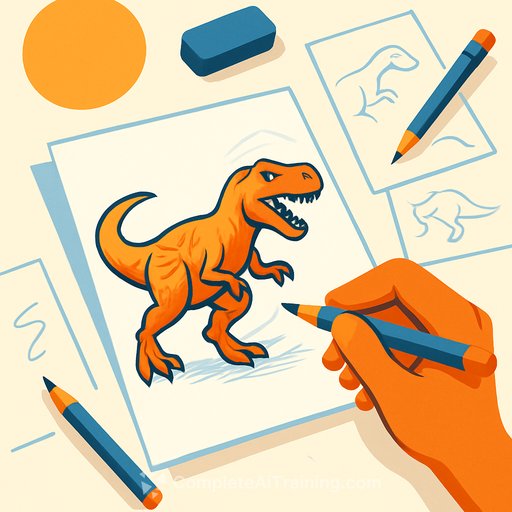
How to Draw a Dinosaur with Pencils
Materials
- PAPER: Canson Imagine 200GSM
- PENCILS: Bic Criterium 2mm, Koh-i-Noor Versatil 5347, Koh-i-Noor Progresso
- ERASERS: Faber Castell Precision eraser pen, Faber Castell kneadable eraser
For two decades, digital tools have dominated commissioned art workflows. Early on, sketches were made on paper, then scanned and colored in Photoshop. Later, working on a Wacom Cintiq made traditional tools almost obsolete. However, with the rise of AI-generated art, many artists are returning to basics to reconnect with the tactile experience of pencil on paper.
Drawing traditionally means embracing the texture of paper, the sound of pencil strokes, and the unpredictability of manual work without the undo button. This process often feels unfamiliar after years of digital practice, but it results in unique outcomes that machines can’t replicate. The approach here combines initial digital composition with traditional drawing and a splash of color to bring the scene to life.
Creating art is unpredictable. The focus is on the process itself and the organic development of the piece — in this case, dinosaurs included.
01. Lay Out a Basic Composition
Start with a simple digital composition using silhouettes and shapes. Use contrasting sizes and values to differentiate characters and create visual interest. This step helps plan the scene’s balance before moving to detailed work.
02. Make a Rough Sketch
Once the composition is set, sketch the major shapes roughly in Photoshop. Focus on the main subject—in this example, a T-rex—to establish dynamic movement. Keep lines minimal; detailed refinement comes later.
03. Make Silhouettes and Shapes
Develop interesting silhouettes for foreground characters. Photoshop layers let you experiment with poses without affecting other elements. Choose the pose that reads clearly and feels dynamic.
04. Add the Details
With the pose selected, start adding details using photo references to maintain realism. Balance anatomical accuracy with style to preserve movement and energy. The goal is believable characters, even if some creative liberties are taken.
05. Build Up the Second Character
Adding a human figure can be easier if familiar with drawing people. Maintain dynamism, contrast, and readability by using asymmetry—mix curves and straight lines, vary shapes, and avoid parallel lines. This is also the time to refine character design elements like clothing and hair.
06. Plan the Shading
Test the illustration’s contrast by adding rough shading digitally. This stage can inspire adding color. For example, bright red hair can make a character pop, creating a focal point that draws the eye.
07. Prepare for Traditional Drawing
Print the line-art to serve as the base for the final pencil drawing. Paper choice is crucial—too smooth or too grainy surfaces affect pencil control. Experiment with different papers to find what suits your style. For this piece, a grainier, warmer-toned paper was chosen after testing options.
08. Tape Your Paper
Secure the paper edges with tape to create clean borders and contrast. Taping also adds a satisfying finish when removed. It’s helpful to have a printout of the digitally shaded version nearby to reference values during drawing.
09. Make Your First Traditional Strokes
Begin the line-art with a mechanical pencil for precision and clean lines. Minimize distractions—turn off music, screens, and phones. Traditional drawing requires intense focus, similar to meditation. Time flies when fully engaged.
10. Choose Your Tools Carefully
Use at least two pencil grades: HB for fine line-art and softer leads (2B to 4B) for shading. Woodless graphite pencils are great for hatching and can create varied line thickness when tilted. Keep a mechanical eraser and putty rubber for corrections, plus several blending stumps for smooth shading.
11. Add Shadows and Smaller Parts
Work on shadows in the background and on the dinosaur using hatching before blending with a stump. Avoid using fingers to blend for more control. Use smaller stumps to add detail within shadowed areas.
12. Work on the Lighting
Apply rim lighting and highlights with a mechanical eraser for precision. This technique helps separate the dinosaur from the background, enhancing depth.
13. Create Textures
Keep some hatching texture even after blending to add strength and volume, especially on curved surfaces like the dinosaur’s neck. Avoid overly soft shadows that dilute the drawing’s impact. Directional hatching can define form effectively.
14. Contrasting Characters
To make the human figure stand out against the dinosaur, keep it flatter with minimal shadows. This 2D effect contrasts with the more volumetric dinosaur, improving visual hierarchy.
15. Give It a Flash of Colour
Add a vivid color accent, like bright red hair with a marker, to create contrast against grey pencil shading. Use pencil lines to add movement and texture to the hair, varying thickness and avoiding parallel lines for a natural flow. Lighten the hair slightly with an orange pencil for richness.
16. Look Back
Finishing a drawing means accepting imperfections. Some areas might not meet expectations, like hair rendering or shading, but every piece teaches something new. Each drawing builds skills for the next one, which will always be better.
For creatives interested in expanding their skills with AI tools that complement traditional workflows, Complete AI Training offers a range of courses that blend tech and art.
Your membership also unlocks: