
AI Product Consistency: Integrate Products in Google Veo 3 & Higsfield Videos (Video Course)
Struggling to keep your product front and center in AI-generated videos? This course shows you how to achieve reliable, brand-accurate results using Google Veo 3 and a practical workflow,perfect for marketers and creatives seeking standout visuals.
Related Certification: Certification in Integrating and Managing Consistent AI Products with Google Veo 3 & Higsfield
Also includes Access to All:
What You Will Learn
- Create annotated super-frames that combine base scenes, product overlays, and prompts
- Generate consistent base images with Midjourney and prepare them for integration
- Use Photoshop or Higsfield to layer products and draw action annotations
- Write precise text prompts to control camera moves, product actions, and background fidelity
- Iterate outputs, mine the best footage, and troubleshoot platform constraints
Study Guide
Introduction: Why Product Consistency Matters in AI Video Generation
If you've ever tried to use AI video generators for marketing or content creation, you've probably hit a wall: your product doesn’t show up where you want, transforms randomly, or fails to look like the real thing. That’s a dealbreaker, especially if you’re aiming for ads or high-fidelity product showcases. This course is a deep dive into solving that,teaching you how to put products into Google Veo 3 videos with reliable, repeatable consistency.
You’ll learn a workflow that fuses the strengths of Google Veo 3, Higsfield, Midjourney, and image editing tools like Photoshop. By mastering this, you’ll not only have granular control over where and how your product appears but also unlock a new level of creative flexibility for marketing, storytelling, and advertising. By the end, you’ll understand exactly how to build your own “product consistency machine” for AI video,and why this is the next-level skill for any modern digital creative or marketer.
Understanding the Product Consistency Problem in AI Video
Before we jump into the how, let’s clarify the why. Traditional AI video generators are powerful, but they have a fatal flaw for marketing: little to no control over whether your specific product appears at all, or if it does, it may morph, vanish, or lose its branding mid-sequence.
The Challenge:
You upload a great scene, but your product isn’t there. Or maybe it pops in halfway, looks off-brand, or the text is garbled. For anyone needing to showcase a real product,like an iPhone, a cereal box, or a branded chocolate bar,this inconsistency kills the value.
The Solution:
A new workflow that starts with a single, highly detailed still image containing the scene, product, annotations, and a text prompt all layered together. This “super-frame” acts as the north star for the entire video sequence, giving you unprecedented control over what appears, how it transitions, and how the camera moves.
Example 1:
You want to show a kitchen scene where a Cocoa Pops box appears on the table. Instead of hoping the AI “gets it,” you build an annotated first frame that clearly includes the product, guiding the video generator to keep it consistent.
Example 2:
You have a deconstructed iPhone on a mat and want it to assemble into a complete phone in the video,apps perfectly placed, widgets in their right spots. The annotated super-frame ensures the AI doesn’t invent its own version of the phone.
Tools and Platforms: The Workflow Ecosystem
This workflow leans on a handful of powerful tools:
- Midjourney: For generating the base image (without the product).
- Photoshop / Higsfield: For layering the product, drawing annotations, and integrating text prompts.
- Google Veo 3 (Flow): The video generator that brings your annotated frame to life.
- Higsfield’s “Draw to Video”: For a streamlined annotation and video generation process, especially if you want to avoid Photoshop.
- Freepic / Image Prompt: For generating or extracting detailed prompts from images and handling age or content restrictions.
Each plays a unique role in the workflow, and mastery of how they connect is essential for consistent product appearances in your videos.
Step 1: Generating the Base Image with Midjourney
The journey begins with a base image,your “scene” minus the product. This creates a visual context for your product to be introduced organically.
Why exclude the product initially?
You want the AI to focus on the environment first, ensuring the eventual product addition looks natural and isn’t distorted by random context.
How to do it:
Craft prompts in Midjourney that describe the scene as you want it, but avoid mentioning the product. For example: “Bird’s eye view of a cutting mat with equally distanced lines, parts neatly organized on the table.”
Example 1:
Scene: A clean kitchen countertop with utensils. Prompt: “Modern kitchen, marble countertop, morning light, utensils and bowls neatly arranged.”
Example 2:
Scene: A medieval knight standing in a field, but no sword or shield. Prompt: “A knight in armor standing in a green field, dramatic lighting, empty hands.”
Practical Tip:
If you have an existing image and want to generate a matching prompt, use a tool like Image Prompt or Freepic. Upload the image and get a detailed prompt to feed into Midjourney for consistency.
Step 2: Preparing the Annotated Super-Frame (Photoshop or Higsfield)
Now, take your base image and turn it into the ultimate guide for the AI video model. This involves layering the product, adding annotations, and writing a detailed text prompt,either in Photoshop or using Higsfield’s Draw to Video.
Key Components:
- Product Image: Add a high-quality, cut-out image of your product. Make it as large as possible within the frame to maximize pixel data for the AI.
- Annotations: Use arrows, circles, or lines to indicate movement, areas of interest, or product transitions. These guide the AI in dynamic actions.
- Text Prompt: A detailed, written instruction describing what should happen in the video: camera moves, product actions, environmental cues, and any special effects like “zero gravity.”
Example 1: iPhone Assembly
- Base image: Deconstructed iPhone parts on a mat.
- Product layer: Complete iPhone, screen facing up, widgets and apps exactly as desired.
- Annotation: Arrows showing parts moving toward the phone.
- Text Prompt: “The camera starts overhead, watching as each component floats into place in zero gravity, assembling the iPhone. All apps remain perfectly aligned.”
Example 2: Cocoa Pops Reveal
- Base image: Kitchen scene.
- Product layer: Cocoa Pops box, front-facing, readable text.
- Annotation: Arrow pointing to where the box should appear.
- Text Prompt: “The camera whip pans left to reveal the Cocoa Pops box on the counter. The box text remains sharp and legible.”
Tips for Layering:
- Use Photoshop for precise control,position, scale, and mask the product as needed.
- Higsfield’s Draw to Video is faster for basic annotations and layering, especially if you want to generate straight into video.
- Always keep the product prominent and clear for maximum fidelity.
Step 3: Writing Powerful Text Prompts
The text prompt is the secret engine behind the whole process. It isn’t just a label,it’s an instruction manual for the AI, telling it what to do, what to focus on, and what to avoid.
What to include:
- Camera Movement: Specify pans, zooms, whip pans, or stationary shots.
- Product Interaction: Describe if the product should be picked up, assembled, opened, etc.
- Environmental Details: Mention lighting, background, or anything that must stay constant.
- Special Effects: Use terms like “zero gravity” for floating parts or surreal movements.
- Background Control: If you want the background to persist, say so explicitly: “The camera fills the screen with the cutting mat scene.”
Example 1:
“The camera starts overhead, focuses on the disassembled iPhone. Components rise in zero gravity and snap into place, assembling the phone. The background remains the green cutting mat throughout.”
Example 2:
“The camera whip pans left to reveal the yellow Cocoa Pops box on the kitchen table. The box remains sharp, with clear readable text.”
Best Practices:
- State explicitly what you want to avoid, e.g., “No white background.”
- For transitions, describe them step by step.
- Use technical camera terms if you want specific effects (“pull focus,” “dolly zoom,” etc.).
Step 4: Annotation Techniques,Guiding the AI’s Hand
Annotations are the visual cues that help the AI understand where things should move, appear, or focus. They can be as simple as an arrow or as complex as a diagram of how a product assembles.
Types of Annotations:
- Arrows: Indicate movement or direction.
- Circles/Highlights: Draw attention to specific areas.
- Overlayed Images: Show products, props, or new elements to be inserted.
- Text Boxes: Can be used to reinforce instructions, though the main text prompt does the heavy lifting.
Example 1: Knight with Artifacts
- Base image: Knight without weapons.
- Annotation: Draw a sword and shield near the knight, with arrows indicating they will be picked up.
- Text Prompt: “The knight reaches for the golden sword and shield lying beside him. He lifts them and assumes a ready stance.”
Example 2: Product Pull from Pocket
- Base image: Person with hand near pocket.
- Annotation: Outline the path the product will take as it’s pulled out.
- Text Prompt: “The camera zooms into her hand as she pulls the Dairy Milk Oreo bar out of her pocket. The background remains soft and blurred.”
Tips:
- Keep annotations clear but not cluttered.
- Place them where the action will happen.
- Use contrasting colors so they’re visible.
Step 5: Feeding Your Super-Frame into AI Video Generators
With your annotated image and text prompt ready, it’s time to hand it over to the AI video model of your choice.
Google Veo 3 (Flow):
- Upload the annotated image.
- Provide a text prompt, even if the image contains written instructions.
- Choose the “Google V3 fast” model for a balance of quality and credit usage.
- Generate the video.
Higsfield “Draw to Video”:
- Upload or create your annotated image directly within Higsfield.
- Annotations and layering are done inside the tool.
- Higsfield doesn’t require a separate text prompt for generation,what you see is what the AI reads.
- Click generate and wait for your video.
Differences to Note:
- Google Veo 3 needs both image and text prompt; Higsfield can work from annotated image alone.
- Google Veo 3 is generally more powerful and gives you more granular control, including sound effects.
- Higsfield is faster for quick iterations and simpler scenes.
Step 6: Iterating and Refining,The Heart of the Workflow
AI video generation isn’t a one-and-done process. It’s iterative. That means you’ll often need several rounds of tweaks to get the perfect shot.
What to look for in the result:
- Is the product sharp and consistent throughout?
- Does the camera movement match your intent?
- Are backgrounds and props as expected?
If not, here’s how to troubleshoot:
- Adjust the text prompt,add clarifying instructions (“no white background,” “keep the product in focus,” etc.).
- Move or resize your product or annotations in the frame.
- Add or remove annotations for clearer action cues.
- Try a different angle or camera instruction.
Example 1:
Your phone assembles correctly, but the background turns white. Update the prompt to “The camera fills the screen with the cutting mat scene. No white background.”
Example 2:
The Cocoa Pops box appears blurry. Make the box larger in the image and specify in the prompt, “The box appears large and sharp, with all text readable.”
Best Practice:
Don’t be afraid to iterate. Each round teaches the AI more about your intent,and you more about how the tool interprets instructions.
Step 7: Mining the Best Footage,Extracting Gold from AI Clips
AI-generated video clips, especially from Google Veo 3, are usually around 8 seconds. But not all 8 seconds are usable. The first 1-2 seconds often contain awkward transitions or “AI weirdness.”
What is “mining”?
It’s the process of trimming away the less useful parts of the video,often the beginning,and extracting the clean, on-brand segments.
How to do it:
- Download the full video.
- Use a video editor to cut out the first 1-2 seconds.
- Identify the segment where your product is most visible and the action is clean.
- Crop, scale, and export the final footage at your desired resolution.
Example 1:
In an iPhone assembly video, the first second is glitchy. Starting from second two, the assembly is smooth and the phone is sharp. Trim accordingly.
Example 2:
A Cadbury Dairy Milk Oreo bar is pulled from a pocket. The first second is off-frame, but the remaining footage is perfect. Cut and keep only the best segment.
Tip:
Always preview the whole clip before deciding what to use. Sometimes the best moment is hidden in the middle.
Advanced Techniques: Direct Product Integration and Complex Scenarios
The method isn’t just for transitions. You can insert props directly into scenes or handle multiple actions/products, though complexity increases.
Direct Product Integration:
Suppose you want to add a sword and shield to a knight’s scene. Use annotations to draw in the props, then instruct the AI: “The knight picks up the golden sword and shield, raising them in victory.”
Multiple Products or Actions:
You can add several props into the initial frame. For example, a kitchen scene with a box, a bowl, and a spoon. However, if you want multiple actions,like the knight picking up both sword and shield, then walking away,complexity increases and you may need to iterate more.
Example 1:
A knight starts empty-handed, picks up a sword, then a shield, and poses. Use clear annotations and break down the prompt into steps: “The knight reaches for the sword, then the shield, then stands ready.”
Example 2:
A kitchen scene where both the Cocoa Pops box and a milk carton appear. Annotate both, specify their locations, and describe the camera movement: “Whip pan left to reveal Cocoa Pops box and milk carton side by side.”
Tip:
For complex narratives, break the workflow into multiple shots, then stitch together in post-production.
Dealing with Platform Constraints and Content Restrictions
Every platform has its quirks and limitations. Google Veo 3, for example, restricts images containing minors. If you hit a wall, here’s what to do:
Example:
You upload a scene with a child character and get rejected. Solution: Use Midjourney or Freepic to regenerate the character as an older teen or adult before integrating into your workflow.
Framing Considerations:
When generating a video of a product being pulled from a pocket, make sure your initial image isn’t too zoomed in. The product needs space to appear naturally.
Multiple Actions/Products:
AI can handle adding multiple products, but if you want several distinct actions, break them into parts or use more detailed prompts and annotations.
Tip:
Always review platform guidelines before submitting. Save time by anticipating and correcting potential issues upfront.
Comparing Tools: Higsfield, Photoshop, Google Veo 3, Midjourney, Freepic
Let’s break down when and why you might choose each platform or tool.
- Photoshop: Best for detailed control over layers, masking, and positioning. Use it when you need pixel-perfect placement or complex composite frames.
- Higsfield “Draw to Video”: Fast and user-friendly for annotation and layering, especially for straightforward scenes or rapid prototyping. Doesn’t require a text prompt for generation.
- Google Veo 3: The powerhouse for video generation, with sound effects and advanced capabilities. Requires a text prompt and works best with well-prepared annotated images.
- Midjourney: The go-to for generating high-quality base images and scenes. Use it to create the “blank canvas” for your product integration.
- Freepic / Image Prompt: Great for generating prompts from images, modifying elements (like changing a character’s age), or ensuring your base image matches your vision.
Advantages:
- Photoshop: Complete control.
- Higsfield: Speed and simplicity.
- Google Veo 3: Power and precision.
- Midjourney: Flexible, creative image generation.
- Freepic: Useful for metadata and modification.
Disadvantages:
- Photoshop: Steeper learning curve.
- Higsfield: Less control over fine details.
- Google Veo 3: Content restrictions, requires more setup.
- Midjourney: No direct video output.
- Freepic: Sometimes generic results.
Product Fidelity: Achieving Exactness in Brand and Text
One of the biggest breakthroughs in this workflow is the level of product fidelity you can achieve,even for text on packaging or detailed UI elements.
Example 1: iPhone Assembly
The apps and widgets on the iPhone in the video match the annotated image precisely. No random icons, no misplaced apps. This is a leap forward from previous AI-generated videos, where details would often be lost or randomized.
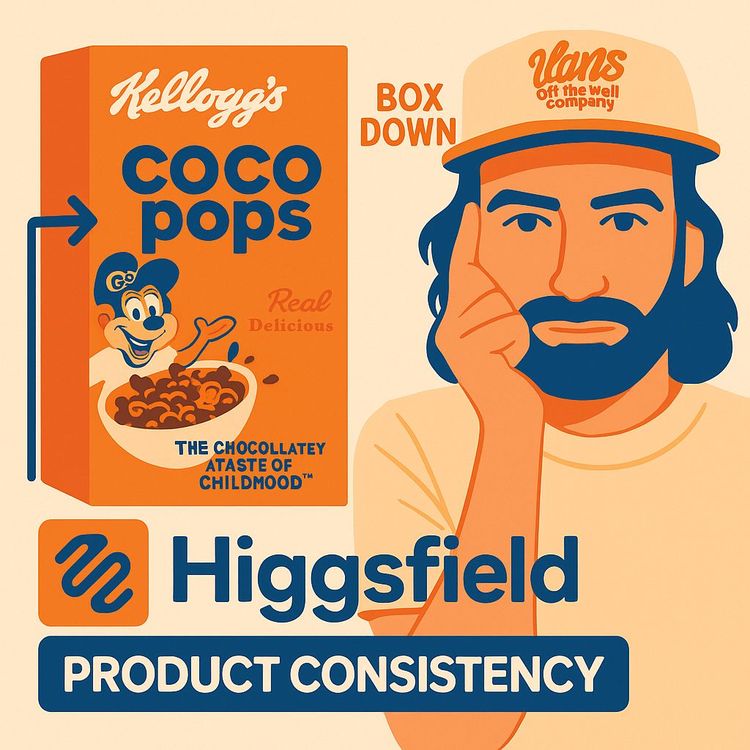
Example 2: Cocoa Pops Box
The text on the box,“Real delicious, delightfully chocolatey. No artificial colors”,is sharp, legible, and accurate. The AI not only keeps the product front and center, but it also preserves branding and even small typography.
Best Practice:
Make your product as large and prominent as possible in the initial annotated image. The more pixels the AI has to “learn” from, the better the fidelity in the final video.
Real-World Marketing Applications and Creative Potential
This isn’t just a technical hack. It’s a new way to create marketing and advertising assets at a speed and quality previously impossible.
Example 1: Ad-Ready Product Transitions
You can now show a product assembling, transforming, or appearing in a scene with full brand fidelity, all in a few iterations and hours,not weeks of traditional animation or video production.
Example 2: Storytelling and Narrative
A knight picks up a sword and shield, then interacts with them, all guided by your annotations and prompts. This opens doors for complex storytelling, product demos, or even explainer videos with branded props.
“Secret Sauce” for High-Level Advertising:
The real secret here is combining all elements,base image, product, annotations, and a killer prompt,into one super-frame. This is what enables AI to deliver exact product consistency, turning your workflow into a repeatable content engine for any brand or client.
Common Pitfalls and How to Avoid Them
Every workflow has its learning curve. Here’s what to watch for:
- Product Too Small: The AI blurs or loses detail. Solution: Make it as big as possible in the frame.
- Unintended Background Changes: The background morphs or disappears. Solution: Add clear instructions in your prompt about the background, or reinforce with annotations.
- Content Restrictions: Your image gets rejected. Solution: Use Freepic or Midjourney to alter problematic elements before uploading.
- Awkward Transitions: The first few seconds of generated footage look off. Solution: Always mine the best segment, trimming as needed.
- Multiple Actions Get Messy: Too many moving parts can confuse the AI. Solution: Break into simpler shots or use multiple iterations.
Pro Tip:
Document your successful prompts, annotations, and image setups. Build a personal library of “winning combos” for future projects.
GenHQ and Further Learning
If you want to go even deeper or connect with other AI creatives, GenHQ is a community offering training, updates, discounts, and peer support for everything Creative GenAI. It’s a good resource for staying updated and getting feedback on your projects.
Services Offered:
- Training on new AI tools and workflows.
- Updates and news on AI video generation.
- Discounts on platforms and credits.
- Peer networking for creative professionals.
If you want to accelerate your learning, consider joining to get hands-on support.
Conclusion: Mastery Through Practice,Your Roadmap to Product Consistency
By now, you have a complete roadmap to guide you from blank canvas to product-perfect AI video. The process is simple in theory,build a base image, annotate and prompt it, feed it into the right AI, iterate, and mine the gold. But the real magic comes with practice.
Key Takeaways:
- The secret to product consistency is combining a clear base image, precise annotations, and a detailed text prompt into a single, powerful input.
- Use the right tool for each step,Midjourney for base images, Photoshop or Higsfield for layering, Google Veo 3 for video generation, and Freepic/Image Prompt for prompt extraction and edits.
- Iteration is not optional; it’s the process. Learn from each output and refine.
- Always mine your footage for the highest-quality moments, and don’t hesitate to edit or recombine segments for the best result.
- This workflow is a game-changer for marketers, advertisers, and anyone who needs reliable, high-fidelity product video content.
Apply these skills, experiment boldly, and you’ll find yourself at the forefront of creative AI video generation,delivering brand-perfect results at a pace that leaves traditional production in the dust.
Frequently Asked Questions
This FAQ section is designed to answer the most common and important questions about achieving product consistency in AI-generated videos using Google Veo 3, Higsfield, and related tools. It covers everything from foundational workflow concepts to troubleshooting, advanced use cases, and real-world applications. Whether you're just starting out or looking to refine your practice, you'll find practical, actionable guidance here.
What is the primary problem this new AI workflow aims to solve?
This new AI workflow, leveraging tools like Higsfield and Google V3, primarily aims to solve the problem of product consistency and controlled object integration within AI-generated videos. Traditionally, if you upload an initial frame to a video generator, you have limited control over how a product appears or moves within the scene as the camera pans or transitions. This method allows for precise inclusion and interaction of products within dynamic video sequences.
How does this workflow allow for precise product integration and transitions in AI-generated videos?
This workflow combines several elements to achieve precise product integration. It involves creating a single still image frame that acts as the primary input for the AI video generator (like Google V3). This image isn't just a photograph; it's an annotated composition that can include:
- A base image: Often generated in tools like Midjourney, representing the initial scene without the product.
- An image of the exact product: Overlaid onto the base image, often with adjusted sizing and positioning. The larger the product on the canvas, the more details the AI can capture.
- Text annotations/prompts: These detailed instructions describe the desired actions, camera movements, and product transitions. For example, "all the components on the cutting mat rise into the air with zero gravity and transition into an iPhone with the screen on."
- Line annotations/arrows: Visually indicating movement or interaction points.
What tools are primarily used in this product consistency workflow, and what are their roles?
The main tools highlighted in this workflow are:
- Higsfield (specifically the "draw to video" feature): This platform allows users to create annotated images directly within its interface. You can upload a base image, add product images, draw annotations, and input text prompts. It can also generate the video directly.
- Google V3 (or Google Flow): This is the AI video generator that takes the annotated image (either from Higsfield or a tool like Photoshop) as its initial frame and generates the video based on the annotations and text prompt. It's known for generating 8-second clips and offering sound effects.
- Midjourney: Used to generate high-quality initial images for the scenes. Users can craft prompts to create environments without the target product, which is then added later.
- Photoshop: An alternative to Higsfield for creating the annotated image. Users who are more familiar with Photoshop can combine their base image, product image, text, and annotations within it before uploading the final composite to Google V3.
- Image Prompt: A tool that can analyse an image and generate a detailed text prompt based on its metadata, useful for replicating or refining scene environments in Midjourney.
- Freepick (specifically Flux Context): Used for experimental features like changing character appearance within an existing image, such as making a younger character appear as a teenager to bypass restrictions.
What are some key tips for optimising the results when generating videos with this method?
Several tips are crucial for optimising results:
- Product Size on Canvas: When adding the product image to the annotated frame, make it as large as possible on the canvas. This provides the AI with more pixels and detail to understand and accurately represent the product.
- Detailed Text Prompts: Be highly specific in your text annotations about actions, transitions, and desired outcomes. Mentioning "zero gravity" for rising objects can help the AI generate physically plausible movements.
- Iterative Process: AI generation is often an iterative process. Expect to make multiple attempts, adjusting images and prompts based on the results to refine the video's fidelity and adherence to your vision.
- "Mining" the Footage: Google V3 generates 8-second clips. It's recommended to "mine" these clips by cutting out the most valuable and polished sections, often starting after the initial 1-2 seconds of transition and ending before any degradation.
- Consider Physicality: The AI models try to generate things that make physical sense. Providing context like "zero gravity" can aid in creating smoother, more believable transitions for actions that defy normal physics.
- Address Background Issues: If the background is being lost or replaced with white, try adding specific instructions to your prompt, such as "no white background" or "the camera fills the screen with the cutting mat scene," at the beginning of your text prompt.
- Prompt First Action: When giving multiple instructions, focus the initial text prompt on the very first action you want the video generator to perform.
Can you add multiple products or props into a scene using this workflow?
Yes, this workflow allows for the integration of multiple products or props into a scene. The examples provided include adding a sword and shield to a knight scene, and the speaker mentions that you could upload two distinct product images (like a Kellogg's cereal box and another product) and have them appear next to each other. The method essentially treats each added element within the initial annotated image as something the AI should incorporate and potentially interact with.
What kind of "product fidelity" can be achieved with this method, especially concerning text?
The product fidelity achieved with this method can be remarkably high, even down to intricate details like text. In one example, an iPhone transition retained the exact positioning and appearance of all app icons and widgets on the screen. Most impressively, a transition involving a Kellogg's Cocoa Pops box resulted in the AI accurately rendering the text on the box, including phrases like "Real delicious," "delightfully chocolatey," and "No artificial colors or flavoring," demonstrating an incredible level of detail and accuracy in text reproduction.
What are some limitations or challenges encountered when using this workflow?
Several limitations and challenges can arise:
- Computational Cost: Generating videos, especially in platforms like Higsfield or Google V3, consumes credits, which can be costly.
- Iterative Nature: Achieving the desired result often requires multiple attempts and adjustments to images and prompts, making the process time-consuming.
- Fidelity Discrepancies: While generally high, there can be minor inconsistencies. For instance, an iPhone transition might show different battery or Wi-Fi icons, or a slight gap in app positioning.
- Background Loss: AI models might sometimes replace detailed backgrounds with generic ones (e.g., a white background), requiring explicit instructions in the prompt to retain the original setting.
- Handling Multiple Complex Actions: While good for single or two-part transitions, asking for multiple complex actions or interactions simultaneously might lead to less predictable or "complicated" results.
- Image Restrictions: Google Flow, for example, has restrictions on uploading images of "minors," which necessitates creative workarounds like altering character ages using other AI tools.
- Audio Issues: Generated videos might have audio that is "completely messed up," requiring manual replacement or sound design.
How can this workflow be applied to marketing and advertising?
This workflow offers groundbreaking potential for product marketing and advertising by enabling creatives to:
- Showcase product transitions: Demonstrate how individual components assemble into a final product, or how a product appears dynamically within a scene.
- Integrate products seamlessly: Introduce specific products into an existing video narrative or environment with precise control over their appearance and interaction.
- Create dynamic product reveals: Have a character interact with a product, such as pulling a chocolate bar from a pocket, with high fidelity.
- Generate diverse ad creatives: Rapidly prototype and create various advertising scenarios, adjusting product placement, camera angles, and transitions.
- Bypass traditional CGI/VFX limitations: Achieve complex product integrations that would typically require extensive and expensive CGI or visual effects, at a fraction of the cost and time.
- Produce highly detailed product visuals: The high fidelity, especially with text on products, ensures that branding and messaging are accurately represented, crucial for advertising.
Why is product consistency a challenge in traditional AI video generation?
Traditional AI video generators often lack granular control over individual products within a scene. When you upload a base frame, the AI may reinterpret or alter product details as the video progresses, leading to inconsistencies in branding, text, or placement. This unpredictability makes it difficult to maintain a product’s appearance throughout transitions or camera movements, especially in professional or marketing contexts where accuracy is critical.
What is the core idea behind combining image, annotation, and text prompts into a single initial frame?
The core idea is to provide the AI video model with a comprehensive blueprint for the video. By merging the base image, overlays of the product, visual annotations (like arrows), and detailed text prompts into one frame, you give the AI specific instructions on what to generate, how objects should move, and what transitions or interactions to include. This dramatically increases control and reduces ambiguity compared to relying on a single image or vague text prompt alone.
What role does Midjourney play in the initial frame creation?
Midjourney is used to generate high-quality, visually rich base images for your video scenes. You start by crafting prompts that create the desired environment without the product you plan to later introduce. This ensures a clean background, allowing more flexibility and control when you add the product overlay and annotations in subsequent steps.
How do you prepare an image in Midjourney to exclude the product you intend to introduce later?
First, describe the scene you want in natural language prompts while intentionally leaving out any mention of the product. For example, instead of saying "a desk with a laptop," you would prompt for "a clean, modern desk workspace" and later add the laptop as an overlay in Photoshop or Higsfield. This approach ensures the initial environment is “neutral” and ready for precise product integration.
What is Image Prompt and how does it assist the workflow?
Image Prompt analyzes an uploaded image and generates a detailed text prompt based on its visual content and metadata. This is especially useful if you want to replicate a scene in Midjourney or refine your prompt for better base image generation. For example, uploading a photo of a kitchen can yield a prompt describing its colors, lighting, and layout, which you can then use or tweak for consistent scene creation.
How are annotations and text prompts added to the initial image?
Annotations and text prompts can be added directly within Higsfield’s "Draw to Video" feature by uploading your base image, then drawing lines, adding product overlays, and inputting text instructions. Alternatively, if you’re more comfortable with Photoshop, you can combine all these elements manually, save the composite, and use it as your input frame for video generation.
What types of annotations are recommended?
Typical annotations include:
- Line drawings or arrows: Indicate intended movement, direction, or point of interaction.
- Product overlays: Add the actual product image, positioned and sized as you want it to appear in the video.
- Text boxes: Provide explicit instructions, such as camera moves, transitions, or actions like “camera pans left” or “components float upward.”
What is the significance of the text prompt in guiding video generation?
A detailed text prompt acts as the narrative guide for the AI video model. It specifies exactly what should happen in the scene: how the camera should move, how products should interact, and what transitions to create. For example, prompts like "the camera slowly zooms in as the cereal box floats upward in zero gravity" help direct the AI’s focus and timing, producing more controlled and relevant results.
Can you give examples of effective text prompt elements?
Yes. Some examples include:
- “Zero gravity” to achieve smooth, floating transitions for objects.
- “Whip pan to the right” for dynamic camera movement.
- “The camera fills the screen with the cutting mat scene” to prevent background loss.
- “All components rise into the air and transform into an iPhone” for controlled product transitions.
What is Google Veo 3 and what are its key features?
Google Veo 3 (also known as Google Flow) is an advanced AI video generator. Its notable features include:
- 8-second video generation with options for sound effects.
- Frame-to-video conversion: Upload annotated still images to guide video creation.
- Credit-based usage: Each video costs a set number of credits, so managing iterations efficiently is important.
How does Higsfield's "Draw to Video" tool work with video generation?
Higsfield’s Draw to Video tool lets you upload a base image, add overlays (like products), draw annotations, and input a text prompt,all within a single interface. Once finalized, this annotated image and prompt are sent directly to the video model (such as Google Veo 3), streamlining the process from concept to output.
Are there differences in prompt requirements between Google Veo 3 and Higsfield?
Yes. Google Veo 3 generally requires a more detailed, descriptive prompt to generate high-fidelity results, especially regarding product integration and camera movement. Higsfield simplifies the process by allowing more visual annotation, so you can rely less on lengthy text and more on drawn cues. Both benefit from clarity, but Google Veo 3 leans more on written instruction, while Higsfield blends visual and textual guidance.
What does "mining" mean in the context of AI video generation?
Mining refers to the process of carefully reviewing the generated video clip (typically 8 seconds) and extracting only the most valuable or relevant segments. Often, the first 1-2 seconds contain transitional artifacts, and the final moments may degrade in quality. By "mining," you focus on the cleanest, most effective section for use in your final project or advertisement.
Why is it important to "mine" the generated clips from Google Veo 3?
Generated clips frequently contain transitional frames or inconsistencies at the beginning and end. Mining ensures you use only the strongest, most visually coherent parts,typically the middle 3-5 seconds,where product transitions and actions appear clean and aligned with your intent. This increases the perceived quality and professionalism of the final output.
Which parts of the generated video are typically cut out or used?
Common practice is to discard the first 2 seconds (due to odd transitions or scene setup) and sometimes the last second or two if the video starts to degrade or veer off. Focus on the middle section where the product action is smooth and detailed,this is usually the most usable segment for marketing or presentation purposes.
Can you describe the Porsche to Transformer example and its significance?
In this example, a Porsche car in the scene transitions into a Transformer robot. The significance lies in the ability of the workflow to maintain precise product details (like the car’s design and branding) while introducing complex, dynamic movement and transformation,highlighting both the fidelity and creative flexibility of the method.
What does the iPhone deconstruction and assembly example demonstrate?
This example showcased high product fidelity, with the iPhone disassembled into components and then reassembled, all while maintaining the exact placement and appearance of app icons and widgets. It demonstrated how the workflow could handle intricate transitions and preserve visual consistency at a granular level.
How does the workflow handle adding props to a scene, like in the Knight and Artifacts example?
The Knight example showed how you can overlay multiple props (such as a sword and shield) onto a character, then use annotations and prompts to direct their interaction (e.g., character picking up the sword). The AI interpreted these cues to generate a video where the character and props interact in a controlled, visually consistent way.
What does the Kellogg's Cocoa Pops example illustrate about this workflow?
It demonstrates the workflow’s ability to integrate branded products with high accuracy, including text and package design, into a pre-generated scene. The video included camera movements (like a whip pan) and maintained the product’s branding, which is critical for advertising use cases.
What challenge was highlighted in the Cadbury Dairy Milk Oreo bar example?
The key challenge was framing,the initial image needed enough space around the character’s pocket to allow the bar to be realistically pulled out. If the camera was too close, the product couldn’t appear naturally in the generated video, underscoring the importance of spatial planning in the initial image.
Why is the AI video generation workflow considered "iterative"?
AI video generation often requires multiple rounds of adjustments,to the initial image, annotations, or text prompts,to achieve the desired result. Early outputs may have issues with product placement, background, or transitions, so you tweak the inputs and regenerate the video until the outcome matches your vision. This back-and-forth process is common, especially when aiming for high fidelity or complex sequences.
How do you troubleshoot issues like incorrect backgrounds or poor product fidelity?
Common troubleshooting strategies include:
- Refining your text prompt (e.g., adding "no white background" or "maintain original scene").
- Adjusting product size or position in the initial frame for better clarity.
- Iterating on annotations to clarify movement or interaction points.
- If the video output misinterprets your intent, review your annotations and prompts for ambiguity and revise accordingly.
What happens if you try to upload an image of a minor to Google Flow, and how do you resolve it?
Google Flow restricts uploading images of minors. To resolve this, you can regenerate the character in Midjourney to appear older, or use a tool like Freepick’s Flux Context to alter the character’s age. This workaround ensures compliance with the platform’s content policies while preserving your overall scene.
Why is image framing important for product actions like pulling a product from a pocket?
Having enough space in your initial frame is crucial. If the product is meant to be pulled from a pocket, the image must include adequate room around the hand and pocket area. Overly tight framing can prevent the AI from generating a smooth product reveal, while a well-composed shot allows for natural-looking actions and transitions.
How do you handle scenarios with multiple actions or products in a single scene?
For multiple actions or products, ensure that each element is clearly annotated and described in your initial frame and prompt. However, requesting too many complex actions at once can overwhelm the AI, leading to unpredictable results. It’s often best to focus on one or two main actions per video, or to break complex scenes into separate sequences and edit them together afterward.
When might you choose Photoshop over Higsfield for annotation?
You might prefer Photoshop if you need advanced image editing features, complex layering, or are already proficient with the software. It offers greater control over fine details and composition. Higsfield is more streamlined and user-friendly for rapid prototyping, making it ideal for quick iterations or when you want to stay within a single workflow.
Certification
About the Certification
Get certified in AI Product Consistency and demonstrate the ability to integrate branded products into AI-generated videos, delivering reliable, on-brand visuals in Google Veo 3 and Higsfield for compelling marketing and creative projects.
Official Certification
Upon successful completion of the "Certification in Integrating and Managing Consistent AI Products with Google Veo 3 & Higsfield", you will receive a verifiable digital certificate. This certificate demonstrates your expertise in the subject matter covered in this course.
Benefits of Certification
- Enhance your professional credibility and stand out in the job market.
- Validate your skills and knowledge in cutting-edge AI technologies.
- Unlock new career opportunities in the rapidly growing AI field.
- Share your achievement on your resume, LinkedIn, and other professional platforms.
How to complete your certification successfully?
To earn your certification, you’ll need to complete all video lessons, study the guide carefully, and review the FAQ. After that, you’ll be prepared to pass the certification requirements.
Other AI Video Courses

Video Course: What is Generative AI and how does it work?

Video Course: How to Use ChatGPT from Beginner to Professional

Video Course: How to Use Google Gemini for Google Workspace to Boost Productivity

Video Course: How to Use Claude 3.7 AI - Tips for Beginners!

Video Course: ChatGPT for Data Analytics: Full Course - from Beginners to Professional

Video Course: Generating Images and photos With ChatGPT?

Video Course: Generating Images & Photo's with MidJourney

Video Course: Generating Design's with Microsoft Designer and AI

Video Course: Generating Design's with Canva.com and AI
Join 20,000+ Professionals, Using AI to transform their Careers
Join professionals who didn’t just adapt, they thrived. You can too, with AI training designed for your job.


