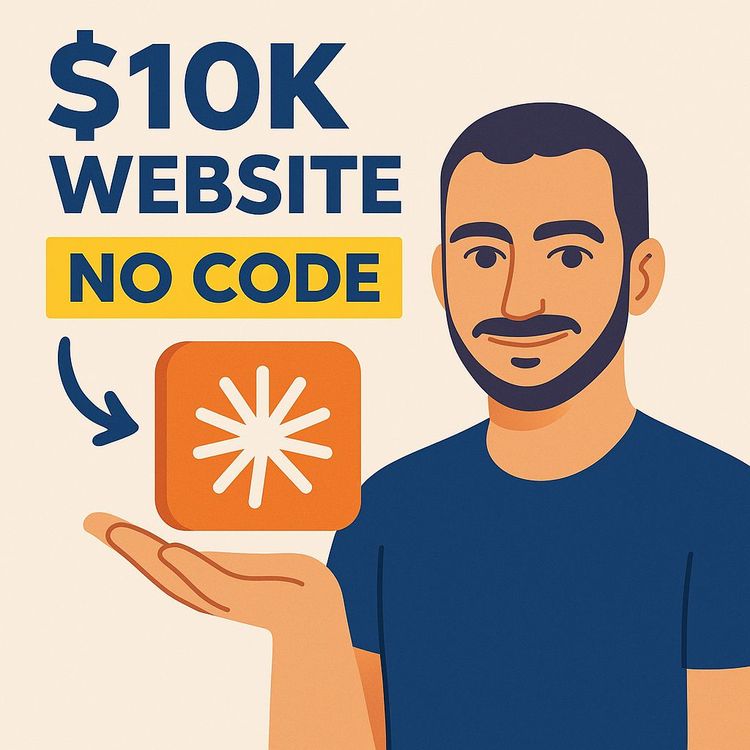
Build $10k Full-Stack Websites with AI & Claude Code (Video Course)
Forget landing pages. Anyone can generate those with AI. This guide shows you how to build real full-stack apps with logins, databases, and media pipelines,clients pay five figures for. You'll build a complete wedding platform using Claude Code, step by step.
Related Certification: Certification in Building AI-Powered Full-Stack Websites
Also includes Access to All:
What You Will Learn
- Plan and spec a full-stack, product-grade web app for real business value
- Set up and use Claude Code, install design skills, and manage AI build sessions
- Connect and operate Supabase, ImageKit, and Higgsfield via MCP integrations
- Build a Next.js multi-tenant app with auth, admin dashboard, and media workflows
- Optimize media delivery (CDN, adaptive bitrate streaming, watermarking) and iterate with AI
Study Guide
Alright, let's cut through the noise. You've seen the videos. The ones promising you the secret to building $10,000 websites with AI. And what do they show you? A landing page. A pretty user interface with some smooth animations. That's it. That's not a $10,000 website. That's a $500 website that looks like it could be worth $1,000 on a good day. The truth is, landing pages are easy now. Anybody can prompt an AI to build a beautiful homepage. The market is flooded with them. So if you want to command premium pricing, you need to build something that actually works. Something that solves a real problem, manages real data, and provides real functionality that a business can't live without. That's what this guide is about. We're going to move past the surface-level stuff and build a complete, full-stack web application using Claude Code. The kind of product that has user authentication, a database, media delivery, and an admin panel. The kind of product you can confidently charge five figures for. We're going to do this by building a real-world case study: a wedding photography delivery platform. This isn't just a demo. It's a multi-tenant application that a wedding venue could use to create branded websites for each couple, manage guest invitations and RSVPs, and deliver high-resolution photos and videos securely. This is a product with genuine commercial value. And here's the kicker: you're not going to write the code yourself. You're going to direct an AI to do it. Your job is to be the architect, the planner, and the quality controller. That's where the real value lies now. Let's get started.The Real Difference Between a Landing Page and a Product
Let's be brutally honest about the current state of the market. There's a reason why so many people are stuck selling cheap websites. They're building the wrong thing. A landing page is a digital brochure. It looks nice, it tells a story, and it has a call-to-action button. But once someone clicks that button, what happens? Usually, they get sent to a third-party service or an email form. The page itself doesn't do anything. A $10,000 website is a tool. It's a piece of infrastructure that a business relies on to operate. It has users who log in. It has data that gets stored and retrieved. It has workflows that save people time and money. It's not just a pretty face; it has a brain and a nervous system. So what does a premium website actually need? First, it needs to solve a genuine problem for a specific audience. Not a generic problem, but a specific, painful one. Our wedding platform solves the problem of delivering a massive amount of high-resolution media to dozens of guests in an elegant, organized way, instead of sending them a chaotic Google Drive link. Second, it needs a backend. This means a database to store user information, content, and relationships. It means server-side logic to handle authentication, permissions, and business rules. Without a backend, you just have a static page. Third, it needs user accounts and roles. A system where a guest has a different experience than an admin. Guests can view content and RSVP. Admins can upload media, manage invites, and control what's published. Fourth, it needs media management. For a content-heavy site, this is crucial. You can't just upload a 4K video to your server and hope for the best. You need a system that optimizes images, streams video efficiently, and delivers everything through a fast global network. Finally, it needs administrative functionality. The client needs a dashboard to manage their content. They need to be able to log in, see their data, and make changes without touching a line of code. If you can build all of that, you're not just a website builder anymore. You're a software developer. And that's a completely different price point.Setting Up Your AI Development Environment
Before we start building, we need to get our tools in order. The primary tool is Claude Code, Anthropic's development environment. You can get the desktop application directly from Anthropic's website. Download it, install it, and sign in with your Claude account. You'll want a subscription that gives you enough usage for complex projects. The free tier won't cut it for building a full-stack application. The desktop app has a few key features you need to understand. There's the Code tab, where you'll create new development sessions. This is where the magic happens. You can also toggle between different permission modes. In standard mode, Claude will ask for approval before every file change or command execution. That gets tedious fast. For long building sessions, you'll want to switch to bypass permission mode. This allows Claude to make changes and run commands automatically. It's like giving a skilled developer full autonomy to get the job done. You'll also select your model. The guide references Fable 5 as a top-tier choice for performance, with Opus 4.8 as a solid alternative. You can adjust the reasoning level too. Setting it to "high" means the AI will think more deeply about its responses, which is worth the extra time for complex tasks. Each project should live in its own folder. You create a dedicated directory for the website you're building, and you point Claude Code at that folder. All changes are scoped within it. This keeps things clean and prevents the AI from messing with unrelated files on your system. There's also a command-line interface (CLI) version of Claude Code. It's more technical, but it gives you finer control, especially for installing certain integrations. Don't worry if you're not a terminal wizard. You can literally ask Claude Code to help you navigate the terminal. Just say, "I'm on Windows, how do I change directories?" and it will guide you. One more thing: voice input. Tools like Whisper Flow can turn your speech into text, which you can then paste into Claude Code. If you think faster than you type, this is a game-changer for writing detailed prompts.Installing Specialized Skills for Better Design
Here's a secret that separates mediocre AI-generated websites from professional ones: skills. Skills are markdown files that teach Claude specific design principles and methodologies. They're like plugging a specialized brain module into the AI. Without them, Claude will produce generic, template-like designs. With them, the output becomes genuinely varied and high-quality. The first skill you need is the front-end design skill. This is a comprehensive set of design principles that guides the AI's aesthetic choices. It prevents the "cookie-cutter" look where every website ends up with the same layout and color scheme. This skill gives Claude the knowledge to make deliberate design decisions based on the project's context. The second skill is UI/UX Pro. This one focuses on the interaction layer. It ensures that the buttons, forms, and navigation are not just pretty, but intuitive and functional. It teaches the AI about usability patterns, accessibility, and creating a polished, professional feel. Installing these skills is simple. You get the URL of the skill repository. You paste it into Claude Code and say, "Install this skill from the repo above." Claude will download and integrate it. After installation, you restart the application and create a new session. Now, you can invoke these skills using slash commands. Type `/front-end-design` and the skill is active. Type `/ui-ux-pro` and you get that expertise. This is a critical step. It's the difference between asking a general contractor to build a house and asking a team of specialized architects and interior designers. The result is on a completely different level.The Art of Strategic Planning with AI
This is the most important part of the entire process, and it's where most people fail. They skip the planning and jump straight to "build me a website." That's a recipe for disaster. You need to approach this like an architect, not a construction worker. The planning phase is where you make the critical decisions that will determine the success of the entire project. Let's use our case study: the wedding photography delivery platform. The vision is to sell this system to wedding venues. The venue buys the platform and uses it as a premium service to offer their couples. For each wedding, the venue gets a customized, branded website. The couple can send digital invitations to their guests. Guests can RSVP online. After the wedding, the venue uploads the photos and videos, and guests can access them through this beautiful, branded interface. It replaces the clunky, unprofessional experience of sharing a Google Drive link. Why would a venue pay $10,000 for this? Because it solves a real problem. It makes their service more premium. It differentiates them from every other venue that sends a link. And it's reusable. They use the same infrastructure for every single wedding they host. That's the business case. Now, how do you plan this with AI? Start with a "brain dump." Write out your vision in natural language. Describe the purpose, the problem it solves, and the features you think you need. Don't worry about structure. Just get it all out. Then, and this is key, instruct the AI to ask you clarifying questions. You don't want it to just take your initial prompt and run with it. You want it to dig deeper. You want to say, "Before we build, ask me questions to refine the requirements." The AI will ask things like: "Who are the user roles?" "What are the authentication requirements?" "What types of media will be uploaded?" "Do you need multi-tenant support?" "What are the customization needs for different venues?" Answering these questions forces you to think through the architecture. It surfaces edge cases you hadn't considered. It ensures that you and the AI are aligned before a single line of code is written. Finally, document everything. Create a plan file. This is your blueprint. Over a multi-hour build session, context can get lost. Having a written plan that the AI can refer back to is essential for maintaining consistency and preventing errors.Your Core Technology Stack
You're not going to build this from scratch. You're going to stand on the shoulders of giants by using a stack of powerful, specialized services. This is the "backend" that makes your $10,000 website a reality. The first piece is Supabase. Think of it as your entire backend infrastructure. It's an open-source Firebase alternative. It gives you a PostgreSQL database, user authentication, file storage, and even edge functions. It handles the heavy lifting of user management and data storage. You'll use it to store user accounts, guest lists, RSVP statuses, and all the metadata for your media files. The second piece is ImageKit. This is your media management and delivery powerhouse. It's a cloud-based platform that optimizes images and videos and delivers them through a global CDN. This is non-negotiable for a media-heavy site. You can't just dump high-res photos on your own server and expect them to load fast. ImageKit handles resizing, compression, format conversion (like WebP), and even watermarking. For videos, it enables adaptive bitrate streaming, which we'll get to later. It ensures your content loads instantly for users anywhere in the world. The third piece is Higgsfield. This is an AI asset generation tool. It can create high-quality images and videos from text prompts. This is incredibly useful for populating demo sites with realistic content when you don't have actual wedding photos. It can also be used to create custom visual assets for clients. It connects to Claude Code via an MCP server, allowing the AI to generate assets on demand. The final piece is Next.js. This is the application framework. It's a React-based framework that allows you to build full-stack applications. It handles the frontend, the server-side rendering, and the API routes. It's the glue that holds everything together, providing the structure for your web app.Connecting the Dots with MCP Servers
This is where Claude Code transforms from a code generator into a full-stack development platform. It's all about MCP, or Model Context Protocol. MCP servers are the bridge that allows Claude to directly control these external services. Instead of you manually going into Supabase to create a database table, you can just tell Claude to do it. Claude uses the MCP connection to make the changes for you. This is the secret sauce for conversational, full-stack development. Let's look at how to connect each service. For ImageKit, the setup is surprisingly simple. ImageKit provides documentation specifically designed for AI coding agents. You copy the setup page and paste it into Claude Code. Claude reads it, executes the steps, and connects to your ImageKit account. You'll need your credentials: the public key, private key, and URL endpoint. These are stored in environment files. Once connected, Claude can upload, organize, and optimize your media assets directly. For Supabase, the process is similar. You go to your Supabase dashboard, find the "connect with Claude Code" option, and copy the prompt it generates. You paste this into Claude Code, and it initiates the connection. This requires a browser-based OAuth authentication. Claude will give you a URL to click, you log in to Supabase in your browser, and you authorize the connection. Once that's done, Claude can manage your databases, schemas, and authentication directly. For Higgsfield, you'll need to use the CLI version of Claude Code. The setup is done by pasting the MCP connection URL into your terminal. Once authenticated, you can ask Claude to generate images or videos, and it will trigger the generation through the MCP server. You can always check your connections by using the `/mcp` command in Claude Code. It will show you all the servers you've set up. Any that require authentication will be flagged. After you authenticate them through the browser, they'll show as "connected" and ready to use. This integration is what makes the entire workflow possible. It's the difference between an AI that writes code for an app that doesn't exist and an AI that builds the app, connects it to a live database, and populates it with content.Building a Coherent Design System
Before we build the entire application, we need to establish the visual foundation. This is the design system. A design system is more than just a color palette. It's a comprehensive set of rules that ensures visual consistency. It includes your color themes, typography choices, spacing rules, and component styles. This is what makes your website look like a professional product, not a random collection of HTML elements. Here's how you do it with Claude Code. First, you invoke the front-end design skill. You activate it with `/front-end-design`. Then, you ask Claude to generate design systems. You can request multiple variations. Ask for "three different color palettes and themes" or "a few typography pairings that feel elegant and modern." The skill gives Claude the knowledge to create these variations with real design intent. Next, you use the UI/UX Pro skill to refine the landing page. You can ask it to take the design system and apply it to a demo homepage. This lets you see the design in action before you commit to building the whole app. The key here is to generate multiple options. For a multi-tenant application like ours, this is crucial. Each wedding couple should have a unique look and feel. So, you'll want to create several themes. One might be a classic, elegant theme with serif fonts and muted colors. Another might be a modern, bold theme with vibrant accents. You can save all of these as templates. Then, you choose one theme to be the foundation for your primary build. This is the one you'll use to develop the full application. The others become options you can offer to future clients. This upfront design work saves you an enormous amount of time later. You're not making design decisions while you're in the middle of building complex backend logic. The visual direction is locked in, so you can focus on functionality.The Full Application Build
Now we get to the main event. With your plan in place, your services connected, and your design system locked in, you're ready to build the full-stack application. You'll give Claude a comprehensive development prompt. This prompt should specify that you want to build the complete Next.js application, implement the Supabase backend, upload local images to ImageKit, serve all images through ImageKit URLs, and use ImageKit for all future uploads and asset handling. This is where the planning pays off. Because you made all the big decisions upfront, the build process is surprisingly smooth. You're not just hoping the AI gets it right. You're giving it a clear, actionable spec. The build itself can take around 30 minutes for a complete application. You can watch it work, and then test the result on localhost:3000. So, what does the built-in functionality look like? For the public-facing side, each couple gets a unique, branded public page. The gallery displays images that load instantly via the ImageKit CDN. Videos stream smoothly through the optimized delivery system. Guests can interact with an RSVP system to accept or decline their invitation. For the admin side, there's a dashboard with email-based authentication. The site owner can log in, manage their weddings, and control their content. They can send personalized invitations to guests, track who has RSVP'd, upload new images and videos, and control when content is published. They have full control over their corner of the platform. If you look at the Supabase dashboard, you'll see the backend infrastructure that was auto-generated. There are complex database schemas, an authentication system with email verification, storage buckets, and edge functions. The system is real. It's not a mockup. In ImageKit, you'll see the media organization. The platform automatically creates folders for each wedding, like "weddings/Sarah-and-Thomas." All files are uploaded and cataloged systematically. The URLs are generated with transformation parameters for on-the-fly optimization. This is the moment where you realize you've built something substantial. You have a working product with a frontend, a backend, and a media pipeline. It's not just a website. It's a platform.Optimization and Iteration
A first build is never perfect. The mark of a professional is how you refine and optimize. This is where you test, identify issues, and use the AI to fix them. One common issue you might encounter is slow video loading. If you're using standard video delivery, large files can take a long time to load. This is a terrible user experience. The solution is adaptive bitrate streaming. This is the same technology that YouTube uses. The video is encoded in multiple resolutions. When a user hits play, the player starts streaming the lowest resolution, which loads instantly. As the user's bandwidth allows, it automatically upgrades the resolution in the background. The result is near-instant playback with no buffering, even on slow connections. You simply instruct Claude to enable adaptive bitrate streaming within ImageKit. It will handle the technical implementation. Another essential feature is watermarking. You can add a text overlay to all images automatically. This text can display the couple's names, like "Sarah & Thomas," in the corner of each image. This provides professional branding and protects the content from being used without credit. It's applied through ImageKit's URL transformation capabilities. You just tell Claude to add the watermark, and it will apply it to the delivery URLs. After these optimizations, you need to test the entire flow. Send a real invite to a test email address. Go through the RSVP process as a guest. Upload sample images as an admin. Verify that the new content appears correctly in the public gallery. Confirm that all assets are being served through the CDN and not from your local machine. This iterative loop is built into the process. You build, you test, you find a problem, you describe the problem to Claude, and it implements a fix. It's a fast, efficient way to polish your product to a professional standard.Creating an Exceptional User Experience
Let's zoom out and look at the complete experience from both the user and the admin perspective. This is what you're actually selling. From the guest's perspective, the experience is premium. They receive a beautiful, personalized invitation link. They click it and land on a stunning website dedicated to their friends' wedding. They can browse a gallery of high-resolution photos that load instantly. They can watch a highlight film that streams without buffering. They can RSVP with a simple click. It's an emotional, memorable experience that reflects well on the couple and the venue. From the admin's perspective, the platform is powerful and easy to use. They log in to a dashboard that gives them an overview of all their weddings. They can create a new wedding site, set its theme, and customize the details. They can import a guest list and send out personalized invitations with tracked RSVPs. They can upload a batch of photos and videos, and the platform automatically optimizes and organizes them. They have complete control over what gets published and when. This is the value of a multi-tenant architecture. The venue isn't paying for a one-time website. They're paying for a platform that serves every wedding they'll ever host. The infrastructure cost is amortized across every client. This is how a $10,000 price tag becomes a no-brainer for a business.Key Takeaways for Building High-Value Websites
We've covered a lot of ground. Let's distill this into the core principles you need to remember. Real functionality drives real value. Aesthetics alone cannot justify premium pricing. The most important thing you can do is build a website that solves a genuine problem with accounts, databases, media management, and administrative capability. That's what separates a $500 landing page from a $10,000 product. Upfront planning is non-negotiable. Making key decisions about tools and features before writing any code dramatically reduces errors, revisions, and wasted effort. The planning phase is where you earn your money. Skills dramatically improve AI output. Installing design-specific skills transforms generic AI-generated interfaces into polished, professional experiences. It's a small step that has an outsized impact on the final quality. MCP servers enable true full-stack development. Connecting your AI coding tool directly to backend services and media platforms allows you to build a complete application through conversation. It's the difference between writing code and orchestrating a system. Multi-tenant architecture multiplies value. Building a platform that can serve multiple clients transforms a one-time sale into a scalable product. It's the key to unlocking the highest price points. Media delivery infrastructure matters. For content-heavy sites, CDN delivery, adaptive bitrate streaming, and automated watermarking are essential for a premium user experience. It's the difference between a professional product and an amateur one. Iterative refinement is built into the process. Initial builds will have issues. The development loop allows you to rapidly identify and correct them. Don't be afraid of imperfection on the first pass. The web development landscape has shifted. The barrier to entry has dropped, but the bar for what constitutes real value has been raised. Those who can master the art of orchestrating AI tools to build functional, full-stack products will be the ones who command the premium prices. The skills you've learned here are not just about building websites. They're about building commercial value with unprecedented efficiency. The opportunity is clear. Go build something that actually works.Frequently Asked Questions
Purpose of this FAQ
This FAQ covers everything you need to know about building premium, full-stack websites that can command $10,000 or more in value using Claude Code as your primary development tool. It addresses questions about setup, design, integration, delivery, and business strategy,whether you are new to AI-assisted development or already have some experience. The answers pull from a complete walkthrough example (a wedding photography delivery platform) and explain how the same principles apply to any project that needs polished front-end design, real user accounts, database functionality, and fast media delivery. Questions are arranged from basic concepts through advanced implementation topics so you can find what you need quickly.
Q1. What is Claude Code and why would I use it to build websites?
Claude Code is a desktop application from Anthropic that lets you build, edit, and deploy software using natural language instructions. It runs on your computer and can create files, modify code, run commands, connect to external services, and manage an entire project folder. It is especially useful for non-developers because Claude can handle tasks like setting up a database schema, connecting a media hosting service, and generating a modern front-end without requiring you to write every line of code by hand.
For high-value website projects, Claude Code offers a way to move beyond simple landing pages. You can use it to build real features such as authentication, RSVP forms, admin dashboards, database tables, and media delivery pipelines.
Q2. What makes a website worth $10,000 rather than just a few hundred dollars?
A basic landing page can be built quickly and sold for a few hundred to a few thousand dollars. A $10,000 website must solve a real business problem and include legitimate functionality. Examples of high-value features include:
- User accounts and authentication
- Back-end databases
- Admin portals
- Email invitations and automated workflows
- High-quality image and video delivery
- The ability to reuse the platform for multiple clients
The site must feel premium and look visually polished, but that alone is not enough. The value comes from saving the buyer time, enabling them to charge more, and giving them a tool that works as a real product rather than just a brochure.
Q3. What technology stack should I use for a $10,000 website?
A practical stack for building this type of project includes:
- Claude Code as the development environment and AI coding agent
- Next.js as the main web framework
- Supabase for authentication, database, storage, and back-end functions
- ImageKit for optimized image and video delivery
- Higgsfield for AI-generated visual assets
- Whisper Flow as an optional dictation tool to speed up your prompts
This combination handles both the customer-facing experience and the administrative side of the product. Supabase removes the need to build your own server infrastructure, while ImageKit ensures that photos and videos load quickly even when they are high resolution.
Q4. How do I get started with Claude Code?
First, download the Claude Code desktop application from Anthropic's website and sign in with your Claude account. A paid subscription is recommended because a free account may not have enough usage to complete a full project. Once you are signed in, open the code tab, create a new session, and choose a working folder on your computer.
For more advanced setup and MCP server authentication, you may need the CLI version of Claude Code, which runs inside a terminal. You can install it from the Claude Code GitHub repository. Both versions can work together; the desktop app is easier for beginners, while the CLI gives you more control over integrations.
Q5. How should I set up my project folder before building?
Create a dedicated folder on your computer, such as wedding-site. In Claude Code, select or create that folder so that all changes stay inside the project. You should also switch to a permission mode that reduces interruptions, such as bypass permission mode or auto-accept edits. That way, Claude can create and modify files without asking you to approve every action.
If you are using the CLI, open a terminal, navigate to your project folder with a command such as cd Desktop/wedding-site, and then run claude. If you do not know how to change directories, you can ask Claude itself to show you the correct command.
Q6. What are Claude "skills" and why are they important?
Skills are markdown instruction files that teach Claude how to approach a particular type of task. For example, a front-end design skill contains design principles, color theory, spacing rules, and typography guidance. When you invoke the skill with a slash command, Claude uses those instructions to produce significantly better designs than it would from a generic prompt.
Skills prevent the dull, repetitive "one website looks like every other website" problem. They give Claude a framework for creating professional and varied user interfaces instead of relying on a single template.
Q7. Which skills should I install for a visually polished website?
Two recommended skills are:
- Front-end design skill - focuses on design systems, color palettes, typography, and overall visual style.
- UI UX Pro skill - improves user interface and user experience decisions, helping Claude create intuitive layouts and interactions.
You can install a skill by copying its URL and pasting it into Claude Code with an instruction like "Install the front-end design skill from this URL." After installation, restart Claude Code and start a new session. You can then invoke the skills using /front-end-design or /ui-ux-pro.
Q8. What are MCP servers and how do they extend Claude Code?
MCP stands for Model Context Protocol. An MCP server connects Claude Code to external tools and services. Once connected, Claude can directly read data from those services, make changes, upload files, and run operations on your behalf.
In this workflow, MCP servers are used to connect:
- Supabase for database and authentication tasks
- ImageKit for media storage and transformations
- Higgsfield for AI image and video generation
Without MCP servers, you would have to manually copy data between Claude and each service. With them, Claude can automate tasks like creating database tables or uploading generated images.
Q9. How do I connect Supabase to Claude Code?
First, create a free Supabase account and create a project. From your Supabase dashboard, go to the project's Connect section, choose MCP, and select Claude Code. Copy the provided setup prompt and paste it into Claude Code. Claude will install the connection details and tell you when it is ready.
Next, inside Claude Code, run /mcp, find Supabase, and choose Authenticate. A browser window will open asking you to authorize the connection. Once approved, Claude can manage your Supabase project directly, including authentication settings, database tables, storage buckets, and edge functions.
Q10. How do I connect ImageKit to Claude Code?
Create a free ImageKit account and copy your public key, private key, and URL endpoint from the developer options section of your dashboard. Then, in Claude Code, paste the ImageKit AI/agent setup page from the ImageKit documentation and ask Claude to complete the installation. When prompted, provide the three credential values so Claude can save them in the project's environment file.
After that, use /mcp to authenticate the ImageKit connection. Claude will open a browser window for authorization. For the private key, you may need to paste it into the terminal and approve it. Once connected, Claude can upload files, create folders, and reference images and videos through ImageKit URLs.
Q11. What is the role of Supabase in the final product?
Supabase provides the back-end infrastructure, including:
- Authentication - lets guests and admins create accounts and sign in
- Database - stores wedding details, invites, RSVPs, and uploaded asset metadata
- Storage - can hold files if needed, though media is primarily handled by ImageKit
- Edge functions - run server-side logic such as sending invite emails
- Real-time features - allow the site to update when uploads are published
Because Claude Code is connected to Supabase through MCP, it can create database tables, set up schemas, and configure auth automatically. You do not need to manage SQL manually unless you want to.
Q12. Why use ImageKit instead of serving images and videos from the local project folder?
Serving media from your local computer only works during development. To distribute images or videos to real users, the files must be hosted on a content delivery network. ImageKit provides that infrastructure and adds valuable features:
- Fast global delivery through CDN
- Automatic compression and resizing
- URL-based transformations such as cropping, quality changes, thumbnails, and watermarks
- Adaptive bitrate streaming for videos
For example, an image can be displayed as a small thumbnail using one URL and as a full-resolution file using another, without needing separate files. This is essential when you want the site to feel fast and professional.
Q13. What is adaptive bitrate streaming and why does it matter?
Adaptive bitrate streaming is a technique used to deliver video more efficiently. Instead of downloading the whole video before playback, the player loads a lower-resolution version first and then upgrades to a higher resolution as bandwidth allows. This is the same approach used by major platforms like YouTube.
In a wedding delivery site, videos may be large, high-resolution files. Without adaptive bitrate streaming, guests could wait a long time for videos to start playing. With it, playback begins almost instantly, even on slower connections. In the project workflow, Claude Code can configure ImageKit to deliver videos using adaptive bitrate streaming automatically.
Q14. How can I add watermark protection to images and videos?
ImageKit supports URL-based transformations that can add a text overlay or image watermark to your media. For example, you can configure Claude Code to append the couple's names or the event name to every image URL. The result is a visible watermark, such as "Sarah and Thomas," in the corner of each photo.
This is useful for both branding and protection. It ensures that when guests download or share images, the origin of the content is clear. Since the transformation is applied through the URL, the original file remains untouched.
Q15. What is a design system and why should I create one first?
A design system is a collection of design decisions that keep a website visually consistent. It includes:
- Color palettes
- Typography choices
- Spacing and layout rules
- Button and card styles
- Image and video treatment
Before building entire pages, Claude Code can generate several design system options based on your goals. You preview them in the browser, choose the direction you like, and then ask Claude to build the full site using that system. You can also save multiple design systems as templates. For a multi-client product such as a wedding venue platform, each couple can receive a different color theme and style while using the same underlying code.
Q16. How do I preview the website while Claude Code is building it?
In the CLI version, Claude Code can run a local development server and provide a URL such as http://localhost:3000. You can click or copy that URL into your browser to preview the site. If Claude does not automatically open the site, ask it to run the project in the browser and offer a link.
During development, the site may look incomplete until the back-end features are connected. It is normal to inspect the site, identify missing pieces, and then ask Claude to continue building or fixing specific issues.
Q17. What should the finished application include to justify a $10,000 price tag?
A complete, sellable delivery platform should include:
- A public landing page that presents well and showcases the experience
- The ability to manage multiple clients or events
- Individual sites with a chosen color theme
- Admin login and dashboard
- Invite management with email sending
- Guest RSVP functionality
- Guest accounts or authentication
- Photo galleries with fast loading and download options
- Video playback with adaptive bitrate streaming
- Image upload and publishing workflow
- Watermark or branding on delivered media
When these pieces work together, the application is a real tool that a business can use repeatedly, making it easier to justify a higher price.
Q18. Can this same workflow be used for websites outside the wedding industry?
Yes. The general formula is:
1. Identify a business problem that requires accounts, data, and media.
2. Plan the features and choose the right external services.
3. Use Claude Code to build a scalable full-stack application.
4. Add a polished, reusable design system.
You can apply the same approach to real estate property portals, event management platforms, photography portfolios, fitness coaching with client portals, or any business that needs to serve personalized content to authenticated users. The key is focusing on functionality, not just appearance.
Q19. Do I need to be a software developer to build this kind of website?
Not necessarily. Claude Code handles much of the technical work, including running shell commands, creating database schemas, and writing code. You do need to understand the project goals clearly and be able to make decisions about features and services.
However, basic familiarity with concepts like folders, terminals, database tables, and environment variables will help. If you get stuck, you can ask Claude to explain commands or perform tasks for you. The workflow is designed so that the AI agent keeps the technical details accessible to non-developers.
Q20. How long does it take to build and what should I expect during the process?
A complete project like the wedding delivery site can take several hours, especially if you are generating custom media and testing every feature. The process is faster when you:
- Write a detailed plan before starting
- Decide which tools and services you will use
- Install skills and MCP servers upfront
- Review the plan before building
- Build the design system and get approval first
- Then build the full application incrementally
Expect to revise prompts, troubleshoot slow or missing features, and wait for videos or images to process. These steps are part of creating a real product. The result is a website that works, looks custom, and can be reused, which is what makes it worth $10,000 or more.
Q21. What is the easiest way to generate high-quality demo images and videos?
Use an AI media generation service such as Higgsfield. After connecting the Higgsfield MCP server to Claude Code, you can simply ask Claude to create wedding photos, films, or other assets. Claude will invoke Higgfield, generate the media, and save the files into your project folder.
This is particularly helpful if you do not have real client content yet. You can fill the site with professional-looking demo assets that show a prospective buyer what their clients would receive. When real content is available, the same upload workflow can replace or add new media.
Q22. What settings should I choose in Claude Code for performance and quality?
For the best result, choose the most capable model available. At the time of the original workflow, the recommended options were Fable 5 or Opus 4.8. Set the reasoning level to high so Claude thoroughly evaluates design and architecture decisions before acting.
Also, switch to a low-interruption permission mode while building. Use Shift+Tab to cycle through modes so that Claude can auto-accept file edits. This is helpful when you are confident in the plan and want to avoid approving every minor change.
Q23. How do I handle invite emails and RSVPs?
The admin dashboard includes an invite feature. You can create invites for individual guests and send them through an email integration. Each invitation link opens a page where the guest can accept or decline. When the guest responds, Claude Code records the RSVP in Supabase and displays the updated attendance status in the admin dashboard.
This is a strong upsell feature for a wedding venue package. It replaces paper invitations and generic RSVP forms with an integrated guest experience tied to the same site that hosts photos and videos after the event.
Q24. What are the most common mistakes to avoid when building with Claude Code?
- Skipping the planning phase - relying on a single vague prompt usually produces a generic site.
- Building a landing page only - without back-end features, the site is not worth $10,000.
- Not installing skills - generic Claude output will not look premium.
- Not connecting MCP servers - manual file uploads and database management create unnecessary errors.
- Using media hosted locally - the site will be slow and unusable for real guests.
- Ignoring video optimization - high-resolution videos will load poorly without adaptive bitrate streaming.
- Using one design for every client - a reusable template with multiple themes is more valuable.
A deliberate, step-by-step workflow avoids these issues.
Q25. How can I convince a buyer that the website is worth $10,000?
The best way is to show the finished product doing real work. A demo should include:
- A polished, custom-looking site for a sample client
- A working admin login
- Invitations that send and track RSVPs
- A photo gallery that loads quickly
- Videos that stream smoothly
- Watermarked images and a consistent brand experience
When a buyer realizes that the same platform can be used for every event they host, the value becomes obvious. It allows them to charge more, differentiate themselves from competitors, and deliver a premium experience without building software themselves.
Additional FAQs
Q26. What is the difference between regular Claude chat and Claude Code for building websites?
Regular Claude chat runs in a browser and can produce short code snippets, but it has no direct access to your file system, cannot run commands, and cannot maintain a full project folder. Claude Code, on the other hand, runs directly on your machine. It can create and modify multiple files, install npm packages, run development servers, connect MCP servers to external services, and manage databases.
For a $10,000 type of application,one with authentication, a database, media delivery, and admin dashboards,you need an environment where the AI can coordinate dozens of files and external connectors. Claude Code is built for that. The browser version is good for quick explanations or simple scripts, but it lacks the persistence and system access to build a complete, ship-ready product.
Q27. Should I use the Claude Code desktop app or the CLI version?
The desktop app works well for most people. It provides a simple interface for starting sessions, installing skills, and viewing output. You can toggle permission modes and switch models without typing commands. The CLI version offers more control for advanced setups such as connecting MCP servers that require terminal authentication or integrating with CI/CD pipelines.
You can start with the desktop app and only switch to CLI when a specific integration demands it. Many users keep both installed,desktop for daily building, CLI for specific tasks like database migrations or debugging environment variables. If you already comfortable with a terminal, the CLI can be faster for repetitive prompts. Both versions share the same model and skill system, so your progress carries over.
Q28. What should I do if Claude Code produces incorrect or broken code?
Claude Code occasionally generates code that does not work on the first try. This is normal. If something breaks, describe the problem clearly in the chat. Say what you expected to happen, what actually happened, and share any error messages you see. Claude will read the console output, identify the issue, and propose a fix.
You can also ask Claude to review its own code for bugs, or to add console logs and then run the site again to see what changed. This conversational debugging approach avoids digging through files manually. If the problem is larger, consider adding a step-by-step description of the file structure you observed before the error occurred allows Claude to understand the context and produce a more accurate patch.
Q29. How do I handle database schema changes and migrations with Supabase?
When you make changes to your application that require new tables or columns, you can tell Claude Code what you need and it will generate the SQL migration and submit it to Supabase through the MCP connection. You do not write raw SQL manually. Claude analyzes the existing schema, adds the new fields, and updates the corresponding application code to use them.
For example, if you decide to add a "preferred song" field for guests at RSVP time, you can type: "Add a new column to the guests table named preferred_song." Claude will check the current table structure, generate an ALTER TABLE statement, run it via the Supabase MCP server, and update the form and submission handler in your code. Always review the migration before applying it on a production project. Claude can show you the SQL for approval if you ask.
Certification
About the Certification
Become certified in building full-stack apps with AI and Claude Code. You'll prove you can ship real platforms with secure user logins, databases, and media pipelines,the kind of work clients pay five figures for.
Official Certification
Upon successful completion of the "Certification in Building AI-Powered Full-Stack Websites", you will receive a verifiable digital certificate. This certificate demonstrates your expertise in the subject matter covered in this course.
Benefits of Certification
- Enhance your professional credibility and stand out in the job market.
- Validate your skills and knowledge in cutting-edge AI technologies.
- Unlock new career opportunities in the rapidly growing AI field.
- Share your achievement on your resume, LinkedIn, and other professional platforms.
How to complete your certification successfully?
To earn your certification, you’ll need to complete all video lessons, study the guide carefully, and review the FAQ. After that, you’ll be prepared to pass the certification requirements.
Other AI Video Courses
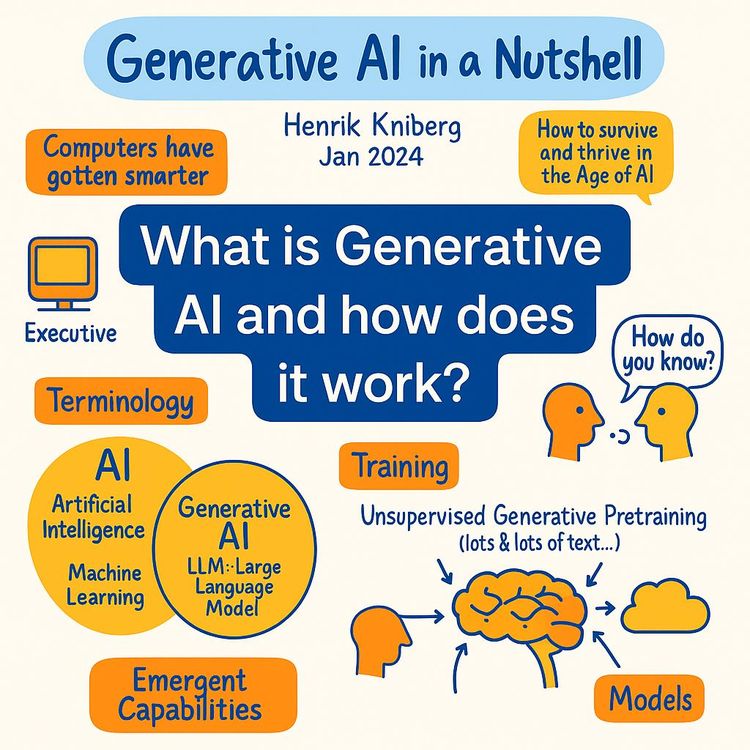
Video Course: What is Generative AI and how does it work?

Video Course: How to Use ChatGPT from Beginner to Professional
Video Course: How to Use Google Gemini for Google Workspace to Boost Productivity

Video Course: How to Use Claude 3.7 AI - Tips for Beginners!

Video Course: ChatGPT for Data Analytics: Full Course - from Beginners to Professional

Video Course: Generating Images and photos With ChatGPT?
Video Course: Generating Images & Photo's with MidJourney

Video Course: Generating Design's with Microsoft Designer and AI

Video Course: Generating Design's with Canva.com and AI
Join 20,000+ Professionals, Using AI to transform their Careers
Join professionals who didn’t just adapt, they thrived. You can too, with AI training designed for your job.