
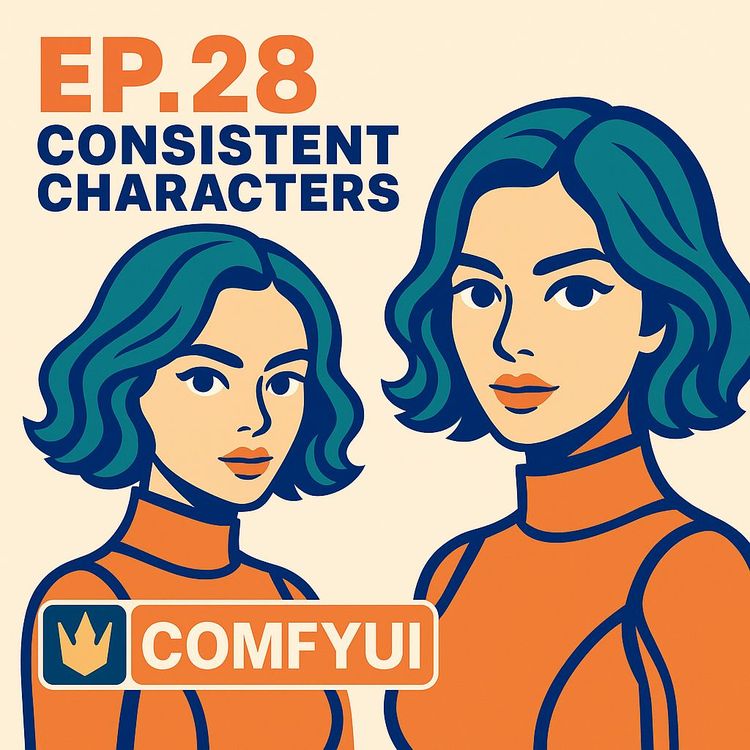
ComfyUI Course Ep 28: Create Consistent Characters with Flux + Train Loras Online
Discover how to create AI characters that stay true to their look across every pose and scene. This course guides you through building character sheets, training LoRAs online, and refining your workflow for reliable, high-quality results every time.
Related Certification: Certification in Designing Consistent AI Characters with Flux and Online LoRA Training
Also includes Access to All:
What You Will Learn
- Create multi-angle character sheets for LoRA training
- Prepare, crop, and upscale images to 1024x1024 for clean datasets
- Use ComfyUI + Flux with ControlNet/OpenPose for precise posing
- Train, evaluate, and select online LoRA epochs (e.g., Tensor.art)
- Integrate LoRAs into ComfyUI using trigger words and troubleshoot artifacts
Study Guide
Introduction: The Power of Consistent Characters with ComfyUI, Flux, and Online LoRA Training
Imagine a world where your AI-generated characters look the same in every story, setting, and pose. Where you don’t wrestle with inconsistencies,different faces, ever-changing outfits, or shifting proportions,but instead, you wield complete creative control. This is not just a possibility; it’s a repeatable process using ComfyUI, the Flux model, and online LoRA training.
This learning guide is your comprehensive pathway into “Consistent Character Creation with Flux + Train Loras Online.” You’ll learn how to craft character sheets, prepare perfect training data, harness the power of ControlNet for precise posing, and train custom LoRAs online for use in ComfyUI. Along the way, we’ll break down every critical decision, every workflow step, and every troubleshooting insight you need to generate characters who are truly themselves,across every image, pose, and environment.
This isn’t just technical know-how. It’s creative leverage. Whether you’re a digital artist, storyteller, game developer, or someone who wants to bring AI character generation into your workflow, this guide will move you from basic understanding to advanced mastery. Let’s get started.
Understanding the Core Concepts: Why Consistency Matters and How LoRAs Unlock It
Consistency in character generation is the difference between a professional, believable visual narrative and a chaotic, unconvincing one. The challenge: AI models, by default, generate variations every time,they’re built to create, not to repeat. But what if you want the same character in different situations? This is where LoRA training transforms your workflow.
A LoRA (Low-Rank Adaptation) is a fine-tuning layer for AI diffusion models. Instead of retraining the entire model, you train a lightweight adaptation on a small set of images,usually a character sheet you generate yourself. This adaptation can then be “activated” during image generation by using specific trigger words in your prompt.
Example 1: You create a LoRA trained on a red-haired adventurer in a blue jacket. With this LoRA, every time you prompt for “red-haired adventurer,” the output stays true to your character’s details,hair color, jacket, even facial structure,regardless of the background or pose.
Example 2: You train a LoRA for a cartoon panda with a green scarf. This LoRA ensures that, whether the panda is standing, sitting, or dancing, the character’s core features and outfit persist across all images.
In both cases, the LoRA is your anchor,ensuring creative continuity, no matter how wild your prompts or backgrounds become.
Setting Up: Why ComfyUI and the Flux Model Are the Foundation
ComfyUI is a flexible, node-based interface for Stable Diffusion models. It gives you granular control over every step,prompting, image resolution, upscaling, and integration with tools like ControlNet. The Flux model, a variant of Stable Diffusion, is tuned for natural language understanding, making it ideal for workflows using descriptive prompts and advanced LoRA techniques.
You’ll need a GPU with sufficient video RAM to run Flux locally. If you’re tight on resources, you can still follow along closely, as LoRA training itself will happen online, reducing local hardware demands.
Example 1: In ComfyUI, you construct a workflow with a prompt node, a Flux model node, a K-sampler for image generation, and an upscaler for detail enhancement,all visually connected.
Example 2: You use Flux’s natural language capabilities to prompt for “a young woman in a yellow dress sitting under a cherry tree, smiling gently,” and the model generates an image that matches the description with remarkable fidelity.
The Foundation: Creating a Consistent Character Sheet
Before you can train a LoRA, you need a set of reference images that perfectly capture your character. This is where the character sheet comes in,a collection of images showing the same character in various standard poses and views.
A strong character sheet typically includes:
- A close-up portrait (face only, capturing facial features and expression)
- A medium portrait (torso and head, for body proportions and clothing details)
- A full body shot (entire character, showing overall proportions and pose)
- Optionally, a fourth image with a different pose or angle for more variety
Example 1: For a fantasy knight, you generate: (1) a close-up of her face in armor, (2) a medium shot revealing her breastplate and sword hilt, (3) a full body shot in a heroic pose, and (4) a side view with her holding a helmet.
Example 2: For an anthropomorphic fox, you create: (1) a smiling headshot, (2) a medium shot with a tailored vest, (3) a full body pose leaping mid-air, and (4) a seated pose holding a book.
Tips for Success:
- Use a fixed seed in ComfyUI when generating these images,this guarantees reproducibility if you need to tweak or regenerate any pose.
- Keep backgrounds as clean and consistent as possible,white or neutral is best. This prevents background artifacts from creeping into your LoRA training.
- Ensure the same outfit, hairstyle, and accessories are present across all images unless you specifically want the LoRA to learn variation.
Harnessing ControlNet and Open Pose: Precision in Posing
ControlNet is your tool for making AI obey structure and composition. It lets you feed a pose skeleton or reference image so that your generated character matches the exact body position you want. Open Pose, a mode within ControlNet, converts reference photos into stick-figure skeletons, which then guide your character generation.
Example 1: You want your character to stand with one arm raised and the other on her hip. You use Open Pose to extract this skeleton from a stock image and feed it into ControlNet,your generated character mimics this pose exactly.
Example 2: For a dynamic scene, you take a photo of yourself in a running pose, process it with Open Pose, and use ControlNet to have your cartoon fox adopt this running stance.
Best Practices:
- While ControlNet is optional, it’s highly recommended for character sheets, especially when pose accuracy is crucial.
- If Open Pose outputs have changed or become less reliable, try alternative ControlNet models or methods as suggested in the latest tutorials.
- Always compare generated skeletons to your desired pose,sometimes small tweaks in the reference make a big difference.
Image Preparation: Resolution, Upscaling, and Cropping for LoRA Training
Perfect training data starts with images at the right resolution,1024x1024 pixels is the gold standard. Why? It matches the input expectations for most LoRA training platforms, ensuring your character’s features remain sharp and consistent.
In ComfyUI, you’ll often need to upscale or downscale images to reach this target. Use the built-in upscaler node, and if your generated image isn’t square, crop or pad it as needed.
Example 1: You generate a 768x1024 image of your character. You use ComfyUI’s upscaler to bring it up to 1024x1024, then crop any excess if needed.
Example 2: Your original image is 1280x720. You first crop to center the character, then resize to 1024x1024, ensuring no stretching or distortion.
Tips:
- Always review your upscaled images for artifacts, lines, or distortion. If the upscaler introduces issues, try reducing the denoise setting or using a different upscaling method.
- If you see unwanted lines after upscaling, lower the denoise value (e.g., to 0.8) to preserve more of the original detail.
- Use Photoshop or similar tools for precise cropping or to remove any stray marks before training. Clean data means clean results.
Online LoRA Training: Why and How (Focusing on Tensor.art)
Training LoRAs locally is technical and time-consuming. Instead, online platforms like Tensor.art let you upload your training images, configure settings, and receive a downloadable LoRA,all from your browser.
Advantages:
- No need for powerful hardware or complex software setups
- Automated tagging and preview generation
Example 1: You upload your 4-image character sheet to Tensor.art, select “Flux Dev fp8” as the base model, set your trigger word (“elvenknight01”), choose 1024x1024 resolution, and let the platform handle the rest.
Example 2: You want to train a LoRA for a cartoon robot. You prepare 6 images, upload them, and use the Florence 2 auto-labeling system for natural language captions. After the training, you download the best epoch for use in ComfyUI.
Best Practices:
- Always use unique trigger words,combine your character’s name with a unique number or code (e.g., “foxmage_x7”) to ensure no overlap with other LoRAs or common terms.
- Choose the Florence 2 algorithm for autolabeling your images. This method writes natural language descriptions that Flux models understand best.
- Preview images during training and download the epoch that gives the best balance between likeness and flexibility,more on this below.
Data Set and Parameter Settings: The Details That Make or Break Your LoRA
Success comes down to the quality and diversity of your dataset and the parameters you set during training.
Key Parameters:
- Base Model: Choose the model you want your LoRA to adapt (e.g., “Flux Dev fp8” for compatibility with your ComfyUI workflow).
- Trigger Word: A unique keyword or phrase that will activate your LoRA during generation. Avoid common words or generic terms.
- Resolution: 1024x1024 pixels,match your training images to this size.
- Sample Images: Set how many preview images you want to generate at each epoch.
Example 1: You set up your training run with the following: Base Model = “Flux Dev fp8”, Trigger Word = “roseknight_23”, Resolution = 1024x1024, 4 images, and 5 sample previews per epoch.
Example 2: For a group of animal mascots, you run separate LoRA trainings for each character, each with its own unique trigger word (“bunnychef99”, “duckdetective22”), ensuring there’s no cross-interference.
Tips:
- Include a mix of close-up, medium, and full body shots in your data set for maximum flexibility.
- Don’t overstuff your dataset with too many images in the same pose,variation is key for a flexible LoRA.
- Keep outfits and backgrounds consistent unless you want the LoRA to learn multiple variations.
Natural Language Tagging (Florence 2): Unlocking the Power of Descriptive Prompts
Flux models thrive on natural language. Florence 2 auto-labeling provides human-readable captions for your training images, making your LoRA understand prompts like a human would.
Example 1: Florence 2 auto-labels your character sheet images as “a young woman with long brown hair in a blue jacket, standing confidently,” rather than generic tags.
Example 2: For a fantasy fox, Florence 2 generates “an anthropomorphic fox in a green vest, smiling, white background”,helping the model learn the context and details.
Tips:
- Always review the auto-generated captions,refine them if important details are missing.
- If a caption is off, edit it to better describe the image,accuracy here leads to better LoRA performance.
Trigger Words: The Secret Keys to Your Custom Characters
A trigger word is the password that unlocks your trained LoRA. It’s included in your prompt whenever you want to “summon” your specific character or style.
Example 1: You trained your red-haired knight LoRA with the trigger “redknight_alpha.” Every prompt that includes “redknight_alpha” activates her unique look.
Example 2: For a pink robot, your trigger word is “pinkbot_v2.” Include this in your prompt, and the model applies the LoRA’s features.
Tips:
- Make your trigger word unique to avoid conflicts with other LoRAs or common language.
- Document your trigger words and their associated LoRAs for easy reference.
Evaluating Trained LoRAs: Previewing, Picking Epochs, and Avoiding Overtraining
Each LoRA training run generates multiple versions (epochs). Earlier epochs may be too weak,later ones can become overtrained, locking in details so tightly that your character can’t change outfits or poses.
Example 1: You preview LoRA images at epoch 2, 4, 6, 8, and 10. At epoch 8, the character’s face and outfit are consistent, but she can still appear in new poses and settings. At epoch 10, the model starts rigidly copying the original training poses,this is too much.
Example 2: You notice that at epoch 5, your cartoon fox is flexible, but at epoch 12, every image looks identical to the training data, even when you prompt for “fox dancing” or “fox with a hat.” You download epoch 5 for use.
Tips:
- Always test multiple epochs,download and try them in ComfyUI to see which version offers the best balance of consistency and adaptability.
- An overtrained LoRA can’t generalize,avoid using the last epoch unless your use case is extremely narrow.
Using Trained LoRAs in ComfyUI: Workflow and Prompt Integration
Once you’ve downloaded your LoRA, it’s time to put it to work inside ComfyUI. This means loading the LoRA and adding your trigger word to your positive prompt.
Step-by-Step:
- Import your LoRA into ComfyUI’s designated folder (usually “models/loras” or similar).
- Add a LoRA node to your workflow and connect it to the Flux model node.
- In your positive prompt, include the trigger word you defined during training.
- Generate your image as usual,your character should now appear with all the learned features.
Example 1: Your character is “elvenknight01.” Your prompt: “elvenknight01, standing under a waterfall, dramatic lighting.” The output is your trained knight, in the new scenario, consistently.
Example 2: You prompt: “pinkbot_v2, sitting at a futuristic cafe, holding a coffee cup.” The pink robot appears in context, with all learned features.
Tips:
- If the character doesn’t appear as expected, double-check your trigger word for typos and ensure the LoRA node is correctly connected.
- Adjust the LoRA weight in the node if the effect is too strong or too subtle,sometimes a value between 0.6 and 1.0 gives the best results.
Leveraging ChatGPT for Prompt Engineering: Consistency in Detail and Scenario
Prompting is both art and science. ChatGPT can be your brainstorming partner for generating rich, detailed prompts that maintain your character’s consistency across diverse scenes.
Example 1: You ask ChatGPT: “Create ten prompts for my character ‘elvenknight01’ in different fantasy settings, always wearing her signature blue armor.” You get scenario-rich prompts with consistent details.
Example 2: For a children’s book project, you request: “Generate playful prompts for ‘pinkbot_v2’ interacting with children in a park, always with her green bowtie.” ChatGPT ensures recurring elements stay fixed.
Tips:
- Feed ChatGPT your character’s visual description and backstory for even richer, more accurate prompts.
- Review generated prompts before use,edit for clarity and ensure your trigger word is always included.
Upscaling for Detail: Enhancing Image Quality in the Workflow
AI images can be small or slightly soft out of the gate. Upscaling increases resolution and sharpness, making your final outputs print-ready or more visually striking.
Example 1: You generate a 512x512 image, then use the upscaler node in ComfyUI to bring it up to 1024x1024 for LoRA training.
Example 2: Post-generation, you upscale your 1024x1024 character image to 2048x2048 for use as a book cover or high-res asset.
Tips:
- When using Flux, be mindful of the model’s maximum pixel count (usually around 2 megapixels),upscale in steps if needed.
- If artifacts appear after upscaling, try a lower denoise value or experiment with different upscaler algorithms.
- For maximum consistency, include the LoRA node in your upscaling workflow so detail enhancements reinforce, not distort, your character’s features.
Troubleshooting and Inconsistency Fixes: Common Issues and Their Solutions
No workflow is perfect out of the box. You may see issues like odd proportions, extra fingers, or inconsistent heads. These problems typically trace back to your training data or workflow settings.
Example 1: Your upscaled image reveals a hand with six fingers. Inspection shows the training image included this error. Solution: Replace or edit the offending image, then retrain or regenerate with a different seed.
Example 2: The character’s face changes slightly between poses. You either (a) increase dataset variety with more angles, or (b) adjust your LoRA training epoch for a tighter likeness.
Tips:
- Always inspect your training images for mistakes before uploading,they will be learned and repeated.
- If inconsistencies persist, generate multiple variations (random seeds) and select the one that best matches your desired result.
- Use Photoshop’s content-aware fill or manual retouching to fix small errors in training images.
Expanding and Adapting the Workflow: Beyond Basic Characters
The methodology described isn’t limited to cartoon girls or simple portraits. With the same workflow, you can generate LoRAs for male characters, animals, anthropomorphic creatures, or even inanimate objects as recurring characters.
Example 1: You create a LoRA for a male wizard with a flowing cloak by generating a diverse character sheet and following the same training process.
Example 2: For a talking car mascot, you generate front, side, and three-quarter views, upscale and crop them, and train a LoRA for consistent appearances in storybook scenes.
Tips:
- Reference images for unique body types (e.g., animals, robots, chimeras) can be found in stock databases or created via posing tools and ControlNet.
- For single-portrait characters (e.g., a celebrity headshot), use Live Portrait nodes and inpainting to generate new poses and angles for your dataset.
The Importance of Training Data Quality: How Every Pixel Counts
The output is only as good as your input. Every detail in your training dataset shapes how your LoRA performs.
Best Practices:
- Include variety,different angles, poses, and expressions,so your LoRA generalizes well.
- Decide whether you want the same outfit in every image (for a fixed look) or variations (for outfit flexibility).
- Keep backgrounds plain and consistent to avoid unwanted elements creeping into new generations.
- Remove stray marks, lines, or artifacts using Photoshop or similar tools before uploading.
Example 1: Your fairy character is always shown on a white background, in three distinct poses; the resulting LoRA produces clean, artifact-free images in any new setting.
Example 2: A poorly-prepared dataset includes one image with a busy background. The trained LoRA sometimes generates unwanted furniture or objects behind your character. Solution: Clean your dataset and retrain.
Background Consistency: Keeping Unwanted Elements Out
A simple, neutral background in your training images keeps your LoRA focused on the character, not the environment.
Example 1: All character sheet images are on a pure white background,generated outputs stay clean, with no unexpected artifacts.
Example 2: You use a pale blue background for your aquatic character. This color subtly influences the LoRA, making it easier to generate images with underwater themes later.
Tips:
- If you see persistent background elements after generation, revisit your training images,remove clutter and standardize colors.
- Avoid using complex or detailed backgrounds unless they’re part of your desired style.
Post-Processing: Final Touches Before and After Training
A little manual editing goes a long way. Whether it’s Photoshop or another editor, clean up your images before training,and don’t be afraid to do minor touch-ups after generation.
Example 1: Before uploading your character sheet, you erase smudges and use content-aware fill to remove stray lines.
Example 2: After generation, you spot a minor artifact on your character’s sleeve. A quick retouch keeps your output professional.
Tips:
- Batch edit your images for consistency,color balance, cropping, and background cleaning can all be done in one go.
- Don’t rely solely on AI,sometimes the best fix is a human touch.
Creative Extensions: Animation and Beyond
Once you have a consistent character, you can go further,animating your images, generating comics, or creating marketing assets. Tools like Cling AI let you turn your static images into moving video.
Example 1: You upload your LoRA-generated image to Cling AI’s “image to video” tool, creating a short animation of your character waving.
Example 2: For a webcomic, you generate several panels of your fox character in different poses, then stitch them into a full page.
Tips:
- Test your LoRA in new creative scenarios,posing, expression changes, or even color shifts,to explore its limits and strengths.
- Share your results with communities (like Civitai) to get feedback and inspiration for further refinement.
Workflow Adaptation: Customizing for Your Style and Needs
No two projects are the same. The workflow described is modular,adapt it for cartoons, realism, anthro characters, or even product styles.
Example 1: For a realistic portrait series, you increase the dataset size and use real photo references. Your LoRA produces lifelike, consistent faces across scenarios.
Example 2: For stylized mascots, you push the prompt engineering further, using ChatGPT to generate quirky, imaginative scenarios.
Tips:
- If your needs change,more flexibility, different styles, new outfits,update your dataset and retrain your LoRA for new capabilities.
- Iterate: Each time you notice a limitation, refine your workflow, retrain, and grow your creative toolkit.
Conclusion: Bringing It All Together,Consistency as Creative Freedom
Consistent character creation in AI is no longer a dream reserved for large studios or technical experts. With ComfyUI, the Flux model, and online LoRA training, you have the power to define, refine, and control your characters at every step. This guide has walked you through every critical stage,from concept to dataset, from training to troubleshooting, from prompt engineering to creative application.
The key takeaways:
- Start with a high-quality, varied character sheet as your foundation.
- Use ControlNet for precise poses and keep your backgrounds clean and consistent.
- Resize and upscale images to the optimal 1024x1024 resolution for LoRA training.
- Leverage online LoRA platforms like Tensor.art for fast, hardware-free adaptation,using Florence 2 for natural language tagging and unique trigger words for activation.
- Evaluate LoRA epochs carefully, avoiding overtraining to preserve flexibility and creative range.
- Integrate your trained LoRA into ComfyUI, using clear trigger words and upscaling workflows to enhance detail.
- Troubleshoot and refine,your training data and workflow choices directly impact your results.
- Expand your workflow for any style, subject, or creative goal, and use tools like ChatGPT and Cling AI to push your projects further.
Consistency isn’t just about repetition,it’s about unlocking new kinds of stories, art, and experiences. Every time you apply these skills, you gain more than just technical proficiency. You gain the power to bring your creative visions to life, again and again, with characters who are unmistakably yours.
Frequently Asked Questions
This FAQ section is designed to clarify the concepts, workflow, and practical details of creating consistent AI-generated characters using ComfyUI, Flux, ControlNet, and online LoRA training platforms. Whether you are starting out or looking to refine your process, these answers will help you troubleshoot common issues, optimize your workflow, and better understand the creative and technical aspects of consistent character generation.
What is the core process for creating consistent AI characters using the discussed methods?
The core process involves generating a character sheet, training a LoRA, and then deploying that LoRA in ComfyUI for consistent image generation.
Start by creating a character sheet with various poses and angles using a model like Flux in ComfyUI. Use these images to train a custom LoRA (Low-Rank Adaptation) model on a platform such as Tensor.Art. The platform will caption the images and let you set parameters (trigger words, resolution, etc.). Once trained, download the LoRA and use it in ComfyUI with a base model like Flux to generate new, consistent images of your character in different scenarios.
How does the use of ControlNet assist in creating consistent character sheets?
ControlNet enables precise control over pose and structure by using reference images.
Upload a reference image with desired poses (for example, a Photoshop mock-up or a real-life photo). The OpenPose node in ControlNet generates a skeleton or pose structure, instructing the AI to render the character in those exact positions. While you can create character sheets without ControlNet, using it generally results in more reliable and accurate pose reproduction, which is crucial for effective LoRA training.
What is the significance of the training images used for a LoRA, and what types of images are recommended?
The variety and quality of your training images directly affect the flexibility and performance of your LoRA.
Include a mix of close-ups, medium shots, full-body images, and various facial angles. Change up the outfits and poses to make the LoRA adaptable to different scenarios. If all images feature the same outfit or are only portraits, your LoRA will be limited to those constraints. Use plain backgrounds (preferably white) to prevent environmental elements from being learned, which can interfere with future generations.
How can a LoRA be trained effectively, and what are some key considerations during the online training process?
Focus on quality captions, unique trigger words, and appropriate settings during online LoRA training.
On platforms like Tensor.Art, upload your training images and use a natural language captioning tool like Florence 2 to generate precise image descriptions. Choose a unique trigger word to prevent overlap with other models or prompts. Set the image resolution to 1024 pixels or higher if possible for better results, but be aware this can increase costs. Monitor sample outputs at different training epochs to select the most balanced LoRA,consistent, but not overtrained.
How is a trained LoRA used in ComfyUI to generate consistent character images?
Load the LoRA into ComfyUI and activate it with its trigger word in your prompt.
After downloading your trained LoRA, place it in the correct folder for ComfyUI. Use a Power LoRA node to load it in your workflow. Split your positive prompt, placing the unique trigger word separately to ensure the LoRA is recognized. Describe your desired scene, pose, and environment in the rest of the prompt. Use a fixed seed for initial generations to ensure consistency, and experiment with random seeds for variations or upscaling.
What are some potential issues that can arise during character generation with a trained LoRA, and how can they be addressed?
Inconsistencies, overtraining, and anatomical errors are typical issues, but they can often be mitigated.
Problems can stem from inconsistent training images (e.g., different proportions or mistakes like extra fingers). Overtrained LoRAs may rigidly mimic the training data, making it hard to generate the character in new situations. If faces vary between outputs, generate multiple images with different seeds and use the upscaler. If overtraining is suspected, use a lower-epoch LoRA or retrain with a more varied and consistent dataset.
How can images be prepared for LoRA training, especially when starting with a character sheet or limited source material?
Split, clean, and standardize your images for optimal LoRA training.
For character sheets in grid format, separate each pose as an individual image using ComfyUI crop nodes or image editing software like Photoshop. Remove unwanted lines or shadows. If you only have a single portrait, use Live Portrait nodes or inpainting to create variations in expression or attire. Ensure all images are sharp and resized to a standard size, such as 1024x1024 pixels, to maximize training effectiveness.
How can external tools like Chat GPT be integrated into the character generation workflow?
Use Chat GPT to craft or expand prompts for character generation.
Provide Chat GPT with your character image or concept and ask it to generate a detailed descriptive prompt, covering appearance, clothing, environment, and actions. This results in richer, more effective prompts for natural language models like Flux. Chat GPT can also help you vary prompts for different outfits or scenarios, making it easier to generate new and consistent images.
What is the primary goal of the ComfyUI workflow demonstrated in the tutorial?
The goal is to create a repeatable process for generating consistent characters in varied situations.
By combining ComfyUI, Flux, ControlNet, and online LoRA training, the workflow allows for the creation of characters that maintain their core identity across multiple images, scenes, and contexts,ideal for storytelling, branding, or game asset pipelines.
Why is it beneficial to create a character sheet with multiple poses for LoRA training?
Diverse poses provide the LoRA with a richer understanding of the character’s form and possible movements.
A character sheet with close-ups, medium shots, and full-body images teaches the LoRA to recognize the character in different body positions and camera angles. This enables it to reproduce the character accurately, regardless of the context or scene.
How is ControlNet used in the character generation workflow to ensure specific poses?
ControlNet interprets pose reference images and guides the AI to match those positions.
By feeding in a reference image, such as a real person or a cartoon character sheet, ControlNet’s OpenPose creates a skeleton map. This ensures the AI model places the character exactly as desired, improving accuracy for both artistic and practical applications.
What are the recommended dimensions for images intended for LoRA training as discussed in the tutorial?
1024x1024 pixels is the recommended size for LoRA training images.
This dimension balances image detail and compatibility with most AI models. Upscaling or cropping images to this size ensures the training data is optimal for LoRA training, leading to better performance and fewer artifacts.
Why might using a fixed seed be important during the initial image generation phase for character sheets?
A fixed seed ensures that the generated image can be recreated exactly for further editing or upscaling.
This predictability is useful for iterative workflows where you may want to tweak and regenerate specific outputs, ensuring consistency across different stages of the process.
What is the purpose of using an upscaler in the workflow, and why might you need to downscale before upscaling with Flux?
Upscalers increase image resolution for quality improvement, but Flux model limits require careful image sizing.
Upscalers are used to enhance the detail of generated images, preparing them for use in LoRA training or final outputs. However, because Flux has a maximum pixel limit, you may need to downscale images before upscaling to avoid exceeding this threshold. For example, start with a 704x704 image, then upscale to 1024x1024.
How does the second K-sampler, with a random seed and higher denoise value, contribute to the upscaling process?
This step introduces subtle variations and corrects minor errors during upscaling.
The random seed combined with a high denoise value (like 0.95) allows the model to refine the upscaled image, fixing imperfections and generating multiple unique versions. This gives you a range of options to select the best final output.
Besides character sheets, what other types of reference images are suggested for generating consistent characters, including anthropomorphic ones?
Use pose reference images of real people or body types similar to your target character.
This approach is particularly handy for anthropomorphic characters, animals, or characters with unique body structures. By matching reference images to your target character’s form, you increase the accuracy of generated poses.
What is a "trigger word" in the context of LoRA training, and why is it important to make it unique?
A trigger word activates your custom LoRA in the prompt, and uniqueness prevents unintended activation.
If your trigger word is too generic, it may overlap with other models or prompt terms, leading to unpredictable results. A unique trigger word ensures only your LoRA is triggered, resulting in consistent, expected character generations.
Why might an "overtrained" LoRA be less desirable for generating characters in different poses or outfits?
Overtrained LoRAs rigidly mimic their training data, reducing flexibility for new scenarios.
If a LoRA has been trained for too many epochs or on overly similar images, it struggles to adapt to new poses, clothing, or environments. This limits creativity and usability in diverse projects.
How does the iterative nature of the character generation and LoRA training process encourage experimentation and refinement?
The workflow is designed for ongoing experimentation, allowing you to adjust, retrain, and regenerate at multiple stages.
You can tweak prompts, reselect images, retrain LoRAs at different epochs, and regenerate images with new seeds. Each step gives feedback about what works and what doesn’t, supporting a process of continual improvement,much like creative editing in graphic design or writing.
How do different types of reference images (cartoon character sheet vs. real person pose) influence the generated output, and what are their limitations?
The choice of reference images affects the accuracy of the generated pose and the character’s look.
Cartoon character sheets are great for stylized consistency, while real person poses help with realistic anatomy or movement. However, mismatched references (e.g., using a human pose for a non-human character) can cause anatomical distortions or oddities in the output. Choose references that closely match your character’s style and body type.
What are the trade-offs and considerations when preparing images for online LoRA training?
Prioritize image quality, consistent backgrounds, and resolution, but balance against time and tool availability.
High-quality, sharp images with standard backgrounds yield better LoRAs. Cropping and splitting can be done in Photoshop for precision or in ComfyUI for speed. Each method has its pros and cons: Photoshop allows more control, while ComfyUI is quicker and integrates with the workflow.
What are the advantages and disadvantages of using an online LoRA training platform like Tensor.Art compared to local training?
Online platforms are accessible and streamlined, but may have costs and less customization than local setups.
Tensor.Art handles the technical aspects, making it easy for non-technical users and those without powerful hardware. However, costs can add up, and you may have less control over advanced settings compared to local training. Local training offers more flexibility but requires technical know-how and a capable GPU.
How does the training dataset impact the flexibility and usability of the resulting LoRA?
A larger, more varied dataset improves the LoRA’s ability to generate the character in new situations.
Include a wide range of poses, outfits, and angles. Consistency in image quality and background helps, while variety in content prevents overfitting. To improve flexibility, augment your dataset with inpainted or AI-generated variations.
What is ComfyUI and why is it used for character generation work?
ComfyUI is a node-based interface for building flexible AI image generation workflows.
It allows you to visually assemble and adjust each step in the process (prompting, ControlNet, upscaling, etc.), making it ideal for iterative creative tasks and complex projects like consistent character generation.
What is the Flux model, and how does it differ from other models?
Flux is a version of Stable Diffusion optimized for certain tasks, especially high-resolution, natural language-driven image generation.
It generally requires more video RAM (VRAM) and is well-suited to workflows that depend on detailed prompts and nuanced variations.
What is a LoRA and how does it enable custom character creation?
LoRA stands for Low-Rank Adaptation, a technique for customizing diffusion models with new styles or characters.
By training on a small dataset, a LoRA lets you apply a specific style, character, or concept to any compatible base model, without retraining the entire model.
What is a character sheet and what role does it play in this workflow?
A character sheet is a collection of images showing a character from multiple angles, poses, or expressions.
It provides the visual diversity needed for the LoRA to learn how to render the character in different ways, ensuring consistency in future generations.
How is OpenPose used with ControlNet in this workflow?
OpenPose analyzes reference images to generate skeleton maps, guiding pose reproduction in ControlNet.
This helps the AI accurately match the desired pose, even for complex or dynamic positions, leading to more predictable and controlled results.
What are upscalers in ComfyUI and when should they be used?
Upscalers increase the resolution and detail of generated images, improving their suitability for training or final use.
Use them after initial image generation to prepare images for LoRA training or when you need higher-quality outputs for publication or design.
What is a K-sampler in ComfyUI and why is it important?
K-samplers control the sampling process, including randomness and noise reduction, during image generation and upscaling.
They allow for fine-tuning the balance between creativity and fidelity, critical for both initial generation and post-processing steps like upscaling.
What does the denoise parameter control in the workflow?
Denoise adjusts how much change is allowed from the starting image during sampling or upscaling.
A high denoise value introduces more variation, useful for correcting errors or creating new versions. A lower value keeps the output closer to the original.
What is the difference between a fixed seed and a random seed in ComfyUI?
A fixed seed produces the same image every time, while a random seed generates a unique variation with each run.
Fixed seeds are essential for reproducibility, while random seeds are useful for exploring creative options and variations.
What is an epoch in LoRA training and how does it affect the results?
An epoch is one full pass through the training dataset during model training.
More epochs mean the model learns more from the data but can risk overfitting if training is excessive. Platforms like Tensor.Art let you download LoRAs at different epochs to find the best balance.
How can you identify if a LoRA is overtrained, and what can you do about it?
Overtrained LoRAs show rigid, repetitive outputs based on the training data and resist variation.
If you notice limited flexibility, try using a LoRA from an earlier epoch, or retrain with more diverse images. You can also adjust prompts or reduce the LoRA’s strength in ComfyUI.
What is autolabeling/captioning and why is it important in LoRA training?
Autolabeling uses AI to generate descriptive captions for each training image, aiding in context understanding during training.
Natural language captions (from models like Florence 2) help the AI associate visual features with text, improving prompt responsiveness and LoRA effectiveness.
How can inpainting be used to enhance a LoRA training dataset?
Inpainting lets you modify images to add new poses, outfits, or correct errors, increasing dataset diversity.
This is especially useful when you have a limited number of original images, or need to quickly create variations for more robust LoRA training.
What are common misconceptions about LoRA training for character consistency?
Some believe more images always improve results, or that any image quality is acceptable.
In reality, image variety, quality, and consistency matter more than quantity. Overtraining, background noise, and inconsistent proportions can all degrade the LoRA’s flexibility and output quality.
What are practical business applications for consistent AI-generated characters using this workflow?
This workflow is ideal for branding, marketing, comics, animation, and game asset creation.
For example, a company can maintain a mascot’s appearance across various ads, or a game developer can generate character art for multiple scenes and outfits without hiring an illustrator for each variation.
How do you troubleshoot common issues like inconsistent faces or anatomical errors in generated images?
Check your training dataset for inconsistencies, generate multiple variations, and use upscaling to improve detail.
If problems persist, retrain your LoRA with more consistent, higher-quality images, or use reference images that better match your desired outcome.
What are some tips for effective prompt engineering with Flux and LoRA models?
Be specific and descriptive, use the unique trigger word clearly, and separate scene details from character cues.
For example, use “triggerword, confident woman, blue suit, office background” to activate the LoRA and describe the context precisely.
Certification
About the Certification
Become certified in AI character consistency with Flux and LoRA training,demonstrate the ability to create, train, and refine character sheets for reliable, high-quality results in digital art and creative workflows.
Official Certification
Upon successful completion of the "Certification in Designing Consistent AI Characters with Flux and Online LoRA Training", you will receive a verifiable digital certificate. This certificate demonstrates your expertise in the subject matter covered in this course.
Benefits of Certification
- Enhance your professional credibility and stand out in the job market.
- Validate your skills and knowledge in cutting-edge AI technologies.
- Unlock new career opportunities in the rapidly growing AI field.
- Share your achievement on your resume, LinkedIn, and other professional platforms.
How to complete your certification successfully?
To earn your certification, you’ll need to complete all video lessons, study the guide carefully, and review the FAQ. After that, you’ll be prepared to pass the certification requirements.
Other AI Video Courses

Video Course: What is Generative AI and how does it work?

Video Course: How to Use ChatGPT from Beginner to Professional

Video Course: How to Use Google Gemini for Google Workspace to Boost Productivity

Video Course: How to Use Claude 3.7 AI - Tips for Beginners!

Video Course: ChatGPT for Data Analytics: Full Course - from Beginners to Professional

Video Course: Generating Images and photos With ChatGPT?

Video Course: Generating Images & Photo's with MidJourney

Video Course: Generating Design's with Microsoft Designer and AI

Video Course: Generating Design's with Canva.com and AI
Join 20,000+ Professionals, Using AI to transform their Careers
Join professionals who didn’t just adapt, they thrived. You can too, with AI training designed for your job.


