Cursor 3.0 AI IDE: Beginner Course for AI-Powered Coding (Video Course)
Cursor 3.0 lets you turn ideas into working apps, even if you've never coded. You'll see every change the AI makes, test in a built-in browser, and keep full control. From first install to parallel agents and cloud builds, this course gets you building fast.
Related Certification: Certification in Building AI-Powered Applications with Cursor 3.0

Also includes Access to All:
What You Will Learn
- Install Cursor and navigate the Agent View and IDE View
- Plan, build, and review projects using the Plan → Build → Review cycle
- Use Plan, Build, Debug, Ask, and Multitask modes and choose AI models
- Manage code with Git: review diffs, commit frequently, and revert safely
- Run sub-agents, work trees, and cloud agents for parallel, scalable builds
- Create rules, skills, and plugins and write precise, context-rich prompts
Study Guide
Introduction: Why This Course Matters
You're about to learn a tool that changes the relationship between ideas and software. Cursor 3.0 isn't just another code editor with some AI features bolted on. It's a complete rethinking of how software gets built, blending the familiar environment of Visual Studio Code with AI agents that can write, debug, and manage entire projects from natural language prompts.
Whether you've never written a line of code or you've been shipping software for a decade, this course walks you through everything from the first download to advanced cloud-based parallel development. The goal is simple: by the end, you'll be able to take an idea, turn it into a working application, and maintain it with confidence. No blind trust in the AI. No black boxes. Just a visual, controlled environment where you see every change and decide what sticks.
The shift toward AI-assisted development isn't coming. It's here. And the people who learn to work with these tools,not just prompt them but truly collaborate with them,will build things at a pace that seemed impossible a few years ago. Let's get you there.
What Makes Cursor Different From Other AI Tools
Most AI coding tools you've heard about,things like Claude Code or Codex,operate through a command line. You type a prompt, and the AI works on files you can't see. You're essentially trusting the model blindly. It might be reading your codebase, but you're not reading what it's doing to that codebase. That works for some people, but it creates a fundamental problem: you lose visibility and control.
Cursor is a full integrated development environment. It's a fork of Visual Studio Code, which means if you've ever used VS Code, the layout will feel instantly familiar. You get the file explorer, the terminal, syntax highlighting, debugging tools,all the things you'd expect from a professional editor. But woven throughout is deep AI integration that lets you generate code, edit files, and manage entire projects through conversation.
Here's the key difference: when the AI makes changes, you see them. Every file modification appears in your editor. You can read through the code, test the application, and review the diff before deciding whether to keep it. This hybrid approach means you can work two ways. You can "vibe code",describe an app and let the AI build it while you mostly watch and guide. Or you can work like a precise engineer, making small targeted edits with traditional IDE tools while using AI for the heavy lifting.
Consider a practical example. Let's say you want to build a personal finance dashboard. With a CLI tool, you'd describe the idea and hope for the best. With Cursor, you'd see every file created, every function written. You could open the main dashboard component, read through the rendering logic, spot a potential bug in how transactions are summed, and ask the AI to fix just that section. That level of control matters,especially when you're building something you'll actually use or ship to others.
Getting Started: Installation and Setup
The first step is straightforward. Cursor runs on Windows, macOS, and Linux. You download the installer from the official website, run it like any other application, and you're in. No complex configuration, no command-line setup. Just a standard install.
Once it's installed, you'll be asked to sign in or create an account. You can also create your account through the Cursor website before opening the app. The free plan is worth starting with,it gives you access to the core features and enough usage to build real projects. As you get comfortable and your needs grow, you can upgrade to one of the paid tiers. Pro, Pro Plus, Ultra, Teams, and Enterprise plans scale up your usage allowances and add features like centralized billing and admin controls for organizations.
The pricing model is usage-based, which means different AI models consume your credits at different rates. Cursor's own models are more efficient. Third-party frontier models cost more per request. You'll learn to balance cost against capability as you go, but for now, just know that the free plan is enough to start building and learning.
When you first launch Cursor, you'll land in what's called the Agent View. It looks like a clean chat interface, centered around a single prompt window. This is the default mode, designed to be welcoming for non-technical users. Don't worry,there's also an IDE View that gives you the traditional editor layout. You can switch between them anytime using the buttons in the interface.
Understanding the Two Views: Agent and IDE
The Agent View is your command center. It's where you prompt the AI, watch it work, and manage multiple agents running in parallel. The interface is built around conversation tabs. Each tab represents a separate agent with its own context and task. You can spawn a new agent with the "New Agent" button, and each one operates independently. This is where multitasking lives,you might have one agent building the backend of your app while another works on the frontend styling.
From the Agent View, you can select which AI model to use, upload images for visual reference, access your skills library, connect MCP servers, and manage plugins. There's also a built-in browser you can open to test your application without leaving the environment. The Agent View strips away the intimidating complexity of a full IDE and gets you straight to the conversational core of Cursor.
The IDE View is what developers will gravitate toward. It presents the classic editor layout: a file explorer on the left, your code in the center, and an AI agent panel on the right. This view is built for precision. You can click through your project files, read every line of code, and make manual edits alongside the AI's work. The keyboard shortcuts Control+K and Control+L are particularly useful here,Control+K lets you make a quick edit to selected code, and Control+L opens a chat reference about specific lines or blocks.
The IDE view also gives you better change management. When the AI modifies files, you get a diff view showing exactly what changed. You can revert individual files or select all changes and undo them. In the Agent View, changes are applied more directly, which is fine for quick iterations but can make reverting trickier. That's why the recommendation is to use the IDE view when you need control and the Agent view when you want speed and parallel execution.
The Modes: Plan, Build, Debug, and More
Cursor 3.0 includes several modes that change how the agent behaves. These aren't just cosmetic switches,they fundamentally alter what the AI does with your prompts.
Plan Mode is where every new project should start. When you enter Plan Mode, the AI analyzes your request and produces a detailed implementation plan. It might generate a markdown file outlining the tech stack, the file structure, the core features, and the order of implementation. Crucially, it doesn't write any code yet. It's thinking before acting. This is your chance to review the approach, catch misunderstandings, and make adjustments before the AI starts building. For example, if you asked for a web-based game and the plan suggests using React with a Node backend, but you wanted something simpler that runs without a server, you can catch that now rather than after hours of generated code.
Debug Mode flips the agent's focus. Instead of building new features, it hunts for bugs. If something's broken, you switch to Debug Mode, describe the issue, and the AI investigates. It reads through the relevant files, identifies the root cause, and proposes fixes. This is much more effective than asking a general agent to "fix the app" because the mode narrows the AI's attention to problem-solving rather than feature development.
Ask Mode is for questions. You can ask the AI to explain how a particular piece of code works, why a certain pattern was used, or what a specific function does. The agent won't change anything,it just answers. This is incredibly valuable for learning. If you're a beginner and the AI generated code you don't understand, you can interrogate it without fear of it modifying your project.
Multitask Mode is where things get powerful. It allows multiple agents to run simultaneously, each working on different tasks. You can queue up several jobs and let them execute in parallel. This is how you go from a plan to a working application in minutes rather than days. The agents work in isolated environments, so they don't step on each other's toes.
Agent Mode is the default. It's the standard conversational interaction for building and editing. When you're not sure which mode to use, this is the safe choice.
Choosing the Right AI Model
The model you select determines both the quality of output and how fast you burn through your usage credits. Cursor gives you several options, and understanding the trade-offs helps you make smarter choices.
Auto Mode is the easiest option. Cursor routes your prompt to its most suitable default model, typically Composer or Grock. You don't have to think about it,the system picks what it thinks works best for your task. This is fine for most everyday work.
Composer 2.5 is Cursor's lighter, cheaper model. It's well-suited for standard web-based tasks,building simple pages, writing straightforward functions, handling routine edits. If you're prototyping or working on a basic project, this keeps costs low while delivering solid results.
Grock 4.5 is a high-performance model trained with compute resources from SpaceX. It offers strong benchmarks at a lower per-token price than comparable frontier models. For complex projects that require advanced reasoning,architecting a multi-file application, dealing with intricate business logic, or solving tricky algorithmic problems,Grock is a great middle ground between cost and capability.
Then there are the frontier models,Fable, GPT-5.x, and similar third-party offerings. These are more expensive and consume credits faster. But sometimes they're worth it. When Cursor's own models are struggling with a problem, or when you want a fresh perspective on a stubborn bug, switching to a frontier model can break the deadlock. Think of them as specialist consultants you bring in when the in-house team is stuck.
There are also two important settings that affect performance. Max Mode expands the model's context window, allowing it to reason over larger codebases. This is essential when you're working on a big project and the agent needs to understand how different files interact. The trade-off is higher credit consumption. Fast Mode speeds up token generation, which means quicker responses. But it also consumes credits at a higher rate. If you're on a limited plan, leave Fast Mode off unless you're in a hurry.
Creating Your First Project
Let's walk through building something real. You'll see how the pieces fit together.
Start by clicking the folder selector in the Agent View. Choose "New Folder" to create a fresh directory for your project. Name it something meaningful,say, "finance-dashboard" or "my-game." Once you've selected your folder, Cursor treats that as your workspace. Everything the agent does happens within that folder.
Now comes the critical part: your initial prompt. The quality of this prompt determines the quality of everything that follows. A vague prompt like "build a finance app" will get you a generic result. A rich, contextual prompt gets you something tailored to your needs.
Here's a template that works well: "I want to build a personal finance dashboard that tracks income and expenses. It should connect to a simple database to store transactions, display monthly summaries with charts, and allow users to categorize their spending. The target user is someone who wants a clear visual overview of their money without complex accounting features. It should work in the browser and be easy to use for people who aren't tech-savvy."
Notice what you've provided: what you're building, why you're building it, who it's for, and the key constraints. That's the context the AI needs.
One powerful trick: at the end of your prompt, add "Ask me any clarifying questions you need before you start." Cursor 3.0 can present these questions interactively. It might ask about the tech stack you prefer, whether you want authentication, or how you'd like the data stored. Answering these upfront prevents the AI from making assumptions that lead to wasted work.
Voice dictation is another game-changer. Tools like Whisper Flow integrate natively with Cursor, letting you speak directly into the prompt window. You can talk much faster than you type, and when you speak, you naturally provide richer, more detailed prompts with better structure. The result is more context for the model, which means better output.
The Plan-Build-Review Cycle
This is the rhythm you'll fall into with every project. It's simple, but following it consistently saves you from chaos.
First, enter Plan Mode. Give the AI your detailed prompt and let it generate a plan. It will typically create a markdown document that outlines the tech stack, the file structure, the key features, and the implementation order. Read through this carefully. Does the approach make sense? Is there anything you'd change? This is your chance to course-correct before any code exists.
Once you're happy with the plan, switch to Build Mode. You'll have a choice: build locally or build in parallel. Building locally means one agent works through the plan sequentially. Building in parallel spawns multiple sub-agents, each tackling a different part of the plan simultaneously. Parallel is faster, but you need to be comfortable with multiple agents working in isolated environments. For your first project, building locally might be simpler to follow. Once you're more confident, parallel will become your default for speed.
When the build completes, test immediately. Open the built-in browser and interact with your application. Does it work? Does it look right? This is where the iteration begins. You'll send follow-up prompts to refine things. Maybe the colors are wrong, or a button doesn't work, or the layout breaks on mobile. Each refinement is a small, targeted change that builds on what's already there.
The key discipline here is making small changes rather than requesting massive overhauls. Small changes are easier to review, easier to debug, and easier to revert if something goes wrong. If you ask the AI to "redesign the whole app," you'll get a mess. If you ask it to "change the header background to dark blue and increase the font size of the titles," you get a controlled improvement.
Testing with the Built-in Browser and Design Mode
Cursor has a fully integrated browser that lets you view your running application without leaving the IDE. This is huge. No more switching between your editor and a separate browser window. The built-in browser includes a console for debugging, a screenshot tool, and a reload button.
But the real gem is Design Mode. This feature lets you interact with elements on the page visually and prompt the AI to modify them. Instead of describing what you want in text,which can be ambiguous,you point directly at the thing you want to change.
Here's how it works. Open the browser and activate Design Mode. You can click on an element to select it. You can circle an area with a drawing tool. You can hold Shift and drag to select a rectangular region. Then you type a description of the change you want, and the AI applies it.
Let's say you built a landing page and the hero section's headline is too small. You circle the headline, type "make this bigger and change the color to a vibrant orange," and the AI modifies exactly that element. No ambiguity, no "find the headline and change it." You've shown it precisely what you mean.
This is especially powerful for UI/UX work. You can visually inspect your design, identify issues, and request fixes with pinpoint accuracy. It's a level of control that text-based prompting simply can't match.
Git Integration and Version Control
Version control is non-negotiable when you're working with AI-generated code. The AI makes mistakes. Sometimes it introduces bugs that aren't immediately obvious. Git gives you a safety net,a way to return to a known-good state.
Git is a version control system used by software developers to track every change in a project. If you're not familiar with it, don't worry. Cursor makes it accessible. You can ask the AI to "enable git and make a repo," and it will handle the setup, including creating a .gitignore file to keep unnecessary files out of version control.
A commit is a checkpoint. When your application is in a stable, working state, you ask the AI to "make a commit." This saves the current state of your code. If you later make changes that break things, you can revert to that commit and start fresh.
The best practice is to commit whenever the app is stable and working. This creates a series of checkpoints you can fall back to. Let's say you're building a game. You get the basic platformer mechanics working and commit. Then you add a double-jump feature, and it breaks the physics. You can revert to the pre-double-jump commit and try a different approach.
Cursor also shows you a diff view after the AI makes changes. This displays exactly what was added, removed, or modified across files. Reviewing the diff is essential. You can spot potential issues before they become bugs. You can understand what the AI actually did rather than just trusting that it did the right thing. In the IDE view, you can revert individual files if a change looks wrong.
Sub-Agents and Work Trees: Parallel Development
This is where Cursor really flexes its muscles. Sub-agents are secondary agents branched off from your main agent to handle delegated tasks. They work in what's called work trees,isolated clones of your project.
Here's why that matters. If a sub-agent makes a mess, it's contained in its own safe environment. It doesn't corrupt your main codebase. Only when the sub-agent is confident in its changes does it apply them back to the main branch. This is like having a developer work on a feature branch and only merge when the code is stable.
A practical example: you're building a web app with a frontend and backend. You can spawn one sub-agent to work on the API endpoints while another works on the UI components. They operate in parallel, each in its own work tree. When both are done, you review their changes and merge them into the main project.
You can watch each sub-agent's activity in real time through a dedicated tab. This gives you visibility into what's happening without needing to micromanage. You can also use the /worktree command to explicitly create and manage work trees.
Sub-agents are also used in the /multimodel-review feature. This runs multiple AI models simultaneously to review your code. Each model works in its own sub-agent, analyzing the codebase, detecting bugs, suggesting refactors, and providing feedback. The results are consolidated into a summary. This is like having several senior developers review your code from different perspectives. One model might catch a performance issue while another spots a security vulnerability. The diversity of analysis catches problems that a single model might miss.
Cloud Agents: Running Tasks Without Limits
Some tasks take a long time. Building a complex application, running extensive tests, or processing large amounts of data can tie up your local machine for hours. Cloud agents solve this by executing tasks on Cursor's remote compute infrastructure.
The setup involves a few steps. First, you connect your project to a Git provider like GitHub. This means creating a repository and pushing your code to it. Then, you link that repository through the Cursor.com dashboard. You'll authorize Cursor to access your GitHub or GitLab account. Once that's done, you create a cloud environment and start a cloud agent.
The benefits are substantial. Cloud agents free up your local resources, so you can keep working on other things while the heavy lifting happens remotely. They also continue running even if your laptop sleeps or loses power. You can close your laptop, go to a meeting, and come back to find the task completed.
You can even manage cloud agents from Cursor's iOS application. This means you can kick off a build from your desktop, then check on its progress from your phone while you're away from your desk. The flexibility is remarkable,you're not tied to any single device.
The /incloud command triggers a task to run on the cloud. This is useful when you're about to start a long-running operation and don't want to be interrupted.
Customizing with Rules and Skills
Every developer has preferences. Maybe you hate TypeScript. Maybe you want all files to stay under 300 lines. Maybe you have a specific naming convention you follow. Rules let you encode these preferences so the AI respects them automatically.
Rules are persistent instructions injected into the agent's context for a specific project. They're stored in a .cursor folder within your project. To create a rule, you simply ask the AI: "Create a rule that says we always use JavaScript, never TypeScript." Or "Create a rule that all components should be in the components folder." From then on, the AI follows that rule in every interaction.
This is incredibly powerful for maintaining consistency. If you're working with a team, shared rules ensure everyone's AI-generated code follows the same standards. If you're working alone, rules prevent you from having to repeat your preferences every time you start a new session.
Skills take customization further. A skill is a reusable workflow defined in a markdown file. Cursor includes several built-in skills covering automation, design, browser control, and more. But you can create your own.
Let's say you often need to run a specific testing procedure on your code. Instead of typing the instructions every time, you create a skill called "run-tests" that describes the exact steps. Then you invoke it with /run-tests, and the AI executes the workflow automatically.
Skills are accessed through the slash menu. You type "/" and you'll see a list of available commands, including built-in functions and your custom skills. This turns repetitive processes into one-command operations.
Plugins, MCP Servers, and External Integrations
Cursor doesn't exist in a vacuum. It connects to the broader ecosystem of tools you already use. Plugins extend Cursor's capabilities by integrating external services. You can browse a plugin marketplace to find integrations for Slack, Figma, Zapier, and many others. These bring external functionality directly into your development environment.
MCP servers,Model Context Protocol servers,allow the AI to interact with external systems at a deeper level. The GitHub MCP server, for example, enables the AI to perform operations directly on GitHub repositories. It can create issues, manage pull requests, push code, and more. This turns your AI agent into a full participant in your development workflow, not just a code generator.
The management interface for plugins and MCP servers is unified across both the Agent View and IDE View. You can add, configure, and remove them without digging through complex settings menus. If you're unsure how to set something up, you can ask the AI to help you configure it. The AI can guide you through the process or even handle it directly.
Side Chats and Automations
Side chats are a subtle but powerful feature. They allow you to select content from your main conversation and open it in a separate chat panel. You can then ask questions or make requests about that content without interrupting the main agent's workflow.
Imagine you're building a complex application and the main agent is in the middle of generating a large section of code. You see something in the output you don't understand. Instead of interrupting the agent, you select that section, open a side chat, and ask "why did you use this approach?" The main agent keeps working while you get your answer in the side chat.
This enables true parallel investigation. You can research, clarify, and explore alternatives while your primary agent continues building. It's a massive productivity boost because you're not constantly stopping and starting the main workflow.
Automations take this to the next level. They enable agents to run on schedules or in response to external events. You can set up an automation that runs a code review every time a pull request is opened on GitHub. Or one that sends a daily summary of your project's status to a Slack channel. Or one that triggers a build whenever a new issue is filed.
The event-driven nature of automations makes them particularly useful for maintaining live codebases. If your application is in production and a Sentry alert fires, an automation can spawn an agent to investigate the error immediately. This reduces response time and keeps your systems healthy with minimal human intervention.
Managing Context Windows
Every AI model has a context window,the amount of information it can consider at one time. This includes your system prompts, project rules, skills, chat history, and the code it's working with. When the context gets full, model performance degrades. It starts forgetting earlier parts of the conversation, making mistakes, and losing coherence.
Cursor tracks the size of your active context and displays it. As you approach 70 to 90 percent capacity, you should take action. You have two options: compact the context or start a fresh session.
Compacting summarizes the conversation so far, preserving the essential information in a condensed form. This frees up context space while maintaining continuity. It's a good option if you want to keep working on the same task without losing the thread.
Starting a fresh session is sometimes the better choice. If you're working on a new task or if the conversation has drifted significantly, a clean slate gives the model maximum room to think clearly. You can always refer back to previous sessions if you need to recall something.
Being proactive about context management prevents the frustrating experience of the AI suddenly becoming "dumber" mid-task. It's not that the model changed,it's that its working memory is full. Monitoring context and acting before it becomes critical keeps output quality high.
Best Practices for Working with AI Agents
You now have the full toolkit. But tools are only as good as the practices you build around them. These are the habits that separate people who get great results from Cursor from those who struggle.
Start every project in Plan Mode. The plan is your map. It prevents the AI from wandering off in the wrong direction and saves you from hours of wasted work. Review it carefully. Make adjustments. Only when you're confident in the approach should you start building.
Provide rich context in every prompt. Answer the three questions: what are you building, why are you building it, and who is it for? The more the model understands your intent, the better it can tailor its output. Don't be stingy with details. A paragraph of context beats a sentence every time.
Make small, iterative changes. This is the single most important habit you can develop. Small changes are easy to review, easy to test, and easy to revert. Large changes are a gamble. When you work in small increments, you catch problems early and maintain a stable codebase throughout the development process.
Review everything the AI does. Use the diff view. Read the code. Test the application. Never blindly trust the output. The AI is a powerful tool, but it's not infallible. Your review is the quality gate that keeps bugs out of your project.
Commit frequently. Every time your application is in a stable state, make a commit. This creates checkpoints you can return to. When something breaks, you can revert to a known-good state instead of scrambling to fix a cascade of problems.
Use the built-in browser to test. Don't assume the code works because the AI said it does. Open the browser, interact with the application, and verify. Design Mode lets you visually inspect and modify UI elements with precision.
Leverage parallel agents when you're comfortable. Sub-agents, multitask mode, and parallel builds dramatically reduce development time. Just remember that parallel agents work in isolated environments and need careful merging.
Customize your environment. Create rules that enforce your coding standards. Build skills for repetitive tasks. Connect MCP servers to the tools you use. The more you tailor Cursor to your workflow, the more efficient you become.
Monitor your context window. Compact or start fresh sessions before you hit limits. This maintains model performance and prevents frustrating quality drops.
Use cloud agents for long-running tasks. Offload heavy compute to Cursor's infrastructure and free up your local machine. You can even monitor progress from your phone.
Practical Example: Building a Game from Scratch
Let's put everything together with a complete walkthrough. You'll see how all the concepts we've covered work in harmony.
You open Cursor and select a new folder called "space-game." Your initial prompt: "I want to build a browser-based space shooter game. The player controls a ship at the bottom of the screen and shoots at incoming asteroids. The game should have a score counter, increasing difficulty, and a clean visual style. It should be easy to pick up and play for anyone. Ask me any clarifying questions you need."
The AI asks a few questions. You answer: no need for sound effects, keep it simple with HTML, CSS, and JavaScript, and make it mobile-responsive.
You switch to Plan Mode. The AI generates a plan: create index.html, style.css, and game.js files. It outlines the game loop, the collision detection logic, the scoring system, and the difficulty scaling. You review it and approve.
You switch to Build Mode and choose to build in parallel. Sub-agents spawn. One works on the HTML structure and CSS styling. Another writes the core game logic in JavaScript. They work in their own work trees, and you watch their progress in real time.
When they're done, you open the built-in browser. The game loads. You play it. The ship moves, the asteroids spawn, and the score increments. But something feels off. The ship is too slow, and the asteroids are too fast. You switch on Design Mode, circle the ship, and type "make the ship move faster." You circle an asteroid and type "slow these down a bit." The AI applies the changes.
You test again. Better. You play for a few minutes and notice the difficulty ramps up too quickly. You send a follow-up prompt: "Adjust the difficulty curve so it starts easier and ramps up more gradually."
You test again. This time it feels right. You ask the AI to "make a git commit with the message 'initial working version.'" Now you have a checkpoint.
You decide to add a feature: power-ups that give the ship temporary shields. You create a new task in Multitask Mode. One agent works on the shield mechanic while another designs the power-up visuals. They work in parallel. When they're done, you review the diff, test the game, and commit again.
This entire process,from idea to a polished, working game with multiple features,took maybe an hour. With traditional development, it would have taken days. That's the power of Cursor when you use it well.
Practical Example: A Business Application
Let's look at a non-technical use case. Say you run a small business and need a customer relationship management tool. You don't know how to code, but you have a clear idea of what you need.
You open Cursor and create a folder called "crm-tool." Your prompt: "I need a web-based CRM for my small business. It should let me store customer contact information, track interactions, set follow-up reminders, and generate simple reports on sales activity. I want it to be easy to use, with a clean interface. I don't need multi-user support,just me. Ask me any questions you need."
The AI asks about your data storage preferences. You say you want it simple, maybe a local database. It asks about the type of reports you want. You describe a few basic charts.
Plan Mode generates a plan. You review it. It looks good. You switch to Build Mode. The AI builds the application. You open the browser and test it. You add a customer, log an interaction, and set a reminder. It works.
You realize you want the ability to email customers directly from the CRM. You ask the AI to add an email integration. It suggests connecting an email service. You approve. The agent implements it.
You test the email feature. It works. You commit.
This person went from "I need a CRM" to "I have a working CRM tailored to my exact needs" in a single afternoon. No developer required. No expensive software subscription. Just a tool they built themselves with AI assistance.
The Discipline of Review and Testing
One thing needs to be emphasized: the AI is not your boss. You are. The AI generates code, but you decide what stays. This means you need to actively engage with the output.
Always review the diff after the AI makes changes. Look at what was added, removed, and modified. Ask yourself: does this make sense? Does it follow the project rules? Does it introduce any obvious issues?
Always test the application. Open the browser. Click around. Try to break things. The AI doesn't know what you know about your users' behavior. You're the one who understands the context and the expectations.
When something goes wrong, don't panic. Use Debug Mode. Describe the issue. The AI will investigate and propose fixes. If a fix doesn't work, revert to a previous commit and try a different approach.
The combination of Git checkpoints, diff reviews, and active testing creates a safety net. You can experiment freely because you know you can always return to a stable state. This freedom is what makes AI-assisted development so powerful,it removes the fear of breaking things.
Building Good Prompting Habits
Prompting is a skill. Like any skill, it improves with practice and intentionality. Here are the habits that will serve you well.
Be specific. "Make the button blue" is worse than "Change the primary button color to a darker blue that matches the brand palette." Specificity reduces ambiguity and gets you closer to your intended result.
Provide constraints. Tell the AI what not to do. "Don't use external libraries for this" or "Keep the implementation framework-free" narrows the solution space and prevents unwanted dependencies.
Give examples. If you have a visual reference or a code snippet that captures what you want, include it. Images can be uploaded directly. Code examples give the AI a concrete pattern to follow.
Break big tasks into smaller ones. Instead of asking for an entire application at once, build it piece by piece. Start with the core structure. Add features incrementally. Each step builds on the previous one, giving you more control and better results.
Ask for explanations. When you don't understand something the AI did, ask. "Why did you structure the data this way?" or "What does this function do?" The AI can explain its reasoning, and you'll learn in the process.
Iterate. The first version is rarely perfect. Expect to refine. Each follow-up prompt is an opportunity to steer the output closer to your vision.
Scaling Up: Teams and Enterprise
Cursor isn't just for individuals. The Teams and Enterprise plans are designed for organizations. They offer centralized billing, administrative controls, and enhanced security features.
For a team, the value is consistency. Shared rules ensure everyone's code follows the same standards. Shared skills standardize workflows. MCP servers connect to the same external systems. The result is a unified development environment across the entire team.
For larger organizations, governance becomes important. Administrators can control access, monitor usage, and ensure compliance with internal policies. The enterprise plan provides the infrastructure to deploy AI-assisted development at scale.
The key takeaway is that Cursor scales. It works for a solo founder building a prototype and for a Fortune 500 engineering team shipping production software. The same principles apply: plan thoroughly, prompt richly, iterate incrementally, and leverage automation where it adds value.
Conclusion: Your Path Forward
You now have a comprehensive understanding of Cursor 3.0. You know how to install it, navigate its interface, craft effective prompts, work with modes and models, test with the built-in browser, manage version control, leverage parallel agents, customize with rules and skills, and scale up to cloud-based development.
The most important thing you can do now is practice. Open Cursor. Create a folder. Write a prompt. Build something,anything. It doesn't matter if it's a game, a business tool, or a personal website. The act of doing is where all this knowledge becomes skill.
Remember the core principles we've covered. Start with a plan. Provide rich context. Make small, iterative changes. Review everything. Commit frequently. Test in the browser. Customize your environment. Monitor your context. Use the cloud for heavy tasks.
Cursor represents a fundamental shift in how software gets built. It's not about replacing developers,it's about empowering everyone to create software. Whether you're a professional engineer looking to accelerate your workflow or a complete beginner with an idea, this tool gives you the power to build.
The future of development is collaborative,human and AI working together, each bringing their strengths. Cursor is where that collaboration happens. You've learned the tools. Now go build something amazing.
Frequently Asked Questions
Cursor 3.0 FAQs , This reference answers the most common questions about Cursor 3.0, from installation and interface basics to advanced workflows involving sub-agents, cloud execution, and custom skills. The goal is to give you practical, actionable answers so you can start building immediately and avoid the usual pitfalls people hit when learning an AI-powered IDE.Getting Started with Cursor
What is Cursor 3.0?
Cursor 3.0 is a full-featured IDE built as a fork of Visual Studio Code. It combines standard development tools,a file explorer, code editor, terminal, source control, and extensions,with integrated AI models that can generate, edit, review, and run code. In version 3.0, Cursor adopted an agent-first interface, letting you run multiple AI agents in parallel, manage them from a central dashboard, and even execute tasks in the cloud.
Key point: It works for both non-technical users who want to create applications through prompts and professional engineers who need fine-grained control over their codebase.
How does Cursor 3.0 differ from command-line AI coding tools?
Command-line tools like Claude Code or Codex operate in a terminal and typically hide the file structure. You provide instructions and trust the AI to make changes without seeing the full context. Cursor is a complete IDE. You can see every file, edit code directly, run the application, inspect terminal output, and use Git version control.
Key point: This transparency gives you much more control. You can work quickly in a prompt-driven style, but you also have the ability to review changes, revert mistakes, and follow disciplined engineering practices. For serious application development, Cursor offers a more reliable environment.
Is Cursor 3.0 free? What are the pricing options?
Cursor has a free plan that allows you to start building without paying anything. Paid tiers include Pro, Pro Plus, Ultra, Teams, and Enterprise. Pricing works on a usage-based model: you receive an allocation of usage across different AI models. Cursor's own models,Composer and Grock,consume less of your usage quota, while third-party frontier models such as GPT-5.6 or Fable consume more.
Key point: For beginners, the free plan is usually enough to learn the basics. You can upgrade later if you need more capacity or access to premium models.
How do I install Cursor 3.0 and set up an account?
Download the desktop application from the official Cursor website. It is available for Windows, macOS, and Linux. After installation, you will be prompted to sign in or create a new account. You can also create an account directly from the Cursor website. Once signed in, the application opens to the default agent view.
Key point: If you have used Visual Studio Code before, the layout will feel familiar since Cursor is a fork of VS Code.
What are the main interface views in Cursor 3.0, and which should I use?
Cursor 3.0 has two primary views. In Agent View, you get a prompt-first interface where you chat with AI agents, see multiple agents running, and manage repositories. This view is ideal for beginners, non-technical users, and anyone who wants to multitask by running several agents at once. In IDE View, you get the traditional code editor layout with a file explorer, editor pane, and a side agent panel.
Key point: Switch between views using the IDE button. Both operate on the same project, so use Agent View for high-level prompting and IDE View for detailed code review.
Can I use existing VS Code extensions in Cursor?
Yes. Since Cursor is built on the VS Code foundation, most popular VS Code extensions work in Cursor. You can browse the extensions marketplace and install tools for syntax highlighting, linters, formatters, themes, and language-specific support. This means much of your existing developer setup carries over.
Key point: Some extensions that deeply integrate with the VS Code API may behave differently, but the core ecosystem is compatible. If an extension isn't working, check whether it uses APIs that Cursor's modified environment doesn't fully support,most mainstream options work without issues.
Project Setup and Effective Prompting
How do I create a new project in Cursor 3.0?
In the Agent View, click the folder selector and choose New Folder to create a fresh directory, or Use Existing to connect to a folder that already contains code. Once you select a folder, Cursor treats it as the project root and will create files inside it. You can also choose to work with a cloud PC or start with no repository.
Key point: For most local development, creating a simple folder is the best starting point. After the folder is selected, you can begin prompting the AI to build your project.
Why should I start with Plan mode?
Plan mode is designed for the beginning of a project. Instead of immediately writing code, the AI asks clarifying questions, proposes design decisions, and creates a detailed plan in a markdown file. This plan may include the technology stack, file structure, and any other relevant details. Reviewing the plan before building prevents wasted effort and ensures the AI understands your goals.
Key point: Once you are satisfied with the plan, switch to a build mode to start implementing it. A few extra minutes at the start saves hours of rework later.
What makes a good initial prompt in Cursor?
A strong initial prompt should answer three questions:
What do you want to build?
Why do you want to build it?
Who is it for?
Add specific constraints such as platform, visual style, features, and user experience. Then ask the AI to ask you clarifying questions before proceeding. For example: "I want to build a browser-based platformer game similar to Super Mario Bros. It should be playable by people aged 10 to 60, use standard keyboard controls, and focus on visuals and gameplay. Please ask me any clarifying questions before we start."
What is "vibe coding" and should I rely on it?
Vibe coding refers to letting the AI generate code without deeply reviewing every line. You describe what you want, the AI writes it, and you test it iteratively. This approach can be productive for prototypes and small projects. However, for production-grade software, you should always review the generated code, understand what it does, and test it thoroughly.
Key point: The risk is that AI-generated code may contain subtle bugs, security issues, or architectural problems. Use version control, diff views, and the built-in browser to catch issues before they compound. Vibe coding is a starting point, not a replacement for engineering discipline.
Models, Modes, and Performance
How do I choose the right AI model in Cursor?
Cursor offers an Auto mode that selects a model for you,a good default for beginners. For simple web-based projects, Composer 2.5 is a solid choice because it is fast and uses less usage. For more complex tasks, Grock 4.5 is powerful and still cost-efficient. If you encounter a bug that Cursor's own models cannot solve, switch to a frontier model like GPT-5.6 or Fable for a fresh perspective.
Key point: Higher reasoning effort produces better results but is slower. Medium reasoning and standard context are sufficient for most projects.
What do the different modes in Cursor do?
Cursor includes several modes that change how the AI behaves. Plan Mode generates a plan before making changes. Debug Mode focuses on finding and fixing a specific bug or problem. Multitask Mode allows multiple agents to run in parallel and handle multiple tasks at the same time. Ask Mode answers questions about your codebase without making any edits.
Key point: If your app isn't loading, switch to Debug Mode and describe the issue. If you want to understand how a file works, use Ask Mode. If you have multiple independent tasks, use Multitask Mode.
Certification
About the Certification
Become certified in AI-powered coding with Cursor 3.0. You'll be ready to turn ideas into working apps, direct AI agents, and manage cloud builds,all while keeping full control of every change.
Official Certification
Upon successful completion of the "Certification in Building AI-Powered Applications with Cursor 3.0", you will receive a verifiable digital certificate. This certificate demonstrates your expertise in the subject matter covered in this course.
Benefits of Certification
- Enhance your professional credibility and stand out in the job market.
- Validate your skills and knowledge in cutting-edge AI technologies.
- Unlock new career opportunities in the rapidly growing AI field.
- Share your achievement on your resume, LinkedIn, and other professional platforms.
How to complete your certification successfully?
To earn your certification, you’ll need to complete all video lessons, study the guide carefully, and review the FAQ. After that, you’ll be prepared to pass the certification requirements.
Other AI Video Courses
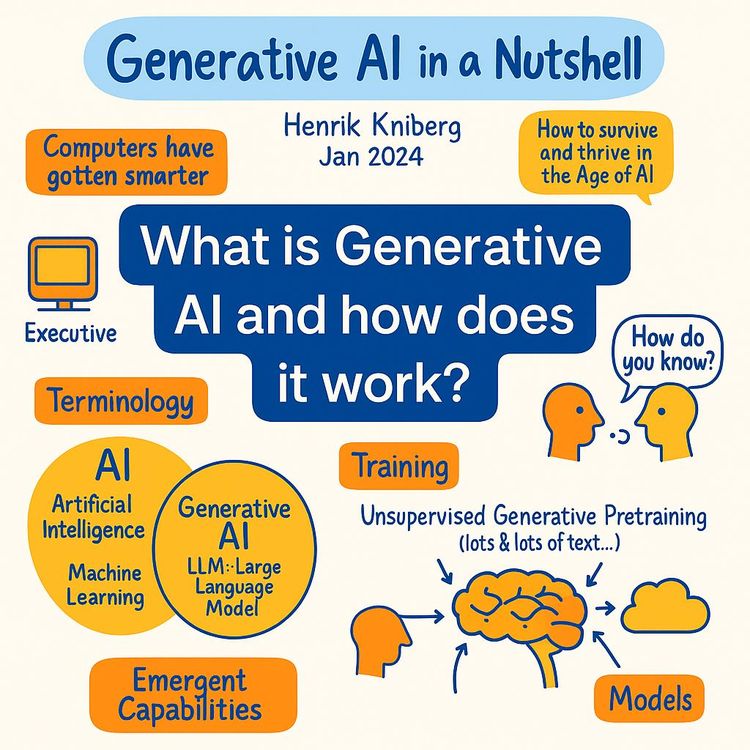
Video Course: What is Generative AI and how does it work?

Video Course: How to Use ChatGPT from Beginner to Professional
Video Course: How to Use Google Gemini for Google Workspace to Boost Productivity

Video Course: How to Use Claude 3.7 AI - Tips for Beginners!

Video Course: ChatGPT for Data Analytics: Full Course - from Beginners to Professional

Video Course: Generating Images and photos With ChatGPT?

Video Course: Generating Images & Photo's with MidJourney

Video Course: Generating Design's with Microsoft Designer and AI

Video Course: Generating Design's with Canva.com and AI
Join 20,000+ Professionals, Using AI to transform their Careers
Join professionals who didn’t just adapt, they thrived. You can too, with AI training designed for your job.