Cursor 3.0 for Beginners: Build Apps with an AI Coding Agent (Video Course)
Software used to require a computer science degree. Now you just talk to an AI agent and it builds it for you. This course takes you from zero to full-stack and mobile apps,no coding experience needed. Just a computer, an idea, and Cursor.
Related Certification: Certification in Building Apps with Cursor AI Coding Agent
Also includes Access to All:
What You Will Learn
- Direct Cursor agents with natural-language prompts to build apps
- Create, run, and iterate UI using visual prompts, Design Mode, and the Cursor browser
- Organize projects with agent sessions, workspaces, Plan Mode, queuing, and steering
- Connect plugins (Convex, Vercel), deploy to the web, and use GitHub version control
- Build native iOS apps and synchronize web and mobile data via a shared database
Study Guide
Let's get one thing straight before we dive in. You are about to learn a skill that, for the last twenty years, required a computer science degree and years of grinding through documentation. That skill is building software. And you're going to learn it by talking. Not by memorizing syntax, not by debugging endless errors, but by having a conversation with an AI agent that does the heavy lifting. This is a full, deep-dive course on Cursor, the AI coding agent that's changing what it means to be a builder. We're going to take you from absolute zero,no programming experience required,all the way to deploying full-stack applications, building native mobile apps, and setting up automated systems that work for you around the clock. The only prerequisites are a computer, an internet connection, and an idea you want to bring to life. The core philosophy here is simple: you describe what you want, and the AI builds it. You don't need to understand the underlying code any more than you need to understand the combustion engine to drive a car. But you do need to understand how to communicate with this powerful tool effectively. That's what this course is about. We're going to break down the interface, master the art of the prompt, and then walk through real-world projects step by step. By the end, you won't just know what Cursor is. You'll know how to use it to build anything you can imagine. Let's start with the foundation.What Is Cursor, Really?
At its most basic level, Cursor is an AI coding agent. It's a piece of software you download and install on your computer. Once it's running, you can talk to it. You can type or speak a request like, "I want to build a little app that lets me track my calories. Simple app, run it locally, very minimal, make it simple." And the agent will get to work.
It won't just give you advice. It will create the necessary files, write the code, and run the application for you. In a demonstration, a user asked for exactly that,a simple calorie tracker. Within about one minute and twelve seconds, Cursor had built the app and displayed a message: "Calotra is built and running locally." The user could then open it in a browser, type in "pizza 100", click "Add", and see it appear in a list. That's it. Idea to working software in under two minutes.
This is the fundamental shift.Software development is moving from a discipline of writing code to a discipline of directing intelligence. Your job is no longer to know how to build the app. Your job is to know what you want the app to do. Cursor is the translator between your vision and the technical reality.
Think about what this means for you. If you have an idea for a website, an app, a tool that would make your life easier, you no longer have to wait for a developer or learn to code yourself. You can just start building. This course is designed to give you the playbook for doing exactly that.
Getting Started: Download, Install, and the Two-Window Interface
Your journey begins at Cursor.com. That's where you download the application. It's available for Mac, and the process is straightforward. Once you download and open the installer, you'll be prompted to sign in with a Cursor account or create a new one. Do that. It's your key to the kingdom.
When you first launch Cursor, you'll notice it presents you with two primary interface windows. Understanding the difference between them is crucial.
The first is the IDE window (Integrated Development Environment).This looks like a traditional code editor. It's the place where you can see the raw files, the folders, and the text of the code itself. For a beginner, this can look intimidating. But you don't need to spend much time here. It's mostly for when you want to inspect what the AI has built or if you want to manually tweak a line of code yourself. Think of it as the engine room. You don't need to live there, but it's good to know it exists.
The second is the Agents window.This is where the magic happens. This is the conversational interface where you interact with the AI agent. It looks like a chat window. This is where you'll type your prompts, see the agent's progress, and manage your projects. You can switch between these two windows using a toggle button at the top of the screen. For most of your time as a beginner, you'll be living in the Agents window.
A good way to think about it: the IDE is the file system, and the Agents window is the command center. You issue orders from the command center, and the work gets done in the file system.
Agent Sessions and Workspaces: Organizing Your Projects
As you start using Cursor, you'll quickly find that you're not just working on one thing. You might have a landing page for one idea, a mobile app for another, and a research project for a third. To keep everything organized, Cursor uses two key concepts: agent sessions and workspaces.
An agent session is simply a single conversation with the AI. It's like a chat thread. You can have many sessions for different topics. You can rename them, pin them to the top of your sidebar for easy access, and archive them when you're done. For example, you might create a new session by pressing Command + N and name it "Model Inquiry" to test out a new AI model. After you're done, you can rename it to "Testing Grock" and pin it so you can find it again next week. If you're managing multiple projects, you might have twenty or more active sessions in a given week. This organizational structure is your sanity saver.
A workspace is a folder on your computer where all the files for a specific project are stored. This is a critical distinction. The agent session is the conversation, but the workspace is the actual project. When you create a new workspace, you're essentially creating a new folder on your hard drive. This is where the AI will save all the code, images, and configuration files it generates for that project.
To create a workspace, you click "Create Workspace", choose a location on your computer (like your Desktop), give it a descriptive name (like "Agent-Native-Site"), and click Create. From that point forward, any work done in that specific agent session will be saved to that folder. It's a clean, simple way to keep projects separate. One thing to note: a workspace appears in your sidebar only after you've created an agent session within it. So, the workflow is usually to create a workspace and then immediately start a new session to work on it.
Plan Mode and Choosing Your AI Model
Before you let the agent loose on a project, you have a few decisions to make. Cursor has a feature called Plan Mode, which is designed to help you think through a project before the agent starts building. When you create a new workspace, Plan Mode is often enabled by default. In this mode, the agent will ask you clarifying questions and help you flesh out your idea. It's like having a consultant before you hire the builder.
However, Plan Mode is optional. Because Cursor is a general conversational agent, you can just ask for a plan in normal chat mode and get equally good results. For example, you can simply type, "Can you create a plan for this project?" and the agent will lay out a step-by-step approach. You can also trigger Plan Mode manually by typing "/plan" or clicking the plus sign and selecting "Plan". For ambiguous or complex projects, using Plan Mode is a great idea. For simple tasks, you can skip it and just ask the agent to build.
The Model Switcher is your control over the agent's brain.Cursor gives you access to a range of AI models, each with different capabilities, speeds, and costs. You'll see a model switcher in the Agents window. The available models include options like Grock 4.5 High/Fast, which is affordable, fast, and suitable for most tasks. Then there's GPT 5.6 Soul, which is often described as the balanced "default" recommendation for most work. At the top end, you have Fable 5 (Medium/High), which are premium models with higher intelligence but at a higher cost.
There are also legacy models that you can find under a "view all models" toggle, but these are generally not recommended. The key here is to match the model to the task. For simple changes like adjusting spacing or colors, a fast, cheap model is perfect. For complex system integration or high-stakes design work, you might want to invest in a more powerful model.
My recommendation for most tasks is to use Auto mode, which lets Cursor select the best model for the job, balancing quality and speed. If you're watching your budget, Grock 4.5 is a fantastic workhorse. Save the expensive frontier models for when you truly need maximum intelligence.
The Art of the Prompt: Text and Visual Instructions
Now we get to the core skill you'll need to master: prompting. A prompt is simply the instruction you give to the AI agent. And prompts can be more than just text. You can paste screenshots and images directly into the prompt area to give the agent a visual reference. This is a game-changer for design work.
Imagine you want to create a landing page for a brand called "Agent Native". You have a screenshot of a design you like from another website. Instead of trying to describe it in words, you simply copy the image and paste it into the prompt. Then you type: "Agent Native is my brand, podcast, and soon mobile app that helps people stay on top of the latest tools and strategies for understanding AI agents. I want to start with the landing page. Can we please create a landing page that looks like this?"
The agent will analyze the image and create a similar site with your branding. This ability to combine text and visual references is incredibly powerful. It allows you to communicate design intent with precision that words alone can't match.
Another example: you might be working on a design and notice that a specific element doesn't look right. Instead of trying to describe it, you can take a screenshot of your app, paste it into the prompt, and use an annotation tool to circle the problem. Then you type, "Please make the subscribe button at the top blue instead of red. It's too jarring." The agent knows exactly what you're talking about.
Running Apps Locally and Using the Cursor Browser
When the agent builds an app, it runs it locally on your computer. The agent will output the files to your workspace folder and then execute the necessary commands to start the app. Once it's running, you'll see a URL appear in the chat window.
You have two options for viewing your app. First, you can click the URL and it will open in your default external browser, like Chrome or Safari. This is fine. But there's a better option. You can right-click the URL and choose "Open in Cursor Browser". This opens the app in a browser window inside Cursor itself.
Why is this better? Because the Cursor browser is deeply integrated with the agent. You can press Command + I (or click a "Message Cursor" button) to open a prompt panel directly over your app. This means you can look at your running application and issue commands to change it without ever leaving the view. It's a seamless feedback loop.
For example, you're looking at your landing page in the Cursor browser. You notice the top right image with "AI" on it clashes with the rest of the design. You press Command + I and type, "The top right image that has AI,I don't like that. I kind of like the vibe that you have with the other ones. They're more colorful. Can you please change that one?" The agent will see your request and start working on it immediately.
Queuing vs. Steering: Managing the Agent's Workflow
One of the most important skills for using Cursor efficiently is understanding how to send prompts while the agent is already working. AI agents can take time to complete tasks, and if you only send one prompt at a time, you'll spend a lot of time waiting. This is where the concepts of queuing and steering come in.
Queuing is when you type a prompt and press Enter (or a specific queue command). The prompt doesn't interrupt the agent's current task. Instead, it waits in line. The moment the current task is complete, your queued prompt will be entered automatically, and the agent will start on it. This is perfect for planning a sequence of tasks. You can think to yourself, "Once it finishes the landing page, I want it to add a contact form." You type that prompt, queue it, and walk away. When the landing page is done, the agent will automatically start on the contact form.
Steering is different. When you use the "send now" (or steer) button, you push your new prompt into the agent's active context immediately. This interrupts the current task to address your new request. This is ideal for when you see an urgent problem. For example, the agent is building your landing page, but you notice it's using a red subscribe button that you hate. You don't want to wait for it to finish the whole page. You steer the prompt: "Please make the subscribe button blue right now." The agent will pause its current work, change the button color, and then resume its previous task.
Mastering these two input modes is essential. Queuing allows you to batch requests and maximize efficiency. Steering allows you to maintain control and correct course in real-time. A skilled Cursor user uses both constantly.
Design Mode: Precision Visual Editing
Sometimes you need to make a very specific visual change to an element on your page. You could try to describe it in conversation, but that can be clunky and imprecise. That's where Design Mode comes in. This is one of Cursor's most powerful features for visual refinement.
When you activate Design Mode, you can click directly on elements in your rendered application. This selects them. Then, you can issue a targeted prompt about that specific element. The agent knows exactly what you're referring to because you've selected it.
Here are a few examples of how you might use Design Mode:
You click on a headline that you think is too large and prompt: "Please make this a little smaller font." The agent will adjust the font size of that specific headline.
You see a graphic where the letter "G" is cut off at the bottom. You click on it and prompt: "The G here is cut off on bottom. Please fix." The agent will correct the clipping issue.
You don't like an arrow icon next to a button. You click on it and prompt: "Please put a different icon than the arrow here. Something that makes sense." The agent will replace the icon with something more appropriate.
Design Mode transforms the editing process from a vague conversation into a precise, visual interaction. It's like being able to point at exactly what you want to change, rather than trying to describe its location in words.
Skills: Transferring Capabilities Between AI Tools
As you get more advanced, you'll want to create reusable instruction sets for the agent. In Cursor, these are called skills. A skill is essentially an instruction file,usually a markdown document,that the agent consults when performing a relevant task. For example, you might have a skill called "YouTube Researcher" that instructs the agent on how to research YouTube content, or a skill called "Colorful Images" that directs the agent to generate images in a specific vibrant style.
Skills are invoked by typing "/" plus the skill name. They allow you to codify your preferences and workflows, so you don't have to re-explain them every time. The real power here is that skills are transferable. If you're coming from another AI coding tool like Codeex or Claude Code, you can import your existing skills into Cursor.
Here's how the transfer process works. You can ask your old tool to generate a text file describing its skills. Then, you can give that file to Cursor and ask it to import them. In one demonstration, a user was able to transfer 77 skills from Codeex to Cursor in a single operation using symbolic links. The prompt used was: "Hey, I need you to give me instructions on where to see your skills. I want to be able to add them from another agent platform to Cursor. Please just give me a prompt that I can copy to give to Cursor that will allow it to gain access to your skills and add them." This is a powerful way to preserve your customization investments when switching platforms.
Building a Landing Page: A Step-by-Step Project
Let's put all these concepts together and build something real. We're going to create a landing page for a fictional brand called "Agent Native". This is a brand, podcast, and soon mobile app that helps people stay on top of AI agent tools and strategies.
The first step is to create a workspace and start a new agent session. Once you've done that, you can begin with a simple prompt that describes the project: "Agent Native is my brand, podcast, and soon mobile app that helps people stay on top of the latest tools and strategies for understanding AI agents. I want to start with the landing page."
To give the agent a visual direction, you can paste a screenshot of a design you like. You might add: "I want that to say 'Agent Native' and I want it to be horizontally moving from left to right on the screen." The agent will analyze the reference image, understand your text instructions, and get to work. You'll see it autonomously editing files, exploring other files, performing searches, and running commands. This is the agent at work.
After a few minutes, the agent will tell you the site is ready and running locally. You can then open it in the Cursor browser to review the result. This is where the iterative loop begins. You'll look at the page and start issuing refinement prompts. You might say:
"The top right image that has AI,I don't like that. I kind of like the vibe that you have with the other ones. They're more colorful. Can you please change that one?"
"Can you please make the subscribe button at the top like a blue color instead of red? It's too jarring."
"I want some more spacing beneath the 'pro' section where I put in the email. I also want that 'a' to not be there."
Each of these prompts is a separate iteration. The agent will make the change, and you can review it again. This back-and-forth is the essence of building with an AI agent. You are the art director, and the agent is your production team. The landing page, which would have taken a developer hours or days, is created and refined in minutes.
Building a Native iOS App with Swift
Now let's take things to the next level. Cursor isn't just for websites. It can build native mobile applications. We're going to create an iOS app for Agent Native. This will be a companion app to the website, built in Swift, and it will have three tabs: a Learn tab (similar to the blog on the website), a Tools tab (a directory of AI tools), and an Agents tab (an AI chat interface).
You'll create a new workspace called "Agent Native Mobile" and start a new session. Your first prompt might be: "I want to create an iOS app. I want this iOS app to be in Swift... it should be a companion app to my agent native site... I want you to create an app that has the same style and use the same assets, like the same images that are on that site."
The agent will create the basic app structure. Then you can issue follow-up prompts to add the different tabs: "Please add a Tools tab and an Agents tab to the app." The entire app was built in just three prompts: one to create the basic app, one to add the tools and agents tabs, and one to fix specific design issues. This demonstrates the speed and sophistication of AI-assisted mobile development.
Navigating the Xcode Simulator
To run an iOS app on a Mac, you need to use the Xcode Simulator. This is a tool that comes with Apple's Xcode development environment. It simulates an iPhone on your computer, allowing you to test your app without a physical device.
If you don't have Xcode installed, don't worry. You can simply ask Cursor for instructions. Open a new chat and type: "How do I download Xcode and get the simulator on my computer?" The agent will provide you with the links and steps you need. Once you have Xcode installed, you can ask Cursor to "Open the app in my simulator." The agent will handle the complex task of running the app in the simulator.
Once your app is running in the simulator, you can interact with it just like you would on a real iPhone. And there are two keyboard shortcuts that are essential for giving feedback to Cursor:
Press Command + S to take a screenshot of the simulator. This screenshot can be pasted directly into your Cursor prompt as visual feedback. If you see a design flaw, take a screenshot, paste it in, and describe the problem.
Press Command + K to open the on-screen keyboard. This is useful for testing keyboard interaction issues. For example, you might notice that the text input field is being obscured by the keyboard. You can take a screenshot and prompt: "The keyboard is being covered by the text. Please fix the layout."
You can also use annotation tools like CleanShot X to add arrows or circles to your screenshots before pasting them into Cursor. This provides even more precise visual instructions for the AI.
Canvas: Creating Ephemeral Mini-Sites
Not every project needs to be a full-fledged application. Sometimes you just need a quick, standalone website for a specific purpose. That's where Canvas comes in. Canvas is a feature that creates small, ephemeral mini-sites within Cursor. To create one, you simply type "/canvas" in the prompt area.
These canvas mini-sites are perfect for creating research portals, sharing information with a team, or building temporary tools. In the Agent Native project, a canvas was created to serve as an automated research site cataloging AI tools. The agent was prompted to research tools in the AI agent space, categorize them (like super apps such as Cursor, Codeex, and Claude Code, plus other categories like hosting and databases), and generate an individual canvas for each tool with explanatory content.
The result was a functional research portal, built in minutes, that cataloged the landscape of AI tools. It wasn't meant to be a permanent, production-grade site. It was a quick, useful tool for gathering and presenting information. That's the power of Canvas.
Automations: Scheduling Recurring AI Tasks
One of the most exciting features of Cursor is the ability to create automations. These are scheduled, recurring AI tasks that run without you having to initiate them. This transforms Cursor from a tool you use to a system that works for you.
In the Agent Native example, an automation was created to keep the research canvas up-to-date. The user prompted: "Hey, I want you to create an automation. This automation should scan my content as well as the nine other YouTubers that you think are in my niche for new tools... only videos in the last week every time you run because this automation should be weekly. I want you to create a section at the top. The top section should be new tools mentioned."
Cursor created the automation, and the first run was executed manually to populate the section immediately. The result was a weekly automation that updates the canvas with new tools mentioned by relevant content creators. This is a powerful way to build self-updating research dashboards. You set it up once, and it runs on autopilot, saving you hours of manual research every week.
Plugins and the Cursor Marketplace: Extending Capabilities
Cursor's built-in capabilities are impressive, but its true power comes from its extensibility. The Customize tab, also known as the plugins marketplace, connects Cursor to external tools and services. Developers commonly connect Cursor to Slack and Linear for work ticket management and team communications. But for our purposes, there are two plugins that are absolutely essential.
The first is Convex, a database provider. A database is what transforms a "site" into an "app". Without a database, any user input,like comments, messages, or favorites,is not stored. It's ephemeral. With a database, you can have user accounts, persistent data, and personalized experiences.
To use Convex, you install the plugin from the marketplace, which handles the account connection. Then you can prompt Cursor: "Use @convex. I want to make authentication and database." You can specify your requirements: email/password sign-in, bookmark favorites on the tools page (saved per user account), and chat history storage.
The agent will then automatically create the database schema, implement the authentication flows, generate all the necessary backend code, and integrate the frontend. The result is a fully functional system where users can create accounts, sign in, save their favorite tools, and have their chat messages stored. The data persists across sign-outs and new sign-ins. In a memorable demonstration, the entire database was shown populating tables (users, sessions, chat messages, conversations) in the Convex dashboard in real-time as actions were performed in the app.
The second essential plugin is Vercel, a hosting platform. Hosting takes an application running locally and makes it available on the internet. After installing the Vercel plugin and connecting your account, you can prompt Cursor: "Please create a brand new project for this and get this on the actual internet. When you're done, send me the link to Vercel of it actually hosted on the internet and open it in the browser as well."
Cursor will handle the deployment automatically. A live URL is generated (like agentnativesite-bice.vercel.app) that anyone can access. This is the final step in taking your project from a local prototype to a public, production-ready application.
Synchronizing Web and Mobile App Data with a Shared Database
Here's where things get really impressive. Once you have a web app and an iOS app, you can connect them to the same Convex database. This allows users to sign in with the same account on both platforms and access the same data. The prompt to achieve this is a masterclass in instructing AI agents: "I want you to look at the iOS app project, the agent native mobile project. We added a convex database there. I want you to sync those databases together. So it's one database and I want to be able to sign in to the same account on the iOS app as the web app."
Cursor will inspect both projects, identify the existing backend, and wire the web app into the same Convex deployment. After this is done, the result is a unified system:
One shared identity system. The same email/password works on both the web app and the iOS app.
One Convex deployment serving both platforms.
Chat history synced across web and iOS. Messages sent on the web app appear in the mobile app's history and vice versa.
This is a complex architectural feat that would traditionally require a team of engineers. With Cursor, it's accomplished through a single, natural-language prompt.
GitHub: Version Control and Cloud Storage
Now that you're building real applications, you need a way to manage your code. That's where GitHub comes in. Think of GitHub as "Google Drive for developers." It's a cloud-based storage service for code that provides version control, collaboration features, and a history of all changes.
There are two ways to create a repository on GitHub. The first is manual. You go to GitHub.com, click "New repository", name it, choose public or private visibility, and click "Create repository". Then you copy the repository URL and paste it into Cursor with a prompt like: "Hey, I created this new repo for the iOS app. Can you please push the code here?" Cursor will handle the connection and upload all your files.
The second method is AI-driven. You can simply instruct Cursor directly: "Hey, I need you to create a new GitHub repository for the web app for agent native and call it agent native web app. Make it private. Create the repository and send me a link to that repository." If Cursor isn't connected to GitHub, it will walk you through the sign-in process. This is a much more seamless experience.
GitHub also supports branches and pull requests. A branch is a separate version of your repository, used for testing changes without affecting the main version. A pull request (PR) is a proposed set of changes that can be reviewed and approved before merging. This is a professional workflow that allows for safe experimentation.
The Cursor iOS App and Cloud-Based Agents
Cursor has an iOS app that extends AI-powered development to your mobile device. This is where the future of the platform is headed. The app uses your GitHub repository as a bridge. Here's how the workflow works:
You open the Cursor iOS app and select the appropriate repository. You can then speak or type a prompt. For example: "Hey, I want you to please explore a different design for this app. I don't want you to push anything to main yet. Explore a new web app style and please send me screenshots..."
Cursor will then spin up a cloud computer. It rewrites the code, runs the app in the cloud, tests it, and sends screenshots (and potentially screen recordings) back to your phone. You can review the results and mark changes as "ready" or provide additional feedback. If you're happy with the changes, Cursor will create a separate git branch and a pull request with a summary. You can then review the PR on GitHub and decide whether to merge or discard it.
This workflow represents a major shift in development. It's asynchronous, cloud-based, and accessible from anywhere. You can be on the couch with your phone and still be actively developing your app. It's a truly mobile, future-proof way to work.
Additional Features: Side Chat, Terminal, and Claude Code
There are a few more features that round out Cursor's capabilities. The Side Chat feature, invoked by typing "/side", opens a secondary agent conversation that runs alongside the main agent. This side agent can answer questions and provide information, but it cannot edit code. It's perfect for researching options while your primary agent is working. You can ask the side chat, "What's the best way to implement a payment system?" while the main agent is building the rest of your app.
Cursor also includes a full terminal interface. While terminals are traditionally difficult for non-technical users, the AI agent can execute any terminal command on your behalf. You can just ask it to do whatever you need. Additionally, you can access Claude Code directly within Cursor's terminal by typing "claude". This allows you to use multiple AI agents within one interface, giving you even more flexibility and power.
Cost-Saving Strategies and Model Selection
As you become a more advanced user, you'll want to be mindful of your costs. Different AI models have different price points, and using the most expensive model for every task is a waste of money. Here are some strategies for managing your budget:
Use Auto mode when possible. This lets Cursor select the best model for each task, balancing quality and speed.
Use a fast, affordable model like Grock 4.5 for most tasks. It's a workhorse that can handle the majority of your prompts.
Save expensive frontier models like Fable 5 or GPT 5.6 Soul for complex planning, system integration, or high-stakes design work where you truly need maximum intelligence.
Use cheaper models for simple changes, such as adjusting spacing, colors, or minor copy edits. You don't need a top-tier model to change a button color.
By being strategic about your model selection, you can keep your costs low while still getting excellent results.
Putting It All Together: The Complete Workflow
Let's look at the big picture. In this course, we've built a landing page, a native iOS app, and an automated research canvas. We've connected them all through a shared Convex database, deployed the web app to the internet via Vercel, and version-controlled everything using GitHub. We've even used the Cursor mobile app to explore new designs from our phone.
And here's the most important part: the entire workflow,from initial concept to deployed web app with synchronized mobile app backend,required only a handful of natural language prompts. We didn't write a single line of code manually. We didn't configure a server. We didn't debug a complex stack trace. We just described what we wanted, and the AI agent made it happen.
This is the paradigm shift. The technical barrier to software creation has been removed. The limiting factor is no longer your ability to code. It's your imagination and your ability to communicate your vision clearly.
The skills you've learned here,prompt crafting, visual feedback iteration, project multitasking, model cost management, and plugin navigation,are the foundational literacies of the AI-native workplace. You are now equipped to move from a simple idea to a fully functioning web or mobile app. The key to success is practice. Start with a simple project. Build a landing page. Then add a database. Then deploy it. Then build a mobile app. The more you practice, the more you'll understand how to direct this powerful tool.
This is your invitation to become a builder. The tools are in your hands. The only question is, what are you going to build? Go create something.
Frequently Asked Questions
What is the purpose of this FAQ?
This FAQ is a practical reference for anyone working through the Cursor 3.0 beginner course. It answers the questions that come up again and again,from the very first download to advanced workflows like syncing a web app with an iOS app. Each answer is written in plain language, with real examples you can apply immediately. Whether you're stuck on a specific feature or just want to confirm best practices, this is the place to look. The questions are ordered from basic setup to production-level topics, so you can jump around as needed.
1. What exactly is Cursor and how does it work?
Cursor is an AI coding agent that you communicate with through natural language. Instead of writing code line by line, you describe what you want to build, and Cursor writes the code for you. The tool operates as a conversational agent,you type or speak your request ("I want to build an app that tracks my calories"), and Cursor responds by creating the necessary files, writing the code, and running the application locally on your computer.
The platform supports multiple AI models, allowing you to choose between different levels of intelligence, speed, and cost. Cursor can build virtually any type of application you can imagine, from simple landing pages to complex iOS apps with databases and user authentication.
2. How do I download and set up Cursor?
To get started, visit cursor.com and click the download button. The website automatically detects your operating system and provides the appropriate version. After downloading, open the application and sign in with your Cursor account. If you don't have an account, the application will prompt you to create one during the setup process.
Once signed in, you'll see two main windows: the IDE window (which displays your code and files) and the Agent window (where you chat with the AI). For most users, the Agent window will be your primary workspace, as this is where you'll communicate your ideas and instructions to the AI.
3. What are workspaces in Cursor?
A workspace in Cursor is essentially a folder on your computer where your project files are stored. When you create a new workspace, you're designating a location (like your Desktop or Documents folder) where Cursor will generate and organize all the code files for your project.
Workspaces are important because they keep different projects separate. For example, you might have a "business website" workspace and a "mobile app" workspace, each containing their own distinct files. When you want to work on a specific project, you open its corresponding workspace.
4. What is Plan Mode and when should I use it?
Plan Mode is a feature that prompts Cursor to ask you clarifying questions before beginning work. When you enter Plan Mode, the AI agent will not immediately start building; instead, it will ask about your goals, preferences, and requirements to create a detailed plan first.
While Plan Mode can be helpful for complex projects where you're unsure what you want, many users find it unnecessary for everyday use. Since Cursor functions as a general-purpose agent, you can simply ask for a plan within a normal chat ("Can you create a plan for this project before you start?") and receive the same benefit without toggling modes. Plan Mode is most valuable when you're starting a large, ambiguous project and want guidance on what questions to consider.
5. What AI models are available in Cursor?
Cursor offers a variety of AI models that differ in intelligence, speed, and cost. Key models referenced include:
- GPT 5.6 Soul - A balanced, general-purpose model suitable for most tasks
- Grok 4.5 (High/Fast variations) - An affordable and fast model, ideal for cost-conscious users
- Fable 5 - A premium, more expensive model designed for complex, high-stakes projects
- GPT 5.6 Luna and GPT 5.4 Nano - Older models that are generally available but rarely needed
You can switch models at any time using the model switcher in the Agent window. For users who want to minimize costs, the "Auto" mode automatically selects the most appropriate model for each task, balancing quality and cost.
6. How do costs work with different models?
Model selection directly impacts your costs. Premium models like Fable 5 are significantly more expensive to use, while models like Grok are designed to be cost-effective. For everyday tasks that don't require maximum intelligence, using a cheaper model can dramatically reduce your expenses.
Two primary strategies for cost management:
- Use Auto mode - Let Cursor decide which model is best for each task
- Default to Grok 4.5 - Select this model manually for routine work and only switch to premium models for complex challenges
Most users find that Auto mode with Grok provides the best balance of performance and affordability, and it's also noticeably faster than premium models.
7. Can I really build an app without knowing how to code?
Yes, this is Cursor's primary value proposition. You communicate your ideas in plain language,what the app should do, what it should look like, what features it should have,and Cursor handles the technical implementation. The AI agent writes the code, creates the necessary files, and runs the application so you can see and interact with your creation.
For example, to build a calorie-tracking app, you would simply describe: "I want to build a simple calorie tracker. Users enter a food name and its calorie count, and the app displays a running total." Cursor will then create a fully functional app that meets your requirements.
You can also show Cursor images of designs you like. By copying and pasting a screenshot of a reference design into the chat, you can instruct the agent to create a site that looks similar.
8. What is the difference between the Cursor browser and an external browser?
Cursor includes a built-in browser that lets you view and interact with your applications without leaving the Cursor environment. This integrated browser has special functionality,you can chat with the AI agent directly from the browser view by pressing Command+I (or equivalent), which opens a chat interface while you look at your app.
Key advantages of the in-app browser:
- You can see changes to your app in real-time as the agent works
- You can select specific elements (in Design Mode) and give targeted feedback
- You can issue multiple prompts and watch changes propagate across the interface
To use an external browser, you click the link provided by Cursor after it deploys your app locally. Many users prefer the integrated browser for development and testing, then switch to an external browser when the app is ready for public use.
9. What is Design Mode and how does it help with fine-tuning?
Design Mode is a feature that allows you to make precise, element-specific changes to your web applications. When Design Mode is enabled (click the Design toggle), you can visually select parts of your app interface and issue targeted commands about them.
Example scenarios:
- Click on a headline and say "Make this font smaller"
- Select a graphic and say "Replace this icon with something that makes sense"
- Point to a section with excessive whitespace and say "Reduce the spacing here"
This tool provides a level of granularity that's difficult to achieve with general text prompts, making it ideal for polishing the visual details of your application.
10. What is "queuing" versus "steering" in Cursor?
These terms describe two ways to issue prompts to the AI agent:
- Queuing - You type a prompt but choose to defer it, so it's entered automatically once the agent finishes its current task. This is useful when you have multiple changes in mind and want them executed in sequence.
- Steering - You send a prompt immediately while the agent is still working. This interrupts the current task or adds to it, giving you real-time control over the direction of the build.
The ability to queue multiple prompts is powerful for efficiency, as it lets you outline a series of changes and walk away while Cursor works through them sequentially.
11. What are Cursor Canvases?
A canvas is a miniature website that lives inside your Cursor environment. You can create a canvas by typing `/canvas` in the chat. Think of canvases as standalone micro-apps that serve specific purposes,like a research hub, a status board, or any other lightweight web interface you want to create.
Practical uses for canvases:
- Research dashboards that aggregate and display current trends
- Internal team tools for monitoring projects
- Personal reference pages that compile resources
Canvases are particularly versatile when combined with automations,scheduled processes that update the canvas content automatically.
12. How do automations work in Cursor?
Automations are recurring tasks that you can set up to happen weekly, daily, or on another schedule. You create an automation by asking the agent to do something on a recurring basis with specific criteria.
Example automation: "I want you to scan videos from the last week from the nine YouTubers in my niche for new tools. Every week, create a section at the top of my canvas titled 'New Tools Mentioned' and populate it with your findings."
Once set up, the automation runs automatically at the specified interval and updates the associated canvas or document. This creates a self-updating research or monitoring system that keeps itself current without any ongoing effort from you.
13. What are Skills and how can I import them from other tools?
Skills are instruction files that the AI agent references when performing certain types of work. For example, you might have a "YouTube Researcher" skill that tells the agent how to search and compile information about specific videos. Skills can also define visual styles, like a "Colorful Images" skill that instructs the agent to generate graphics in a particular aesthetic.
A significant advantage of Cursor is that it can import skills from other AI agent tools like Codeex and Claude Code. Simply ask the agent: "I need instructions on where your skills are located. I want to add them to Cursor. Please give me a prompt to copy that will allow Cursor to access them."
Cursor will create symbolic links to your existing skill files, making them available without duplication. You can then use any skill by typing `/` followed by the skill name in the chat.
14. What are plugins and which ones should I install?
Plugins connect Cursor to external services and tools, expanding its capabilities. From the Customize tab, you can browse the marketplace and install plugins for platforms like Slack, Linear, and others.
Currently, the most essential plugins are:
- Convex - A database provider that allows your applications to store and retrieve data. This transforms a static website into a dynamic application where user information persists.
- Vercel - A hosting service that deploys your application to the internet. Once you've built an app locally, Vercel makes it accessible to anyone online.
Additional note on databases: A database is what takes your project from being a "site" to an "app." When users type information (like comments or messages), a database stores that data associated with their user account. Cursor's ability to work seamlessly with Convex makes database integration remarkably straightforward.
15. How do databases and authentication work in Cursor-built apps?
When you create applications that collect user data (chat messages, saved items, preferences), that data needs to be stored somewhere persistent,that's where the database comes in. Authentication ensures that data is associated with the correct user.
The process:
- Users sign in (through email/password or third-party providers like Google)
- The application identifies which user is signed in
- Any actions (posting comments, saving favorites, chatting) are saved to the database with that user's ID
- When the user returns, they see their own data
With Cursor, you don't implement these systems manually. You simply request them: "Add authentication and a database. Users should sign in with email/password. Store all chat data and allow users to save favorite tools." The agent handles all the technical details.
Certification
About the Certification
Become certified in building apps with Cursor 3.0. You'll prove you can turn a bare idea into a working full-stack or mobile app using AI agents,no code degree required. Build, debug, and ship projects employers will notice.
Official Certification
Upon successful completion of the "Certification in Building Apps with Cursor AI Coding Agent", you will receive a verifiable digital certificate. This certificate demonstrates your expertise in the subject matter covered in this course.
Benefits of Certification
- Enhance your professional credibility and stand out in the job market.
- Validate your skills and knowledge in cutting-edge AI technologies.
- Unlock new career opportunities in the rapidly growing AI field.
- Share your achievement on your resume, LinkedIn, and other professional platforms.
How to complete your certification successfully?
To earn your certification, you’ll need to complete all video lessons, study the guide carefully, and review the FAQ. After that, you’ll be prepared to pass the certification requirements.
Other AI Video Courses
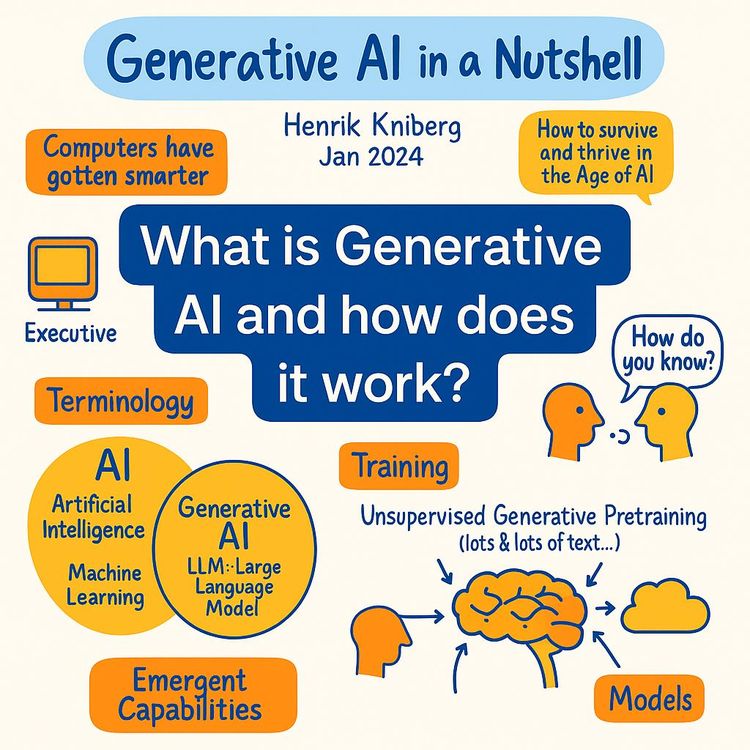
Video Course: What is Generative AI and how does it work?

Video Course: How to Use ChatGPT from Beginner to Professional
Video Course: How to Use Google Gemini for Google Workspace to Boost Productivity

Video Course: How to Use Claude 3.7 AI - Tips for Beginners!

Video Course: ChatGPT for Data Analytics: Full Course - from Beginners to Professional

Video Course: Generating Images and photos With ChatGPT?
Video Course: Generating Images & Photo's with MidJourney

Video Course: Generating Design's with Microsoft Designer and AI

Video Course: Generating Design's with Canva.com and AI
Join 20,000+ Professionals, Using AI to transform their Careers
Join professionals who didn’t just adapt, they thrived. You can too, with AI training designed for your job.