
Kling 3.0 Text-to-Video for Beginners: Elements & Multi-Shot (Video Course)
Make AI video feel like directing. This beginner-friendly Kling 3.0 guide shows you how to get consistent characters with Elements, build multi-shot sequences, lock start/end frames, and use native audio,so you get predictable results you can trust.
Related Certification: Certification in Multi-Shot Text-to-Video Production with Kling 3.0
Also includes Access to All:
What You Will Learn
- Navigate Kling 3.0 interface, modes, orientation, quality, and frame controls
- Create and manage Elements (AI characters, clones, and product assets) for consistency
- Write concise per-shot prompts and build Multi-Shot sequences with continuity
- Use start/end frames and proximity tactics to lock compositions and boost fidelity
- Leverage native audio, iterate in Standard, finalize in Pro, and apply smart workarounds
Study Guide
Goodbye VEO... The Ultimate Kling 3.0 Guide for Beginners
Kling 3.0 makes AI video feel less like gambling and more like directing. If you've ever fought with character drift, awkward camera cuts, or stitched together shots in a messy timeline, this guide is your fast-track out of chaos. You're going to learn how to use Kling 3.0 from scratch: the interface, the "Elements" system for rock-solid consistency, multi-shot sequencing for real storytelling, director-grade control with start/end frames, and native audio that doesn't sound like it was glued on after the fact. We'll also walk through the current limitations, how to outsmart them, and the precise workflow I recommend if you want predictable, professional results.
The point is simple: AI video is finally usable as a production tool. This course shows you how to treat it like one,step-by-step, with examples, prompts, and best practices you can run today.
How to Use This Guide
You'll start with fundamentals, then layer in power features and workflows. Each section explains the concept, gives you practical implementations when relevant, and ends with tips and small tactical moves that compound into better outputs. You'll see plenty of examples,ads, short scenes, product demos, and training visuals,so you know what to say to Kling and why it works.
By the end, you'll be able to: confidently navigate the interface, build "Elements" for consistent characters and products, create multi-shot sequences with continuity, control your opening and ending frames, leverage native audio, avoid known pitfalls, and run a pro-grade workflow from brief to final export.
The Mental Model: Text-To-Video That Behaves
Think of Kling as a director who follows your shot list religiously,if you speak its language. Your job is to give it the right nouns (characters and objects), clear camera intent (framing, angle, lens), and motion direction (what happens, when, and where). Kling 3.0 adds two breakthroughs that finally make this practical: Elements for consistency and Multi-Shot for pre-edited sequences inside a single render. Add native audio and improved emotional realism, and you've got a tool that goes from "cool demo" to "production assist."
Example:
Instead of: "A guy runs through a city," you'd say, "24mm wide shot. @AlexSerif sprints past neon storefronts at night, rain on the ground, camera pans left to reveal a tram passing. Native audio on,wet footsteps, distant traffic."
Example:
Instead of: "Make an ad," you'd say, "Multi-shot. Shot 1: 3 sec close-up on @AstraWatch on a runner's wrist, beads of sweat, golden hour light. Shot 2: 4 sec medium shot,runner breathes deep, taps @AstraWatch, pace readout animates. Shot 3: 4 sec slow dolly to skyline; VO stub, ambient city and heartbeat."
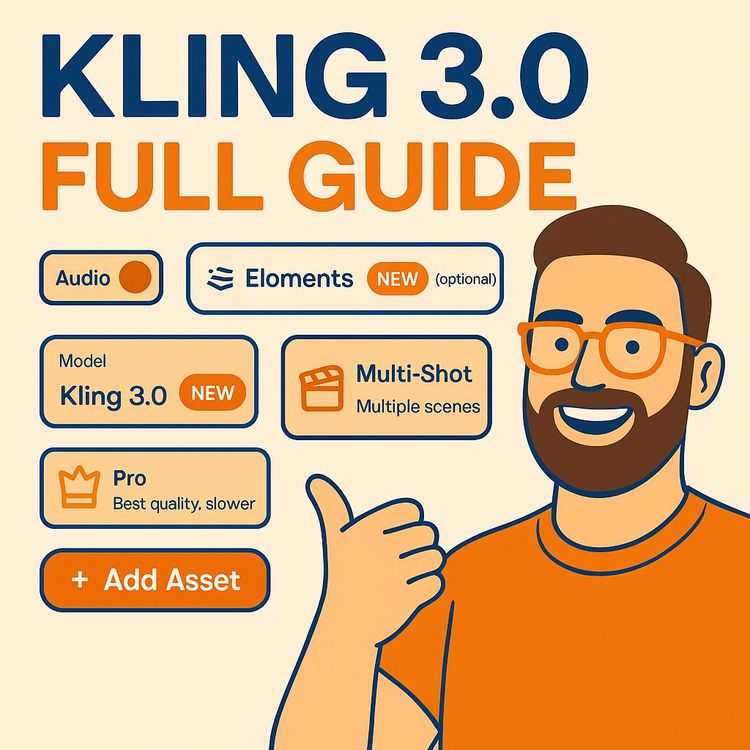
Tour of the Kling 3.0 Interface (What Every Control Does)
Text Prompt Field: This is the brain of your video. Be specific with visual intent, camera language, motion, mood, and any Elements you want included using the @ symbol. More signal here = fewer surprises.
Video Orientation: Choose Horizontal (16:9), Vertical (9:16), or Square (1:1). Match the platform and creative goal. Horizontal for YouTube or web players. Vertical for shorts and stories. Square for grid posts or carousels.
Quality Settings: Standard for speed and iteration. Pro for highest fidelity, richer textures, and better edge detail. Draft in Standard, lock in with Pro.
Video Duration: Set between 3 and 15 seconds. Longer doesn't always mean better; use the time you need to execute your shot list cleanly.
Mode Selector: Single-Shot for one continuous clip. Multi-Shot for a sequence with multiple cuts inside one generation.
Native Audio Toggle: Adds ambient sound, basic SFX, and dialogue that fits the action. Great for draft previews and social-first videos. You can always replace audio in post if needed.
Frame Control: Upload a starting frame, an ending frame, or both. This pins the composition at the start and/or end so you get director-level control over how the scene opens and lands.
Elements Tab: Where you create your reusable characters, AI clones, and product assets. This is the engine of consistency across shots, scenes, and campaigns.
Examples:
- Horizontal orientation for a cinematic explainer that will live on a landing page, with Pro quality for crisp product textures.
- Vertical orientation for a 10-second streetwear promo; Standard quality for rapid iterations, then switch to Pro for the final cut.
Tips:
- Draft three quick versions in Standard across different orientations before committing to Pro. You'll get composition, motion, and vibe choices fast.
- Treat the prompt field like a director's note: framing + action + mood + references to Elements. Don't be vague.
Elements: Consistency Solved
Elements are reusable digital assets that lock in a character, real person, or product so Kling renders them the same way,every time. This single feature eliminates the usual AI-video headache: the face that subtly changes between shots or the product that mutates angle-to-angle.
What Are Elements? They're profiles you create and name. When you reference @Name in a prompt, Kling uses that definition as a ground truth: facial features, wardrobe, proportions, product geometry,kept consistent across scenes.
Types of Elements and How to Create Them:
1) AI Character: You define appearance, age, gender, clothing, style, era, and vibe. The system generates a character that matches your definition. Use this for fictional roles or brand spokescharacters.
2) AI Clone (Digital Twin): You upload multiple photos of a real person from different angles, including at least one expressive shot. Identity verification is required. The benefit: the clone holds emotional range and likeness for acting beats.
3) Product Asset: You upload at least four photos from different angles, add a name and a short description. The asset becomes a faithful representation of your product for ads, demos, and how-tos.
Examples (AI Character):
- "@MaraStone": mid-30s, athletic build, curly dark hair in a ponytail, forest-green windbreaker, trail runner, light freckles, calm and confident energy.
- "@NeoArchivist": older librarian, round glasses, tweed blazer, soft smile, silver hair in a bun, gentle presence, warm bookstore lighting.
Examples (AI Clone):
- "@JordanReyes": upload head-on, 3/4, profile, and an expressive laugh photo. Use for brand updates where Jordan speaks directly to camera.
- "@ElenaQ": upload portrait set from a keynote, candid desk shots, and one surprised expression to capture brow and eye nuance for reaction shots.
Examples (Product Asset):
- "@AstraWatch": four angles under neutral lighting, plus a close-up of the bezel and strap texture. Use for lifestyle and macro shots.
- "@NimbusBottle": matte-black steel bottle, 500ml, removable cap, ridge detail. Shots on white and in-studio gray for lighting consistency.
Best Practices:
- Use clear, stable lighting in your photos. Avoid extreme color casts; they can bake into the Element in ways you don't want.
- Name Elements cleanly: @FirstNameRole, @BrandProduct. This keeps prompts readable and scalable.
- For clones: secure explicit consent and keep a record of permissions. Verification exists for a reason,respect it.
Prompting with Elements: Patterns That Work
To use an Element in a prompt, type @ElementName wherever it appears in the shot. If the character or product is in multiple shots, reference it in each shot's prompt,especially in Multi-Shot mode. That's how Kling keeps continuity tight across cuts and angles.
Examples (Single-Shot):
- "35mm medium close-up. @MaraStone zips her jacket, exhales visible breath in cold air. Light snow falls. Native audio: soft wind, zipper sound."
- "Macro shot of @AstraWatch glinting under studio light as seconds hand ticks. Dark background, dramatic rim light, shallow depth of field."
Examples (Multiple Elements):
- "Wide shot. @JordanReyes presents @NimbusBottle on a minimalist desk, soft daylight, hand model rotates the bottle slowly. Native audio: ambient room tone, soft whoosh as it turns."
- "Two-shot conversation: @NeoArchivist and @MaraStone at a reading table. Warm lamp light, quiet ambiance, subtle smiles as they share a book."
Tips:
- Keep action verbs crisp: walks in, turns, points, opens, laughs. Kling follows clean verbs well.
- Use camera language: 24mm wide, 50mm portrait, dolly-in, crane down. This communicates framing and motion without confusion.
- If wardrobe matters, reinforce it in the prompt: "wearing the same forest-green windbreaker."
Multi-Shot Generation: Build Sequences in One Pass
Multi-Shot lets you create a pre-edited sequence inside one generation. You define each shot with its own mini-prompt. Kling stitches them into one continuous file with clean cuts. This replaces the old workflow of generating a dozen fragments and editing manually.
How It Works: Switch to Multi-Shot mode. Add prompts for each shot. Each shot must be at least 3 seconds. Each prompt has a 500-character limit. The total duration across all shots can't exceed 15 seconds. Reference any Elements in every shot where they appear.
Example Sequence (Narrative):
- Shot 1 (3s): "Wide 24mm. @MaraStone jogs into a misty clearing at dawn, breath visible, soft birdsong."
- Shot 2 (5s): "50mm medium. She slows, checks @AstraWatch; heart rate reads steady. Camera dolly left, sun peeks through trees."
- Shot 3 (4s): "Close-up. Fingers tap START. Sweat bead on her temple. Ambient: heartbeat + wind."
- Shot 4 (3s): "Back to wide. She sprints forward with a confident smile, mist swirling."
Example Sequence (Ad):
- Shot 1 (4s): "Macro. @NimbusBottle cap twists open, clean click, condensation droplets."
- Shot 2 (4s): "Medium. @JordanReyes takes a sip on a mountain overlook, golden light, calm breeze audio."
- Shot 3 (4s): "Product hero. Bottle centered on a rock, logo visible, shallow DOF, distant river sound."
Tips:
- Think in beats. One action per shot. If you combine too much, you'll get mush.
- Keep continuity tight: mention wardrobe, props, and lighting across shots. Reference the same Elements in each cut.
- Use the 500-character limit as a discipline. Write like a shot list, not a novel.
Director Control with Starting and Ending Frames
Starting and ending frames anchor your composition. You can animate from a precise opening still, land on an exact closing still, or connect both for a defined arc. This is gold for product reveals, transformations, and scene transitions.
Using a Starting Frame: Upload an image that represents the first frame. Kling will animate forward from that exact composition, camera position, and lighting.
Using an Ending Frame: Upload an image that represents the final frame. Kling reverse-engineers the motion and timing to arrive there naturally.
Using Both: Provide a start and end still. Kling creates the motion bridge. Use this for controlled movement or morphs where timing and position matter.
Examples (Start Only):
- A tent in a moonlit forest. Prompt: "A bear slowly walks into frame from the right and nudges the tent." You lock the vibe, Kling handles motion.
- A studio-lit @AstraWatch macro still. Prompt: "Seconds hand ticks, soft parallax on the face; gentle lens flare."
Examples (End Only):
- Final shot: a rocket resting on a dusty lunar surface. Prompt: "A small rocket flies through space and softly lands, gentle dust plume." Kling builds the approach and landing path.
- Final shot: @NimbusBottle centered, logo perfect. Prompt: "Bottle rotates to face camera and settles into hero position."
Examples (Start + End):
- Start: closed treasure chest. End: chest open, golden light spilling out. Prompt: "The chest opens slowly to reveal bright, magical light."
- Start: messy desk with unboxed bottle. End: pristine desk layout with @NimbusBottle centered and lit. Prompt: "Hands place and align items; final hero composition."
Tips:
- Use frames for "must land here" marketing shots. It prevents last-frame drift.
- Keep lighting consistent between your provided frames when using both. Extreme changes can confuse motion planning.
Enhanced Realism and Native Audio
Kling 3.0 elevates facial nuance, lighting, and surface detail. Characters smile without the uncanny dip. Skin, hair, and fabric render with believable texture. Depth of field and light falloff feel more photographic. When you switch on native audio, you get synchronized ambience and sound cues that match the action, plus light dialogue stubs where fitting.
Examples (Emotional Performance):
- "50mm close-up. @ElenaQ hears good news, eyes widen subtly before a relieved laugh. Soft indoor room tone."
- "Medium shot. @NeoArchivist frowns gently, then smiles as a child hands them a book. Warm library ambience."
Examples (Visual Detail):
- "Macro. @AstraWatch brushed steel texture catches a moving light; minute hand glides smoothly."
- "Portrait. Wind lifts @MaraStone's hair; tiny flyaways visible, jacket fabric shows ripstop pattern."
Examples (Native Audio):
- "City sidewalk. Footsteps, passing car whoosh, faint chatter. @JordanReyes says: 'Back in a minute.' Lipsync suggests a brief line."
- "Kitchen scene. Kettle whistling, ceramic clink, a dog collar jingle off-screen. Natural and unobtrusive."
Tips:
- If you plan a custom score or VO, still enable native audio during iteration. It gives you timing and vibe cues for the final mix.
- Keep dialogue to short, natural lines. Avoid complex monologues; treat native dialogue as a placeholder.
Known Limitations (And Smart Workarounds)
1) Character Distance: The farther your character is from camera, the more fidelity drops,faces go soft, proportions drift.
Workarounds:
- Favor close-ups and mediums for character beats. Use wides for establishing, where detail matters less.
- If you need a wide, keep the character near foreground. Or anchor the scene with a product close-up, then cut to a tasteful wide for context.
Examples:
- Instead of a distant runner in a massive valley, do a medium of @MaraStone tying laces, then a brief wide of the valley for scale, then back to a medium jogging shot.
- For a team scene, do a wide with silhouettes and then coverage: mediums of each speaker for expression.
2) Text Rendering: Kling still struggles with complex text like timetables, paragraphs, and dense signage. Expect garbled glyphs or artifacts.
Workarounds:
- Keep on-screen text short and simple. One or two words max if you must show it in-camera.
- Add detailed text in post. Overlay UI cards, titles, or captions using your editor.
Examples:
- Product screen: "Pace" or "Start" rendered in-camera, then composite the real UI later.
- Signage: Use icons and color for in-shot visuals; insert any critical copy in post.
The Recommended Workflow (Run It Like a Production)
1) Establish an Asset Library: Build Elements for every hero character, real-person clone, and product. This is your consistency backbone.
2) Define Compositions (Optional but powerful): Prepare starting/ending frames for shots that must open or close on a specific layout.
3) Structure the Narrative with Multi-Shot: Break scenes into beats. Each prompt is a concise direction: framing, lens, action, and Element references.
4) Reference Assets in Every Prompt: Use @ElementName wherever they appear, shot by shot, to lock consistency.
5) Generate, Review, Iterate: Expect a few passes. Tighten verbs, adjust framing, or switch to Pro once composition and motion are locked.
Examples (Creative Ops):
- Internal brand library: @BrandFace (clone), @HeroProduct, @LifestyleBag. Anyone on the team can use them for instant, on-brand content.
- Campaign flow: test variations in Standard across three orientations; pick winners; finalize hero cuts in Pro with frames for the opening and ending beats.
Tips:
- Save your best-performing prompts as templates. Reuse with small swaps (location, lighting, wardrobe).
- Keep a prompt log. Versioning beats guesswork.
Interface Settings in Practice
Orientation Strategy: Plan for the platform first. Vertical for social. Horizontal for site and long-form. Square for feed balance. Don't just crop after; compose intentionally.
Quality Strategy: Start Standard to explore. Switch to Pro when the idea is working. Reserve Pro for shots with skin, fabric, or metal textures where fidelity is noticed.
Duration Strategy: Each shot gets just enough time to communicate the beat. If it feels rushed, add a second. If it's mushy, split the shot into two cleaner beats.
Examples:
- Vertical, 12 seconds, Standard draft: a quick product story for reels.
- Horizontal, 15 seconds, Pro: polished landing-page hero video with a tight opening and a precise end frame.
Applications and Industry Playbooks
Filmmaking & Content Creation: Build concept scenes, pre-viz, or short narratives with real continuity thanks to Multi-Shot and Elements.
Examples:
- A short scene: @MaraStone and @NeoArchivist swap lines in a library across three cuts with consistent wardrobe and light.
- A moody action beat: start frame on a neon-lit alley, end frame with a slow turn and reveal; native audio adds rain and footsteps.
Advertising & Marketing: Create a product asset once, then spin up a month of variations,angles, settings, and CTAs,without calling a crew each time.
Examples:
- @AstraWatch lifestyle montage: trail, gym, office; same product, different context, consistent brand vibe.
- Founder's talking-head clips with @JordanReyes (clone) to standardize messaging across markets.
Education & Training: Visualize processes, simulations, and step-by-step scenarios with consistent digital instructors and recurring props.
Examples:
- Safety training: @Instructor demonstrates a three-step procedure in a workshop; Multi-Shot shows each step cleanly.
- Biology explainer: macro demos of equipment with @LabKit asset, plus subtle ambient audio for immersion.
Prototyping & Design: Put early product ideas in motion to test ergonomics, packaging, or usage flows.
Examples:
- @ConceptMug pour test: handle grip angles across three camera shots; see liquid behavior and reflections.
- Spatial design pre-viz: a character moves through a new lobby concept; start and end frames match your layout renders.
Advanced Prompt Patterns and Templates
Use these as scaffolding. Swap Elements, actions, and environments.
Cinematic Character Beat:
"50mm medium close-up. @CharacterName stands near a window, soft side light, shallow depth. She smiles subtly after a pause, eyes glistening. Ambient: distant city, quiet room tone."
Product Macro Sequence (Multi-Shot):
Shot 1: "Macro. @ProductName surface texture under moving light, slow pan."
Shot 2: "Profile hero. Crisp logo, clean background, soft cast shadow."
Shot 3: "Usage demo. Hand picks up @ProductName; tactile click, natural skin tones."
Founder Message (Clone):
"Medium shot, clean background. @FounderClone addresses camera: 'Here's what we've been building.' Subtle hand gesture, confident posture. Native audio: room tone, soft voice bed."
Explainer With Start/End Frames:
Start: UI on device angled left. End: full-screen UI straight-on. Prompt: "Device tilts toward camera as UI fills frame. Gentle motion, sharp focus on @ProductName."
Two-Character Dialogue:
Shot 1: "Two-shot. @CharA and @CharB in a cafe, warm light, gentle chatter."
Shot 2: "Over-shoulder on @CharA, soft nodding as @CharB speaks."
Shot 3: "Reverse over-shoulder on @CharB, light laugh."
Realism, Emotion, and Cinematography Cheat Codes
Lighting: Mention source, quality, and direction: warm lamp light, harsh noon sun, blue neon rim, golden hour backlight. This massively improves realism.
Lenses & Movement: 24mm for wides and environmental context, 35mm-50mm for natural portraits, 85mm for tight beauty shots. Add "dolly-in," "slow pan," or "lock-off tripod" for motion intention.
Emotion: Call the beat: "eyes widen," "gentle smile after a pause," "suppressed laugh," "relieved exhale." Kling's emotional performance follows concise cues.
Examples:
- "85mm beauty close-up. Soft key light from the left, hair light rim, @CharacterName smiles with relief. Minimal movement, quiet air tone."
- "24mm wide, hand-held feel. @CharacterName sprints under rain, dramatic street reflections, camera pans with them."
Tips:
- Let a single emotion drive the shot. Mixing 'joyful shock with sadness' in one beat muddies output.
- Use "shallow depth of field" or "background bokeh" to lift subjects and add perceived quality.
Native Audio Tactics
Native audio is best for ambient realism and quick publishes. Treat it like a guide track or the final mix for social-first content. Dialogue works for simple, natural lines; save complex VO for post.
Examples:
- "Outdoor cafe scene,soft chatter, cup clinks, passing scooter."
- "Gym montage,weights clank, breath, rubber floor squeak, subtle bassy room tone."
Tips:
- Ask for specific ambience: "quiet forest," "busy market," "silent studio" for clean tracks.
- If you hear odd audio artifacts, regenerate with the same visual prompt and slightly different audio cues, or disable native audio and add SFX in post.
Quality Settings, Duration, and Budgeting Your Time
Standard vs Pro: Standard is your sketchbook; Pro is your gallery. Iterate fast in Standard. Flip to Pro for finals that need crisp edges, subtle textures, and stable motion.
Duration: Use exactly what you need. Three seconds is enough for a macro reveal. Ten to fifteen seconds is ideal for a simple narrative with three to four beats.
Examples:
- Draft three variations of a product hero in Standard, pick the best angle, then render in Pro with a locked end frame.
- For a dialogue snippet, run Standard to dial the expressions and pacing, then switch to Pro for the final.
Tips:
- Keep a "shot menu" with common durations (3s opener, 4s action, 3s hero). Use it to structure sequences under 15 seconds.
- Don't bump everything to Pro. Most views won't notice micro-gains on throwaway transitions; save Pro for key beats.
Asset Hygiene, Ethics, and Safety
AI Clones: Only use images you own or have explicit permission to use. Identity verification is there to safeguard real people. Follow it, document it, and store assets securely.
Products: Confirm you have the rights to depict brand marks, packaging, and trade dress. If in doubt, use generic or placeholder labels and replace in post.
Company Practices: Maintain a shared Element library with naming conventions, visual references, and usage notes. Keep all license and consent records centralized.
Tips:
- Add a short usage policy to your team wiki covering clones, voice, and likeness. Prevent problems before they start.
- For minors or sensitive categories, get extra approvals and be conservative with depiction.
Troubleshooting: How to Fix Common Issues
Soft Faces in Wides: Move closer. Switch to medium or close-up for expression shots. Use the wide only for context.
Mismatched Wardrobe Between Shots: Re-state wardrobe in each shot's prompt. "Wearing the same forest-green windbreaker."
Weird Hand or Object Interactions: Keep actions simple: "picks up," "holds," "sets down." Avoid complex finger choreography in one shot. Split into two shots if needed.
Text Looks Nonsensical: Don't force it. Keep it to single words, or add text overlays later.
Audio Feels Off: Ask for a defined ambience. If the mismatch persists, disable native audio and design the sound in post.
Examples:
- A bottle cap "teleports" mid-turn? Split into two shots: Shot 1 shows the twist; Shot 2 shows the cap fully off and set down.
- Dialogue feels too stiff? Shorten to a natural phrase and add a nonverbal beat: "She smiles, nods, says 'Got it.'"
From Brief to Final: A Repeatable Project Flow
1) Define outcome: What's the single message or emotion? Who's the hero,character, product, or place?
2) Build or select Elements: Lock your character(s) and product(s). Confirm wardrobe and props.
3) Write beats: 3-4 shots max. One action per shot.
4) Choose orientation and duration: Platform dictates the canvas. Budget time per beat.
5) Draft in Standard: Test 2-3 variations. Pick the strongest flow.
6) Lock frames (optional): Add start/end frames for must-hit comps.
7) Final in Pro: Render the keeper. Swap audio in post if needed.
8) Version: Spin alternative intros/outros or crop variations for other platforms.
Case Studies (Concrete Scenarios You Can Replicate)
Independent Filmmaker Proof: A creator uses Elements for two lead characters and generates a three-shot dialogue scene in a cafe,two over-shoulders and one wide establishing. Native audio adds cups clinking and light chatter. The scene cuts together like real coverage with consistent faces.
Ad Team Sprint: A brand sets up @BrandFace (clone) and @HeroProduct once. In a single afternoon, they draft five vertical promos and three horizontal hero cuts. Multi-Shot sequences keep continuity. The team only tweaks copy and mix in post.
Education Clip: A professor creates @Instructor and @LabKit Elements. Multi-Shot demos a three-step process: set up, action, result. Students get a clear, steady visual they can rewatch quickly.
Design Pre-Viz: A UX lead demos a wearable interface by anchoring the end frame to the final UI hero state. The middle motion shows lift, tilt, and a natural handoff,all consistent with the @Wearable asset.
Deep Dive: Multi-Shot Continuity Essentials
Continuity Checklist Per Shot: Repeat Element names, wardrobe specifics, lighting vibe, and prop positions. Reinforce actions simply. Keep camera intent consistent: if you start hand-held, keep it or justify a change.
Examples:
- "Same cafe, same warm light, @CharA keeps the blue sweater, @CharB holds the red notebook."
- "Maintain rain and neon reflections; camera stays on a slow dolly left across all three shots."
Tip: If a shot must look identical except for a small change (eyes move, hand lifts), consider a start+end frame pair to lock the space and let Kling animate the micro-change.
Scene Control with Frames: Advanced Tactics
Match Cuts: Use identical composition in start and end frames across two different settings. Prompt a smooth transition that feels like a match cut.
Before/After Reveals: Start frame: messy desk. End frame: clean layout with @Product front-and-center. Prompt a tidy-up montage feel over 4-6 seconds.
Examples:
- "Start: door closed, End: door open, golden light. Prompt: 'Door opens slowly; dust motes in the beam.'"
- "Start: @Product angled left, End: @Product front-on hero. Prompt: 'Slow turn to centered hero, crisp reflection.'"
Why Proximity Matters (And How to Use It)
Close-ups are where AI video shines. Skin pores, fabric weave, lip corners,these cues carry emotion. If a shot needs empathy or persuasion, bring the subject to camera. Use wides sparingly for context and spectacle.
Examples:
- A founder reassurance message: 50mm medium with native audio beats any wide lobby monologue.
- Product trust: macro cut-in of a precise button click adds tactile credibility to a lifestyle sequence.
Tip: Structure your edits with a heartbeat: wide (context) → medium (presence) → close-up (emotion/detail) → wide (resolve). Kling handles this pattern well.
Key Insights You Should Internalize
- Elements solve character and product consistency across scenes. Use them religiously.
- Multi-Shot compresses your editing workflow into a single generation with continuity baked in.
- Proximity equals fidelity. Bring characters close to camera for crucial beats.
- Start/End frames give you director-level control of compositions.
- Complex text remains unreliable. Keep words simple or add in post.
- A structured, repeatable workflow is the difference between luck and results.
Quotes and Proof of Potential
"We've turned a corner. Complex set pieces with multiple consistent elements are now possible."
"This workflow solves problems that have existed since AI video generation first became a thing. Character consistency, solved. Multi-shot sequences without creating every frame manually, solved."
An AI filmmaker recently won a major prize at a global creator summit using technology of this kind. The takeaway: early mastery translates into real commercial wins.
Skill Drills: Mini Projects to Cement Learning
Project 1: The Macro Hero (Beginner)
- Create a product Element for something on your desk.
- Single-Shot, 3-4 seconds. Macro, shallow DOF, slow parallax. Native audio on (quiet room tone).
- Iterate in Standard, finalize in Pro with a locked end frame.
Project 2: The Three-Beat Story (Intermediate)
- Build an AI character Element. Write a three-shot arc: enter, decision, action. 9-12 seconds total.
- Multi-Shot. Tight verbs. Keep wardrobe and light consistent. Native audio on for ambience.
- Add a start frame to lock the opening composition.
Project 3: The Product-in-Use Ad (Advanced)
- Create a product Element and a clone or character Element.
- 12-15 seconds, Multi-Shot: macro hero → lifestyle usage → hero close.
- Use an end frame for the final logo-forward composition. Replace native audio with a polished track in post.
Answers to Common "What Ifs"
What if my character's face looks slightly different across shots? Re-mention their defining features and wardrobe in each shot. Consider Pro quality for tight portraits. If it persists, regenerate one offending shot with sharper character cues.
What if the product distorts at certain angles? Provide more reference photos when creating the Element, especially tricky angles. Lock the final with an end frame for the hero angle.
Can I trust the native dialogue for ads? Use it as a placeholder. For final ads, record real VO and mix in post. Keep native for fast social posts or drafts.
Putting It All Together: A Complete Beginner-to-Pro Walkthrough
Scenario: You're launching a new fitness watch and want a short video for social and a hero clip for your site.
Step 1: Elements Create @AstraWatch and @MaraStone. For @AstraWatch, upload four clean angles plus a macro. For @MaraStone, define age, clothing, and vibe.
Step 2: Multi-Shot Draft (Vertical Social) 12 seconds in Standard.
- Shot 1: Macro of @AstraWatch with light shimmer (3s).
- Shot 2: Medium of @MaraStone running at dawn, checks @AstraWatch (5s).
- Shot 3: Hero product shot with logo (4s). Native audio on: breath, wind, soft click.
Step 3: Review and Iterate If the running looks mushy, split the second shot into two: slow to check watch, then a confident start sprint. Keep Element mentions in both.
Step 4: Lock Website Hero (Horizontal) Add a start frame (studio-lit macro) and end frame (centered hero composition). Switch to Pro. Keep total to 8-10 seconds for site performance.
Step 5: Post Replace native audio on the site version with a clean score and foley. Keep native audio for the social version to sound more candid.
Further Study and Skill Expansion
- Study advanced prompting patterns: camera grammar, lighting calls, and micro-actions.
- Explore AI-assisted pre-viz and storyboarding pipelines,Kling first, then edit, then overlay UI or motion graphics in post.
- Learn simple automation: connect prompt templates to naming conventions and asset libraries so your team can scale output without reinventing the wheel.
Have You Covered the Essentials? Quick Self-Check
- Do you know how to use every interface control: prompt, orientation, quality, duration, mode, native audio, start/end frames, Elements tab?
- Can you create three Element types: AI character, AI clone (with verification and expressions), and product asset with multiple angles?
- Can you reference @Elements in every shot to maintain consistency?
- Can you run a Multi-Shot sequence with 3+ beats under 15 seconds with 500-character prompts per shot?
- Do you know when to use start frames, end frames, or both?
- Are you working around the distance and text limitations with tighter framing and post overlays?
- Are you following the recommended workflow from asset library to iteration and Pro finals?
Conclusion: Direct, Don't Gamble
AI video used to be a party trick. Kling 3.0 turns it into a production tool you can rely on. With Elements, you lock identity. With Multi-Shot, you build real sequences without manual stitching. With start and end frames, you decide exactly how scenes open and close. Native audio brings it to life. Realism and emotional nuance carry the story the way an audience expects.
Respect the limitations,keep humans close to camera for fidelity, keep on-screen text simple, and lean on post for typography. Follow the workflow: establish assets, plan shots, reference Elements consistently, iterate in Standard, then finalize in Pro with precise framing. When you work this way, your output stops looking like "AI" and starts looking like content you'd be happy to publish.
Mastery here isn't about memorizing prompts; it's about thinking like a director, building a repeatable system, and refining with feedback. Run the mini projects, log your best prompts, and build your Element library. The earlier you get fluent with this, the more leverage you'll have,creatively and commercially.
Next step:
Pick one product or character you care about. Create the Element. Write a three-shot sequence. Generate in Standard, then finish in Pro. That's your first win,repeat it until it feels as natural as opening your editor.
Frequently Asked Questions
This FAQ exists to answer the most common and useful questions about using Kling 3.0 for text-to-video creation. It moves from basics to advanced workflows, with practical tips, examples, and business use cases so you can go from first render to repeatable results without guesswork.
What is Kling 3.0?
Key takeaway: Kling 3.0 turns text prompts and reference images into short, high-fidelity videos with character consistency and native audio.
Kling 3.0 is a text-to-video model built for producing short, cinematic clips from natural language. It adds multi-shot generation, reliable character and product consistency via Elements, integrated sound effects and ambience, and more lifelike expressions. That means you can script a 15-second sequence with multiple cuts and keep the same person or product looking identical across shots. For business users, it's ideal for ad concepts, product demos, recruitment clips, UGC-style spots, and social content. Example:
"@BrandBottle on a marble counter; slow push-in; droplets; crisp, natural light" yields a clean product beauty shot for a landing page hero or vertical ad test.
What are the basic settings for video generation?
Key takeaway: Control the outcome by setting orientation, quality, mode, duration, audio, and optional reference frames.
You'll describe your scene in the Prompt field, select orientation (16:9, 9:16, or 1:1), pick Quality (Standard or Pro), choose Mode (Single-Shot or Multi-Shot), and set Duration from 3 to 15 seconds. Native audio can be toggled on if you want ambient sound and effects generated automatically. You can also upload a Starting Frame and/or Ending Frame to lock specific compositions. Example:
Vertical 9:16 + Pro + 10 seconds + Multi-Shot for a storyboarded social ad with three cuts, or 16:9 + Standard + 7 seconds + Single-Shot for a fast concept test you'll refine later.
What is the difference between "Standard" and "Pro" quality?
Key takeaway: Use Standard for speed and exploration; use Pro for polish and final delivery.
Standard is faster and cost-efficient for drafting ideas, testing prompts, and iterating on scenes. Pro takes longer but delivers more detail, smoother motion, and better lighting and texture fidelity,suited for client reviews and public-facing assets. A practical workflow is to ideate in Standard, lock your prompt and Elements, then switch to Pro for final renders. Example:
Draft five product hero shots in Standard to pick a winner, then re-render the top two in Pro for your A/B landing page test and paid placements.
How long can the generated videos be?
Key takeaway: Each generation can be set from 3 to 15 seconds; choose the exact length you need.
You can specify a precise length between 3 and 15 seconds. This control helps you match platform constraints (e.g., bumper ads, Stories, Shorts) or storyboard timing. For campaigns needing longer narratives, generate multiple clips and stitch them in post while maintaining consistency with Elements and coherent lighting across scenes. Example:
Create three 10-second segments (hook, product demo, CTA) and combine them into a 30-second explainer, keeping the same spokesperson Element throughout.
How does Kling 3.0 solve the problem of character consistency?
Key takeaway: Elements act as reusable, named assets that lock identity and appearance across shots and videos.
Elements are profiles for characters or products you create once and then reference in prompts using @ElementName. Kling uses these to maintain facial features, clothing, colors, and proportions across generations. This prevents the common drift you see in AI video where a person or object changes between cuts. For teams, Elements become a brand library,your spokesperson, founder, or hero product stays consistent across formats. Example:
"@AvaHost in a minimalist studio, medium close-up, calm tone, soft key light" stays consistent across five how-to clips.
What types of "Elements" can be created?
Key takeaway: You can create AI Characters, AI Clones (with consent), and Product assets.
There are three primary Element types: Custom AI Characters built from descriptive attributes; AI Clones created from photos and identity verification; and Products made by uploading multi-angle images. Each becomes a named asset you can call in prompts. For product marketing, a single Product Element powers consistent beauty shots, lifestyle scenes, and UGC-style demos without reuploading references. Example:
"@TrailRunnerShoes splashing through a shallow creek, 120fps feel, crisp water droplets" produces repeatable, brand-safe visuals for multiple campaigns.
How do I create a custom AI character asset?
Key takeaway: Use the character builder to define look, clothing, and vibe; the system generates the underlying description.
Open the character builder and set appearance, age, skin tone, hair, clothing, and style details. The tool converts your selections into a descriptive profile that Kling uses to render the same character each time. Save it with a memorable name and call it with @ in prompts. Start with a few wardrobe presets and add variants later to cover different scenarios. Example:
"@NoraPM in a sunlit co-working space, reviewing a kanban board, medium shot, natural color grade" for a recruiting or culture clip.
How do I create a digital clone of myself?
Key takeaway: Upload clear multi-angle photos, include expressive shots, and complete identity verification.
Provide several photos from different angles with varied expressions and lighting. Include at least one expressive image to improve emotional fidelity. You'll also complete a short verification step. Use this responsibly and only for subjects who have given explicit consent. For public-facing work, disclose synthetic media as needed by your policies or local rules. Example:
"@Founder talking to camera about a product launch, medium close-up, punchy key light, subtle background office blur."
How do I use my created Elements in a video prompt?
Key takeaway: Reference Elements with the @ symbol, then describe the scene as usual.
Type @ followed by the Element's name directly in your prompt. Combine it with camera direction, action, and environment to guide the model. Include the Element reference in each shot when using Multi-Shot. Keep names short and unique so they're easy to recall. Example:
"@ArthurWiner walking through a neon city at night, rain reflections, 35mm look, slow dolly."
Can I use multiple characters or objects in the same video?
Key takeaway: Yes,reference multiple Elements to stage interactions or product-plus-talent scenes.
You can include more than one Element in a single prompt to create interaction. Be explicit about placement, action, and relationships to reduce ambiguity. For complex choreography, break it into Multi-Shot prompts that move the scene forward step by step. Example:
"@ArthurWiner and @Cyberkitty exit a plane with parachutes; wide shot; then medium shot of @Cyberkitty signaling OK; wind and sky ambience."
What is multi-shot generation?
Key takeaway: Multi-Shot creates a single video with multiple cuts you define via separate prompts.
Instead of one continuous clip, Multi-Shot lets you script a sequence of cuts,wide to medium to close-up,inside a single generation. This mirrors an edited ad or trailer. It's efficient for pacing, storytelling, and testing variations without bouncing between timelines. Keep shots intentional; each one should add new information or emotion. Example:
Shot 1: wide city exterior; Shot 2: medium character entering; Shot 3: close-up on product reveal; CTA slate in post.
How do I use the multi-shot feature?
Key takeaway: Enable Multi-Shot, add prompts per shot, set durations, and reference Elements in every shot.
Toggle Multi-Shot, then write a prompt for each cut. Define framing (wide, medium, close), lens feel, motion (dolly, handheld), and the specific action. Ensure durations add up to your chosen total length. Keep prompts concise and specific to reduce noise. Example:
Shot 1 (3s): "Wide 24mm, @Host enters studio." Shot 2 (5s): "Medium, @Host lifts @Product, smiles." Shot 3 (4s): "Close-up, label sharp, soft falloff, natural audio."
What are the rules for writing multi-shot prompts?
Key takeaway: Each shot must be at least 3 seconds; each prompt is capped at 500 characters.
Plan your sequence so every shot earns its time. Use clear structure: Subject + Camera + Action + Environment + Mood. Avoid cramming too many actions into one cut; spread them across shots. Reference Elements consistently and repeat key visual anchors (lighting, wardrobe) to keep continuity. Example:
"Medium, 50mm look, @NoraPM gestures to wall charts, warm key, cool rim light, office ambience."
How do I maintain character consistency across different shots in a multi-shot sequence?
Key takeaway: Include the @Element in every shot prompt and keep wardrobe, lighting, and setting coherent.
Consistency comes from repetition. Mention the same Element names in each shot and restate key visual anchors like outfit, hair, and lighting. If you change context intentionally (day to night), call it out and keep other variables steady. For product scenes, repeat color, finish, and scale cues. Example:
"@BrandBottle, matte black, gold logo, studio gray sweep, soft top light",repeat across shots to prevent subtle drift.
Certification
About the Certification
Get certified in Kling 3.0 text-to-video production. Prove you can craft multi-shot sequences, keep characters consistent with Elements, lock start/end frames, and use native audio,delivering reliable, on-brand videos for ads, explainers, and social.
Official Certification
Upon successful completion of the "Certification in Multi-Shot Text-to-Video Production with Kling 3.0", you will receive a verifiable digital certificate. This certificate demonstrates your expertise in the subject matter covered in this course.
Benefits of Certification
- Enhance your professional credibility and stand out in the job market.
- Validate your skills and knowledge in cutting-edge AI technologies.
- Unlock new career opportunities in the rapidly growing AI field.
- Share your achievement on your resume, LinkedIn, and other professional platforms.
How to complete your certification successfully?
To earn your certification, you’ll need to complete all video lessons, study the guide carefully, and review the FAQ. After that, you’ll be prepared to pass the certification requirements.
Other AI Video Courses

Video Course: What is Generative AI and how does it work?

Video Course: How to Use ChatGPT from Beginner to Professional

Video Course: How to Use Google Gemini for Google Workspace to Boost Productivity

Video Course: How to Use Claude 3.7 AI - Tips for Beginners!

Video Course: ChatGPT for Data Analytics: Full Course - from Beginners to Professional

Video Course: Generating Images and photos With ChatGPT?

Video Course: Generating Images & Photo's with MidJourney

Video Course: Generating Design's with Microsoft Designer and AI

Video Course: Generating Design's with Canva.com and AI
Join 20,000+ Professionals, Using AI to transform their Careers
Join professionals who didn’t just adapt, they thrived. You can too, with AI training designed for your job.


