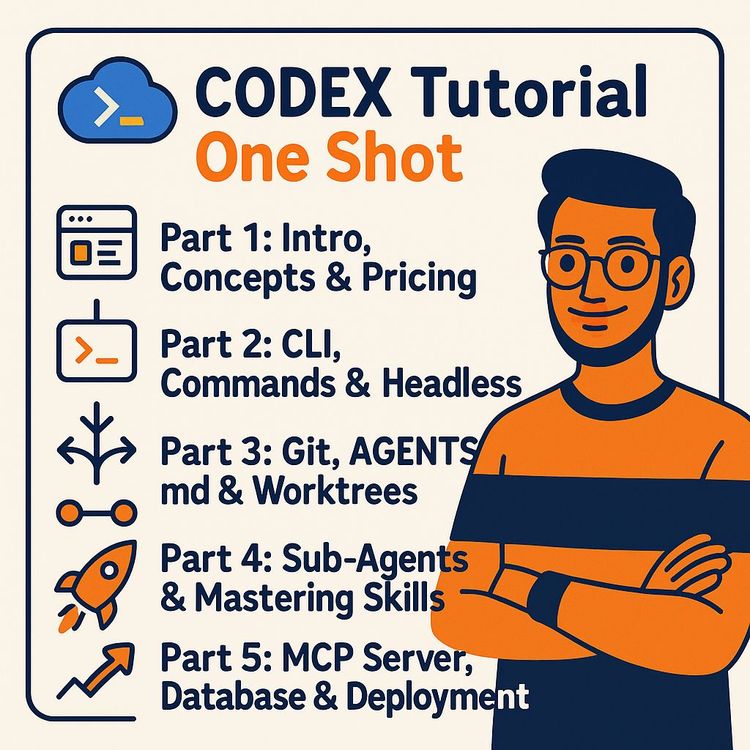
OpenAI Codex: Build Real Projects with AI Agents (Video Course)
Codex builds software on its own,planning, coding, testing, deploying. This course covers every interface, pricing, and advanced workflows like subagents and MCP. Build a full-stack app from scratch.
Related Certification: Certification in Building Real Projects with AI Agents
Also includes Access to All:
What You Will Learn
- Explain agentic AI principles: reasoning, acting, memory, and the agentic loop
- Use Codex interfaces (Desktop, Web, CLI) for task delegation and headless automation
- Configure projects with AGENTS.md, create skills, and run subagents for parallel work
- Integrate external tools via MCP and GitHub to test, migrate databases, and deploy
- Manage pricing and token usage with rolling windows, weekly limits, and /status monitoring
- Apply security and sandboxing best practices with config.toml, approval policies, and worktrees
Study Guide
Introduction: Why Codex Changes How You Build Software
You've probably used ChatGPT to generate code. Maybe you've even built entire projects by copying and pasting responses into your editor. That workflow works, but it puts you in the middle of every single step. You generate, you paste, you test, you debug, you copy the error back, and you repeat the cycle until something finally works. It's productive, but it's not autonomous.
OpenAI Codex represents a fundamental shift in that relationship. Instead of being a suggestion engine that waits for you to act, Codex is an agent that executes. It reads your files, writes code, runs commands, tests its own work, fixes errors, and pushes results to GitHub. You give it a goal, and it figures out the steps. This is the difference between generative AI and agentic AI, and that difference matters more than any single feature or model update.
This course is a complete walkthrough of Codex. We'll start with the architecture that makes agents work, move through every interface you can use, cover pricing and token management, and then dive into the advanced workflows that separate casual users from power users. By the end, you'll know how to configure sandboxes, build custom subagents, create reusable skills, connect external tools through MCP, and deploy a full-stack application from scratch. You'll also understand when Codex is the right tool and when another agent might serve you better.
Let's start with the foundation: what an AI agent actually is and how it thinks.
The Shift From Generative AI to Agentic AI
When ChatGPT first appeared, the pattern was simple. You typed a prompt, the model generated a response, and you decided what to do with it. The model had no ability to check its work, no access to your files, and no way to execute anything. It was a brilliant text generator trapped inside a chat window.
Agents close that loop. An AI agent doesn't just produce text,it produces actions. It can open your codebase, understand the structure, make changes, run tests, and iterate until the result passes your requirements. The key difference is autonomy. The agent decides what tools to use, in what order, and how to recover when something goes wrong.
Codex operates on three core principles that govern every task it handles:
Reasoning:
Before Codex does anything, it plans. It analyzes your request, identifies what information is missing, determines which tools it needs, and constructs an execution strategy. This isn't a single thought,it's an ongoing process that happens at every step of the task.
Acting:
Execution happens through tools. Tools are external programs or instructions that give Codex access to resources beyond its immediate environment. This includes reading and editing files, running shell commands, calling APIs, interacting with databases, and controlling applications. Without tools, an agent is just a chatbot. With tools, it becomes a worker.
Memory:
Codex maintains both short-term and long-term memory. Short-term memory covers the current session,what you've discussed, what files you've touched, what errors have occurred. Long-term memory persists across sessions, so recurring tasks don't start from scratch. This memory system is what allows Codex to build on previous work instead of redoing it.
Here's a concrete example of how these principles work together. Suppose you ask Codex, "What's the weather in my city?" The agent first recognizes an ambiguity,you didn't specify which city. It plans: determine location, fetch weather data, summarize the result. It then acts by calling a geolocation tool to find your city. After observing the result, it reasons again and calls a weather API. Finally, it synthesizes the raw data into a natural-language response like "34°C, partially cloudy, humidity 58%."
Now imagine that weather API fails. A generative AI tool would give you an error and ask you to retry. Codex doesn't stop. It re-enters the planning phase, assesses why the call failed, and attempts an alternative approach. This autonomous feedback loop is called the agentic loop, and it's what separates real agents from scripted tools.
The agentic loop looks like this: you give a goal, the agent plans, it acts, it observes the result, it re-plans based on what it learned, and it continues until the task succeeds. On failure, the loop simply repeats with adjusted parameters. This is why Codex can work on complex tasks without constant human supervision.
How Codex Compares to Other AI Agents
Codex isn't the only agent on the market. Claude Code from Anthropic, Cursor, GitHub Copilot, Replit, and Bolt all operate in the same general space. They share the ReAct architecture, but they differ in execution style, and those differences matter for real work.
Speed vs. Deliberation:
Codex is built for speed. It favors rapid action over extensive planning. This means it starts executing quickly, uses fewer tokens, and completes tasks faster. The tradeoff is that it may require more iterations to get complex tasks right. Claude Code, by contrast, invests heavily in up-front planning. It consumes more tokens and takes longer to start, but its initial outputs tend to be more correct.
Think of it this way: if you're building a CRUD API with standard patterns, Codex will fly through it. If you're refactoring a legacy codebase with subtle interdependencies, an agent that plans more deeply might save you time in the long run despite the slower start.
Token Efficiency:
Because Codex limits deliberation, it uses fewer tokens per task. This translates directly to cost savings if you're on a usage-based plan. For teams processing large volumes of routine work, that efficiency adds up quickly. For complex, high-stakes tasks where a single mistake is expensive, the extra tokens spent on planning might be worth it.
Environment:
Codex runs in a cloud environment by default. This means it can execute tasks without tying up your local machine, and it can spin up resources on demand. Some other agents run locally, which gives them direct access to your file system but also means they consume your compute resources.
The practical guidance is simple: match the agent to the task. If your priority is token conservation and you're working on well-understood problems, Codex is an excellent choice. If you're tackling something novel and complex where output quality is paramount, consider whether a more deliberative agent might serve you better. Neither is universally superior,they're optimized for different workflows.
Pricing Plans and Token Management
Codex is available through subscription plans and API-based consumption. Understanding the pricing structure is essential because token exhaustion can interrupt your work at the worst possible moment.
Subscription Tiers:
The Lite plan runs around $18 per month and suits lightweight coding tasks with basic model access. The Plus plan at approximately $120 per month is the most popular option,it includes access to the latest models plus ChatGPT features like image and video generation. The Pro plan, around $100 per month per user, is designed for teams or multi-user accounts.
API-Based Usage:
If you prefer pay-as-you-go, you can access Codex through the API and pay only for the tokens you consume. This works well for sporadic usage or for teams that want to integrate Codex into their own applications.
The 5-Hour Rolling Window:
Codex tracks usage with a token-based system. Two thresholds govern your work. The first is a 5-hour rolling window. Here's how it works: if you consume 60% of your token budget at 9:00 AM, that consumption rolls off at 2:00 PM. You don't have to wait for a hard reset,the budget gradually regenerates as older consumption expires.
Let's walk through an example. At 9:00 AM, you consume 60% of your budget, leaving 40%. At 10:30 AM, you consume another 20%, leaving 20%. At 2:00 PM, the 60% from 9:00 AM rolls off. Your remaining 20% plus the recovered 60% gives you 80%. At 3:30 PM, the 20% from 10:30 AM rolls off, and you're back to 100%.
Weekly Limits:
The second threshold is a weekly cap. Even if your rolling window regenerates, you can't continue once the weekly limit is exhausted. You have to wait until the weekly period resets. The Codex app shows your weekly limit and reset date, so check it before starting long sessions.
Monitoring Your Usage:
Codex doesn't provide built-in real-time alerts, so you need to monitor proactively. The OpenAI platform dashboard shows your credits used, total spend, and remaining balance. In the Codex CLI, the /status command displays a real-time snapshot of token usage, weekly limits, and current session statistics. Third-party tools like Session Watcher for macOS provide real-time alerts and usage dashboards, though they typically require a one-time subscription.
One useful feature is the ability to force resets before your weekly limit expires. You can do this up to four times per cycle. You can also purchase additional credits without upgrading your base plan, which is handy when you hit the limit during an important deployment.
The Codex Desktop Application
The desktop app, available through the ChatGPT application at chatgpt.com/codex, provides a visual interface for task delegation. It's the most accessible entry point for users who prefer a graphical environment over the terminal.
Core Features:
The New Task button lets you assign any task to Codex, and you can run multiple tasks in parallel. The Schedule Task feature configures recurring tasks,daily, weekly, or at custom times,and lets you specify model selection, reasoning effort, project destination, and execution frequency. This is perfect for automation like "every morning at 7:00 AM, summarize my calendar."
The Project Workspace creates isolated environments for task execution. Each project has its own codebase context, environment variables, and configuration. This prevents tasks from bleeding into each other and keeps Codex focused on the right files.
The Pull Requests view manages GitHub pull requests associated with your connected repositories. You can review, approve, and merge PRs without leaving the app.
Plugins and Integrations:
Plugins are connectors that grant Codex access to external tools. Available plugins include documents, PDF, spreadsheets, GitHub, Computer Use, and more. The Computer Use plugin is particularly powerful,it allows Codex to control your local machine, including opening applications and interacting with the operating system. This is useful for end-to-end testing or automating tasks that span multiple applications.
The Sites feature transforms ideas into live websites. Codex handles the hosting automatically and provides a shareable URL, eliminating manual deployment steps. The built-in Browser lets you view sites and test local development servers directly within the app.
Profile and Account Controls:
The Usage Remaining display shows your weekly limit consumption and reset date. The Forced Resets option lets you manually reset limits before the weekly expiry, up to four times. Additional Credits can be purchased without upgrading your plan. The Showpad is a draggable popup widget that provides at-a-glance information about active tasks.
Settings Configuration:
The settings menu controls all app behaviors. Appshot takes a screenshot and automatically attaches it to the chat for context,you can configure it to send to the current or a new chat. This is invaluable for debugging UI issues. Hooks automate commands that trigger at specific points in a task lifecycle, like running git pull before any action or running tests upon completion. Connections enable remote control of your local machine from a mobile phone or another desktop via QR code or access code. Git Configuration defines branch naming conventions, merge strategies, and commit instructions. Environment Variables grant project-specific variable access. Archived Tasks lets you manage and restore older completed work.
Codex on the Web
The web interface mirrors the desktop application's functionality. The key distinction is access: Codex web features require at least a subscription plan. Free-tier users see a prompt directing them to download the desktop application instead.
ChatGPT and Codex operate on the same platform. You switch between standard chat and "work" mode to access task delegation features. The web version supports plugins, including GitHub integration for repository management. To use GitHub integration, you'll need to connect your GitHub account through the plugin settings first.
For users who travel between machines or prefer not to install software, the web interface is a solid option. It's also useful for quick tasks when you don't need the full power of the CLI.
Codex CLI: Command-Line Power and Automation
The Codex CLI is the primary interface for terminal-based workflows, CI/CD pipelines, and headless environments. If you're a developer, this is where Codex becomes truly powerful.
Installation:
The primary installation command is npm install -g @openai/codex. You'll need Node.js installed,verify with node -v before proceeding. Alternative installation methods include Homebrew and direct binary downloads for macOS, Linux, and Windows. Always check the Codex changelog for the latest version to avoid downloading outdated builds.
Authentication:
First-time setup requires authentication via one of three methods. ChatGPT Sign-in is recommended for subscription users,it uses your existing plan credentials. Device Code lets you connect from another device using a one-time code. API Key is for users paying per token and requires an OpenAI API key.
Essential Slash Commands:
The CLI uses slash commands to control behavior. Here are the ones you'll use most:
/model switches between available models and reasoning effort levels (low, medium, high). /fast increases execution speed by about 1.5x at the cost of higher token usage. /ide transfers the current session to the Codex IDE extension. /permission adjusts the approval policy,ask for approval, approve for sensitive actions, or grant full access. /memories accesses stored context for recurring tasks. /skills lists and invokes available skills. /hooks configures automated pre/post-task commands. /resume continues a previous session from history. /delete permanently removes a session. /init scaffolds an AGENTS.md file with baseline instructions and conventions. /status shows token usage, rolling window status, and weekly limit details. /exit ends the session, and /logout signs you out.
Headless Automation with codex exec:
The command codex exec (alias: codex e) enables completely non-interactive execution. This is essential for automation environments where no human interaction exists, such as CI/CD pipelines.
Here's an example of deploying Codex into a GitHub Actions workflow for automated code review:
You'd create a workflow file that triggers on pull requests, sets the OPENAI_API_KEY environment variable from GitHub Secrets, installs Codex, and runs a review command. The agent reviews the PR for bugs, logic errors, and missing test coverage, then reports back. No human presence is required.
This headless capability transforms Codex from an interactive tool into an automated team member that works alongside your existing CI/CD infrastructure.
Security and Sandboxing
Codex enforces safety through a layered sandbox architecture. When Codex runs inside a project, it establishes an isolated environment that restricts file access and system modifications to that project's directory. Any action attempting to access files, APIs, or applications outside the defined project scope triggers a user approval prompt.
On macOS, the OS-level "Seatbelt" mechanism enforces these restrictions. The policies defined by Codex are transferred to the host operating system, creating a genuine security boundary rather than a software illusion.
Configuration Files:
The global config.toml file lives in your home directory at ~/.codex/config.toml and affects all projects. A project-level config.toml can override global settings, but only if the project is marked "trusted" in the global config. This prevents untrusted repositories from injecting arbitrary configuration.
Here's an example global configuration:
model = "gpt-5.4"
reasoning_effort = "medium"
sandbox_mode = "read-only"
approval_policy = "on-request"
Custom Profiles:
You can create additional config files to define specialized model profiles. For example, a fast.config.toml might use a lighter model for quick tasks. Invoke it with codex --profile fast "task description". This lets you match the model to the task complexity without manually switching settings.
Security Recommendations:
Keep approval_policy set to "on-request" unless you fully trust the task and project environment. Store API keys and secrets in environment variables, not directly in config files. Use project-level sandbox policies for sensitive codebases. Review actions when Codex requests access to external resources or system utilities. These habits keep your environment secure while still allowing Codex to be productive.
AGENTS.md: Defining Project Instructions
AGENTS.md is the core instruction file that guides Codex behavior within a specific repository. It functions as a rulebook describing project conventions, tech stack, file structure, and operational commands. Think of it as the onboarding document for AI agents,the same way README.md explains a project to human developers, AGENTS.md explains it to Codex.
You can generate a base file with /init, then customize it to your project's needs. A well-crafted AGENTS.md includes several key elements:
Repository Guidelines: The high-level project philosophy and objectives.
Project Structure: The expected folder hierarchy, like server/ for backend, client/ for frontend, and test/ for tests.
Useful Commands: The development commands Codex must use, such as npm run dev, npm run test, and npm run build.
Coding Style: Conventions for naming, formatting, and code organization.
Subtask Instructions: Specific rules for commit messages, environment files, and test execution.
Here's an example for a URL shortener project:
# Repository Guidelines for Link Forge
## Project Overview
Full-stack URL shortener built with:
- Backend: Express.js (Node.js)
- Frontend: React.js (Vite)
- Database: PostgreSQL (Neon Serverless)
## Structure
- server/ , Express API and services
- client/ , React application
- test/ , Test files (Jest)
## Commands
- npm install , Install dependencies
- npm run dev , Start development server
- npm run test , Run test suite
- npm run build , Compile production bundle
## Coding Conventions
- Use ES6+ standards
- Name files: camelCase for JS modules
- Always import React and use hooks for functional components
## Rules
- Always run tests before committing.
- Add new API endpoints to server.js routing table.
- Use environment variables for any external service credentials.
By defining AGENTS.md, you transform Codex from a generic assistant into a virtual contributor that internalizes project-specific requirements and follows them consistently. This file should be checked into version control and shared with your team, giving every agent the same baseline knowledge.
Subagents: Parallel Task Delegation
Codex supports subagent delegation, allowing the main agent to spawn multiple child agents to handle independent tasks concurrently. This is how you build full-stack applications in minutes instead of hours.
How Subagents Work:
The main agent receives your primary request and breaks it into subtasks. It then spawns subagents, each with a specific responsibility,one for frontend, one for backend, one for testing and documentation. The subagents work simultaneously, preventing bottlenecks and reducing total build time. Once all subagents finish, the main agent merges outputs and performs final consistency checks, like running combined tests or builds.
Behavioral Distinction:
Claude Code automatically uses subagents when it detects task complexity or long context requirements. Codex requires explicit user instruction. You need to say something like, "Use subagents to build this. Split work into three independent tasks." This gives you more control but also requires more deliberate prompting.
Monitoring Subagents:
Use the /agent command to switch between active agent threads and inspect their progress in real time. You can watch each subagent work independently and intervene if something goes wrong.
Canonical Use Case:
A prompt like "Build a URL shortener project using subagents. Split the work into independent tasks: one agent should create the frontend, another should build the backend, and another should prepare tests and documentation. After they finish, integrate everything" results in three parallel agents running simultaneously. In practice, this completed a full-stack CRUD application,including frontend, backend, tests, and GitHub push,in approximately 7 minutes and 43 seconds.
Custom Subagent Files:
To make subagents reusable, create a custom definition file at .codex/agents/reviewer.toml:
name = "reviewer"
description = "Review my files in this project and report any potential bugs."
developer_instructions = """
Review code like a senior engineer. Prioritize:
- Correctness
- Security and behavior regressions
- Missing test coverage
Report findings with specific file paths and line numbers.
"""
model = "gpt-5.5"
reasoning_effort = "medium"
sandbox_mode = "read-only"
Once created, you can invoke this reviewer agent by name in any session. This is powerful for maintaining code quality standards across multiple projects.
Skills: Reusable Workflow Templates
Skills are a mechanism for codifying recurring workflows into selectable instructions. When you perform a repetitive task,like adding new API routes,you can create a skill once, then invoke it by name in future prompts. Skills complement subagents by focusing on methodology rather than delegation.
Skill Creation File Structure:
Skills live in a specific directory structure:
.codex/
└── agents/
└── skills/
└── api-endpoint/
└── SKILL.md
SKILL.md Format:
The skill definition uses YAML frontmatter followed by instructions:
---
name: api-endpoint
description: Add a new Express route in this project following our conventions.
---
## Steps
1. Add the route to src/server.js using express.Router().
2. Follow the existing response shape:
- Success: { data:
- Failure: { error: " }
3. Use the storage logic from src/services/store.js.
4. Ensure the endpoint is tested via npm run test.
## Notes
- File naming: camelCase (e.g., deleteShortCode.js).
- Do not commit unless all tests pass.
Invocation Patterns:
You can invoke a skill explicitly: "Use the api-endpoint skill to create a delete route." Or you can rely on implicit invocation: "Add a delete route for short codes." In the implicit case, Codex automatically matches the task description to the skill's description field and applies the skill if the task aligns. The description field is crucial,it's what enables this semantic matching.
Skills save significant time and ensure that generated code consistently follows your project's best practices. Any task you perform more than twice is a candidate for a skill.
MCP: Model Context Protocol Integration
MCP is the standard framework that enables Codex to connect with arbitrary external applications. Plugins are essentially pre-configured MCP servers. The architecture has three components: the Model (the AI assistant), the Context (the resources and data needed to act), and the Protocol (the rules defining communication).
Example Connections:
Notion connects remotely via HTTPS/SSE with OAuth authentication. Figma uses remote connection with OAuth. GitHub uses a bearer token or personal access token. Neon (PostgreSQL) uses a plugin with OAuth via the Neon console. Vercel uses CLI plus plugin authentication. Excalidraw+ uses a remote connection with an API key.
Setting Up an MCP Server:
First, locate the MCP URL or command from the official application or community registry. Then add the MCP server to the global ~/.codex/config.toml:
model = "gpt-5.4"
reasoning_effort = "medium"
[mcp_servers.notion]
url = "https://mcp.notion.com/mcp"
Authenticate using codex mcp login
CLI Command Example:
codex mcp add github --url https://api.githubcopilot.com/mcp/ --header "Authorization: Bearer
MCP is what makes Codex a complete development environment rather than just a code generator. It bridges the gap between the agent and the services you use daily.
Git Worktrees: Concurrent Branch Development
Git worktrees solve the multi-branch collaboration challenge. Normally, switching branches in a single working directory is conflict-prone and disruptive. Worktrees allow you to check out multiple branches to different directories simultaneously.
How Worktrees Work:
Creating a worktree with git worktree add ../link-forge-one -b delete-ui creates a separate directory with its own working copy and branch. Independent terminals can run Codex sessions in each worktree without interfering with each other. When work is complete, merge the branch via a standard PR and remove the worktree with git worktree remove
In the Desktop Application:
Select the "New Work Tree" option under the project's local environment menu. Configure environment variables or select from saved environments. Give the task to Codex,it automatically creates a branch in the new worktree and commits changes. After completion, "hand off" the worktree's branch to the main directory, create a Pull Request, and merge into main.
Worktrees allow a fork-and-merge flow that's clean even when an agent is involved. You get the safety of experimentation combined with the ability to merge parallel features without chaos.
Building a Full-Stack Application: A Complete Case Study
The most effective way to understand Codex is through application construction. Let's walk through building a URL shortener application end-to-end.
Step 1: Repository Setup
Create a local folder, add a README.md, and push to GitHub. Authenticate with gh auth login and let Codex handle the git operations. It will add files, commit, and create the repository at the chosen URL.
Step 2: Instruction File
Run /init to scaffold AGENTS.md, then customize it to your project conventions. Specify the structure, commands, and coding style as we covered earlier.
Step 3: Dependencies
Install via npm or git commands. Codex handles this automatically when you specify the tech stack.
Step 4: Backend and Frontend Development
Use subagents to parallelize the work. One agent builds the frontend, another builds the backend, and a third prepares tests and documentation. The main agent integrates everything and runs combined tests.
Step 5: Data Persistence
Connect to a production database like Neon serverless Postgres via the Codex plugin. Replace in-memory storage with real database tables. A prompt like "Use the @neon/postgres plugin to shift my in-memory database to Neon serverless Postgres. Create the short_url table and configure environment variables" triggers the migration.
Step 6: Production Testing
Run the app locally and verify CRUD operations,create, read, delete. Confirm data appears in the remote database. This validates that the entire stack works before deployment.
Step 7: Deployment
Deploy to a hosting platform like Vercel using the @vercel plugin. Handle platform-compatibility issues as they arise. For example, Vercel cannot deploy a standalone Express backend directly,Codex converts it to serverless functions. Short URLs might use localhost instead of the live URL,instruct Codex to replace the base URL with the Vercel deployment URL. The delete route might not work initially,confirm the backend and frontend are pointing to the same API endpoint.
Performance Metrics:
Full backend plus frontend build takes about 7 minutes with subagents. API endpoint creation takes about 1 minute 16 seconds. Database migration takes about 3 minutes. Deployment iterations take about 14 seconds each for bug fixes.
This case study demonstrates Codex's ability to handle the entire application lifecycle,from repository creation to production deployment,with minimal human intervention.
Extended Workflow Tips
Choosing Among Models:
Codex allows switching models per conversation with /model. Use the most capable model for complex integrations and a lighter model for simple tasks like renaming variables or inspecting files. Reasoning effort,low, medium, high,corresponds to how much foresight the model invests in planning. Higher reasoning yields cleaner code but increases token cost.
Permission Management:
During a session, you can switch between "ask for approval" for expected permission before external actions, "approve for me" for automatic approval of non-sensitive actions, and "full access" for complete autonomy. When you trust Codex and the task is well-defined, full access avoids dozens of intermediate permission prompts during long deployments.
Logging and Observability:
Use the OpenAI platform dashboard for overall usage, /status for session snapshots, and third-party tools like Session Watcher for real-time alerts. Tracking your usage helps you choose the right profiles and avoid unexpected interruptions.
Conclusion: Making Codex Work for You
Codex represents a fundamental shift in how software gets built. It's not a smarter autocomplete,it's an autonomous worker that can plan, execute, test, and deploy. The architecture of reasoning, acting, and memory creates a loop that recovers from errors without human intervention, and the tool ecosystem around it,subagents, skills, MCP, worktrees,makes it a complete development environment.
The operational strengths of Codex lie in speed and token efficiency. It's ideal for routine tasks, bulk code generation, and cost-sensitive projects. The tradeoff is that complex, novel problems may require more iterations than a more deliberative agent. The key is matching the tool to the task rather than relying on brand loyalty.
Start with a disposable project. Configure your sandbox, create an AGENTS.md, experiment with subagents, and build something end-to-end. Codify repetitive tasks into skills. Connect the external tools you use daily through MCP. Monitor your token usage and adjust your approach as you learn.
The foundations you've learned here,how agents reason, act, and integrate with systems,will become as essential to software professionals as version control and agile methodologies. The tools will evolve, but the principles of agentic development are here to stay. The sooner you internalize them, the more effective you'll be at directing this new class of autonomous workers.
Go build something.
Frequently Asked Questions
Fundamentals
What is OpenAI Codex?
Codex is an AI agent built by OpenAI that turns natural-language instructions into real action. Instead of only generating text, Codex reads and modifies files, runs commands, calls external services, creates pull requests, deploys applications, and manages workflows in both local and cloud environments.
Codex is optimized for software engineering, but it can also automate non-coding tasks through plugins and tools. It plans, takes action, observes results, and retries until a task is complete. You can access Codex through a desktop app, a web interface, a CLI tool, or an IDE extension. The underlying models are trained specifically to handle coding workflows, which makes Codex especially effective for developers, though non-technical users can also benefit from its automation capabilities.
How does Codex work as an AI agent?
Codex follows a simple but effective cycle: reason, act, observe, and repeat. First, it analyzes the task and decides what steps are necessary. Then it uses tools to perform actions that move the task forward. Next, it reads the result of each action. Finally, it continues iterating until the requested outcome is achieved.
This is called a ReAct loop , Reasoning plus Acting. For example, if you ask "What is the weather in my city?" Codex first plans: locate your city, fetch weather information, and summarize the result. Then it uses a location tool, calls a weather API, and presents the response. If a step fails, such as a network error, it automatically retries or adjusts its approach rather than stopping and asking for help.
What is the ReAct framework behind Codex?
ReAct stands for Reasoning and Acting. It is the pattern that drives Codex's behavior as an agent. The framework breaks down into three phases: reason, act, and observe. In the reasoning phase, Codex breaks your request into steps and identifies which tools it needs. In the acting phase, it calls the appropriate tool , a shell command, a file editor, an API call, or any registered MCP server. In the observing phase, it reads the result and shifts back into reasoning to update its plan.
The loop continues until the task completes successfully or safety limits block it. This is what separates Codex from a simple chatbot. A chatbot gives you text and stops. Codex gives you text, then goes and does the work, checks the result, fixes errors, and comes back with a finished outcome.
What is the agentic loop?
The agentic loop is the automated process that keeps Codex working through errors without human intervention. When Codex runs into a failure mid-task, it does not stop and wait. It rereads the original instructions, reviews the `AGENTS.md` project guide, attempts the action again, or changes its approach entirely. It continues until a success criterion is reached or the environment's safety limits block it.
You do not need to explain error messages back to Codex. You simply watch as it self-corrects and continues. This is especially useful in coding workflows. If a test fails, Codex reads the failure output, re-plans the fix, makes adjustments, and re-runs the test. The agentic loop is what makes Codex feel autonomous rather than reactive.
What are "tools" in Codex?
Tools are external programs, services, or instructions that let Codex access resources beyond its immediate environment. They include shell commands and local scripts, file system access for reading and editing code, APIs and web services, plugins for platforms like GitHub, Notion, Neon, Vercel, and Figma, and MCP servers that connect Codex to custom applications.
Tools are what enable Codex to do more than generate code. They let it interact with your project, your computer, and the wider internet. Without tools, Codex would be just another text generator. With tools, it becomes an agent that can actually execute work.
How does Codex retain context and memory?
Codex has both short-term and long-term memory. Short-term memory comes from the current session. Codex remembers the conversation and the work it has done so far within that session. Long-term memory comes from persistent files such as `AGENTS.md`, skills, custom subagent definitions, and configuration files.
This means when you ask Codex to perform a similar task later, it can reuse instructions and patterns instead of starting from scratch. It can also resume previous sessions using the `/resume` command. The combination of short-term and long-term memory is what makes Codex consistent across multiple interactions with the same project.
Is Codex only for software developers?
No. Codex can handle many everyday automation tasks. It can send emails, open applications, create documents, or interact with websites if the right plugins or permissions are installed. However, Codex is especially strong in software engineering. OpenAI trains Codex on coding-focused models, so it excels at reading codebases, fixing bugs, writing tests, creating branches, and deploying applications.
A non-technical user can use Codex, but the results may be less polished outside of software-related workflows. If you are not a developer, you will get the most value from Codex by using it for automation tasks through plugins, scheduled tasks, and the desktop app's built-in features.
How does Codex compare to Claude Code, Cursor, or Copilot?
All modern coding agents share the same basic principles: they plan, act, and learn from results. The main differences are speed, reasoning depth, token efficiency, and execution environment. Codex is designed as a fast agent with a cloud environment. It tends to start acting quickly without spending excessive time on planning. This can lead to lower token usage and faster initial responses, but it may require more iterations to fix issues.
Tools like Claude Code often spend more time planning before acting, which can produce higher-quality output on the first attempt but consumes more tokens and takes longer. The right choice depends on your workflow. If you want to save tokens and your task is straightforward, Codex is ideal. If your task is complex and output quality matters more than cost, a more deliberate agent may be better.
Getting Started
What are the main ways to run Codex?
Codex can be used in four main environments. First, the desktop app, available from the Codex website, provides a full UI with tasks, plugins, sites, and scheduling. Second, the web interface, available through ChatGPT in the "Work" area, offers the same functions as the desktop app without installation. Third, the CLI, installed locally with npm or a package manager, is ideal for terminal-based workflows and automation. Fourth, the IDE extension integrates Codex directly into editors like VS Code.
Each interface works with the same underlying Codex engine, so you can choose whichever fits your workflow. The CLI is the most flexible for developers because it supports non-interactive commands for CI/CD pipelines. The desktop app is the most approachable for non-technical users.
How do I install the Codex CLI?
To install the Codex CLI, navigate to `chatgpt.com/codex` and copy the npm install command. Alternatively, check the Codex Changelog for the latest version and install it from there. First, verify that Node.js is installed by running `node -v` in your terminal. Then run the install command.
On first run, type `codex` and follow the authorization prompts. You can sign in with your ChatGPT account, use a device code, or use your own API key. Once inside, you will see the interactive terminal UI with the model name and your current directory. The CLI is the most powerful option because it runs in any terminal, including CI/CD pipelines.
What can I do with the Codex desktop app?
The Codex desktop app includes many features. You can create a New Task for one-time work or run multiple tasks in parallel. You can Schedule Task for recurring operations like daily summaries. The Plugins section lets you install integrations for GitHub, Notion, Neon, Vercel, computer use, browsers, and more. The Sites feature turns an idea into a live website without manual deployment. The Pull Requests view lets you review and manage GitHub pull requests. You also get a standard Chat panel, Projects for organizing work around repositories, and Appshot for capturing screenshots into chat.
The app also provides usage tracking, force resets, and a Showpad widget that shows what Codex is currently doing. Remote Connections let you control your computer from another device, and Work Trees create isolated working directories for different branches.
What is Appshot and how do I use it?
Appshot is a feature in the Codex desktop app that captures your current screen and pastes it as an image into a chat. You trigger it with a keyboard shortcut, such as pressing both Command keys on macOS. This is excellent for diagnosing UI issues because you can show Codex exactly what you see on your screen.
Instead of describing a visual bug in text, you capture it and let Codex see the problem directly. This is particularly useful for frontend work, design reviews, and any task where visual context matters. Appshot bridges the gap between what you see and what Codex needs to understand.
How do I schedule tasks in Codex?
The Codex desktop app includes a Schedule Task feature that lets you set up recurring tasks. You can configure tasks to run daily, weekly, or on custom schedules. For example, you could set up a task that runs every morning at 7:00 AM to summarize your calendar.
When creating a scheduled task, you set a priority, choose the model, and define the frequency. Codex then runs the task automatically at the specified times. This is useful for daily code reviews, weekly dependency checks, or any repeated workflow you want automated. Scheduled tasks work in the background, so you can continue doing other work while Codex handles the routine operations.
How do I authenticate Codex with GitHub?
To let Codex work with GitHub, you need to install the GitHub CLI and authenticate. Run `gh auth login` and follow the prompts. Choose GitHub.com, select HTTPS, and authenticate via your browser. Grant Codex sufficient permissions for repositories and organizations.
Once authenticated, Codex can create repositories, push commits, open pull requests, and manage branches on your behalf. This is essential for the full-stack workflow where Codex builds a project from scratch, pushes it to GitHub, and manages the entire git lifecycle. Without GitHub authentication, Codex is limited to local file operations only.
Pricing and Usage Limits
What pricing options are available for Codex?
Codex offers several access models. Free access lets you try Codex in some form, but certain features and web workflows require a paid plan. Subscription plans provide a set allocation of Codex usage each month. Lower-tier plans suit lightweight coding tasks, while higher-tier plans include access to the latest models and additional ChatGPT features like image and video generation. API-based billing lets you pay only for the tokens you consume, which is useful for controlling costs or building automated workflows.
Subscription plans vary by team size as well. For individual daily use, a standard paid plan is often sufficient. For multiple users, a Pro-style or team plan may be more appropriate. The right plan depends on how frequently you use Codex and how complex your tasks are.
How do Codex usage limits work?
Codex tracks usage by tokens, not by the number of messages. Two limits matter: the 5-hour rolling window limit and the weekly limit. The 5-hour limit resets gradually. Suppose you have 100% of the 5-hour limit available. At 9:00 AM, you use 60%. At 10:30 AM, you use another 20%. At 2:00 PM, the 60% from 9:00 AM rolls back, so your available limit becomes 80%. At 3:30 PM, the 20% from 10:30 AM also rolls back, restoring you to 100%.
The weekly limit is separate. If you exhaust your weekly limit, you may have to wait until the weekly reset even if your 5-hour rolling limit has recovered. Always monitor both limits to avoid interruptions.
How can I monitor my token usage?
There are several ways to track Codex usage. The OpenAI Platform usage page shows overall account usage and token consumption. The `/status` command in Codex CLI provides a snapshot of your current context, tokens used, and weekly limit status. The Codex app profile section shows your weekly usage and when it will reset. Third-party tools like Session Watcher for macOS provide real-time alerts and a visual dashboard.
Monitoring is important if you are working on large tasks or using multiple agents, because token exhaustion can interrupt a session mid-work. Make it a habit to check `/status` before starting a big task and periodically during long sessions.
Configuration and Safety
Certification
About the Certification
Become certified in building production software with OpenAI Codex. You'll prove you can direct AI agents to architect, code, test, and deploy a full-stack app,plus configure subagents and MCP for real workflows employers need.
Official Certification
Upon successful completion of the "Certification in Building Real Projects with AI Agents", you will receive a verifiable digital certificate. This certificate demonstrates your expertise in the subject matter covered in this course.
Benefits of Certification
- Enhance your professional credibility and stand out in the job market.
- Validate your skills and knowledge in cutting-edge AI technologies.
- Unlock new career opportunities in the rapidly growing AI field.
- Share your achievement on your resume, LinkedIn, and other professional platforms.
How to complete your certification successfully?
To earn your certification, you’ll need to complete all video lessons, study the guide carefully, and review the FAQ. After that, you’ll be prepared to pass the certification requirements.
Other AI Video Courses
Video Course: What is Generative AI and how does it work?

Video Course: How to Use ChatGPT from Beginner to Professional
Video Course: How to Use Google Gemini for Google Workspace to Boost Productivity

Video Course: How to Use Claude 3.7 AI - Tips for Beginners!

Video Course: ChatGPT for Data Analytics: Full Course - from Beginners to Professional

Video Course: Generating Images and photos With ChatGPT?

Video Course: Generating Images & Photo's with MidJourney

Video Course: Generating Design's with Microsoft Designer and AI

Video Course: Generating Design's with Canva.com and AI
Join 20,000+ Professionals, Using AI to transform their Careers
Join professionals who didn’t just adapt, they thrived. You can too, with AI training designed for your job.