
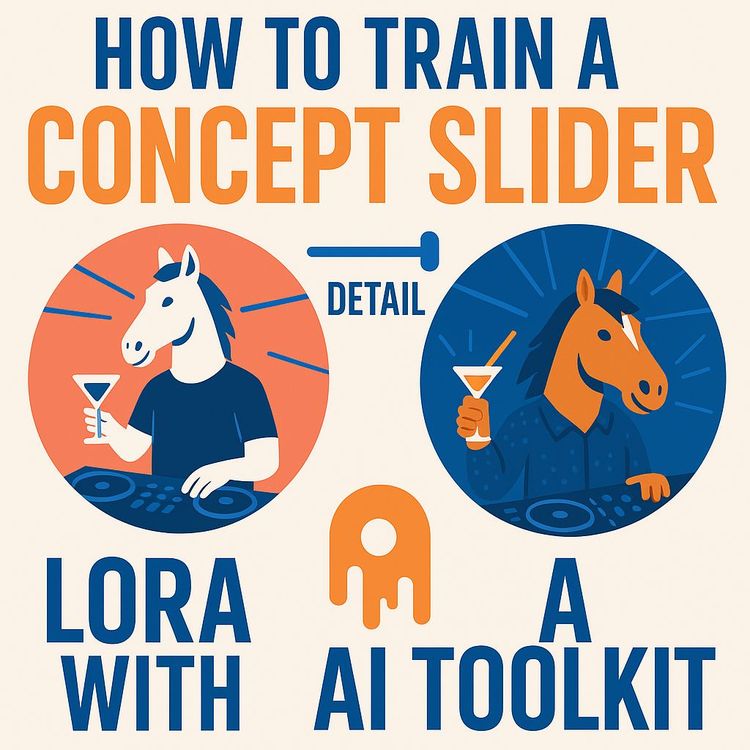
Train Concept Slider LoRA for AI Image Generation with AI Toolkit (Video Course)
Build bidirectional sliders that steer any model along a single axis,detail, age, mood, style,in minutes. Use tiny datasets, low-rank training, and anchors to keep scenes stable,no wrestling prompts. Step by step in AI Toolkit, from training to deployment.
Related Certification: Certification in Training and Applying Concept Slider LoRA for Image Generation
Also includes Access to All:
What You Will Learn
- How Concept Slider LoRAs shift existing model bias bidirectionally (knowledge-shifting).
- How to craft positive/negative prompts, anchors, optional target class, and tiny datasets.
- How to set practical hyperparameters (rank 4, lr ~1e-3, 300-500 steps) and run training in AI Toolkit.
- How to sample with fixed seeds, inspect weight grids, and iterate fast inside AI Toolkit.
- How to diagnose and neutralize tertiary hallucinations via prompt edits and anchor tuning.
- How to evaluate, version, and deploy sliders (weight ranges, UI exposure, production tips).
Study Guide
Train a Concept Slider LoRA with AI Toolkit
There are two ways to get better with AI. You can collect more data and build bigger models. Or you can learn to work with the model's existing knowledge and bend it to your goals. Concept Slider LoRAs are how you do the second one. You're not teaching the model a new subject or style. You're steering what it already knows along a clean, controllable axis: less to more detail, young to old, happy to sad, simple to intricate. One slider. Bidirectional control. Real-time results.
This course walks you through the complete process of training and deploying a Concept Slider LoRA inside AI Toolkit. You'll learn why it's fast, how it works, how to set it up, and how to fix the weird side effects that always show up (and how to make those side effects work for you). You'll build sliders that let you sculpt an image without wrestling prompts. You'll understand the logic behind the method so you can adapt it to any model, any concept, any workflow.
What You Will Learn
- The principle behind Concept Sliders: shifting internal biases instead of teaching new facts
- The core components of a slider: positive prompt, negative prompt, target class, and anchor class
- How to design datasets (only a handful of images needed), set training hyperparameters, and iterate fast
- A step-by-step workflow inside AI Toolkit: from dataset to sampling to refinement
- How to identify and correct tertiary hallucinations (unwanted shifts in contrast, color, or composition)
- How to evaluate, version, and deploy your slider in production workflows
- How to build sliders for detail, age, mood, and style with repeatable methods
The Mental Model: Knowledge Shifting, Not Knowledge Adding
Traditional LoRAs teach the model something new (a character, a style). A Concept Slider LoRA does the opposite. It moves the model's attention between two concepts it already understands. The slider learns the difference between a positive prompt and a negative prompt. When you apply it with a positive weight, the model leans toward the positive concept. Apply a negative weight, it leans toward the opposite concept. Same file. Two directions.
The bedrock idea: if you can erase a concept, you can enhance it. Inverting the LoRA enhances the opposite. You're not changing the model's resolution or giving it new skills; you're changing its internal bias along one conceptual spectrum. That's why this is fast, VRAM-light, and powerful.
Examples:
- Detail Slider: "low detail, flat, simple" ↔ "high detail, intricate, patterned." Weight -1.0 flattens and simplifies; weight +1.0 adds intricacy and pattern density.
- Emotion Slider: "sad, frowning, downcast" ↔ "happy, smiling, upbeat." Negative weight turns the vibe somber; positive weight turns it cheerful.
How a Concept Slider Works
Training isolates the latent space that separates your two prompts. The LoRA learns a small transformation that pushes generations toward the positive prompt and away from the negative prompt, with an anchor to stabilize everything else. Apply the LoRA at inference with a weight. Positive enhances the positive side. Negative enhances the negative side. Zero removes its effect.
Core components you define:
- Target Class: An optional subject category the slider should focus on, like "person," "car," or "building." Leave it blank for a global effect (e.g., more or less detail everywhere).
- Positive Prompt: A descriptive prompt for the + side. Think: what should "more" feel like?
- Negative Prompt: The descriptive opposite for the - side. What should "less" feel like?
- Anchor Class: A regularizer. The reference the model keeps constant so only the target concept moves. This prevents collateral changes in lighting, palette, or composition.
Examples:
- Target Class (focused): "person" for a muscle-mass slider; "car" for a gloss vs. matte paint slider.
- Target Class (global): Leave blank for a universal "detail" or "contrast" slider affecting the whole image.
- Anchor Class (practical): "plain white background" to lock background mood; "bright room" to keep illumination neutral when altering skin tone or clothing darkness.
- Positive/Negative Prompts (style): "oil painting, textured, brush strokes" ↔ "flat vector art, minimal, simple shapes."
Why Concept Sliders Are Efficient
Because you're shifting what the model already knows, you don't need a big dataset, a high-rank LoRA, or long training. The model's text encoder already understands your words. You exploit that. That's why aggressive learning rates, low ranks, and a few hundred steps are enough. This is more prompt engineering than data engineering.
Examples:
- A set of 6-10 generic images generated by the same base model is typically enough.
- A LoRA rank of 4 can outperform higher ranks for this task because you want a single, clean axis,not a wide, entangled transformation.
Data and Model Requirements
Use a small, general dataset. You are not collecting "opposing poles" imagery. You are providing a neutral stage where the prompts can do the work.
Dataset:
- 6-10 images that are relevant to your target class or leave the effect global.
- Ideally generated by the base model you're training on. Same model = same priors = smoother training.
- Simple captions like "photo of a person," "a car on a street," "portrait in a studio." You don't need detailed labels because the prompts define the axis.
Model compatibility:
- Works across diffusion models like SD 1.5 and SDXL.
- Works with LLM-based vision models as well (e.g., Quinn), since you're leveraging the text encoder's conceptual understanding.
Examples:
- For a clothing texture slider, generate 8 neutral portraits wearing simple clothing on a plain background with the base model.
- For a landscape realism slider, generate 8 scenic images (mountains, forests, coastlines) in neutral midday lighting.
Key Training Parameters
These defaults are a practical starting point:
- LoRA Rank: 4 (low rank gives a tight, single-axis effect)
- Learning Rate: 1e-3 (aggressive to move fast in a known concept space)
- Training Steps: 300-500 (you can stop early if results stabilize)
- Sample/Checkpoint Frequency: every 25 steps (frequent inspection is the superpower here)
- Resolution: 512×512 (you're moving abstract concepts, not pixel-perfect detail)
Examples:
- Sample grids at steps 25, 50, 75, 100, then every 50 steps. Monitor the arc from -2.0 to +2.0 weights to catch early drift.
- If you see collapse or overshoot, lower LR to 5e-4 or stop training and roll back to an earlier checkpoint.
Set Up the Project in AI Toolkit
You'll configure four things: data, prompts, training parameters, and sampling. Keep it simple. Iterate fast.
Step 1 , Create a lightweight dataset
- Generate 6-10 images from the base model you'll train on (portraits if targeting "person," objects if targeting "car," or mixed scenes for global effects).
- Caption simply ("portrait photo of a person, studio," "white car on a street").
Step 2 , Define your slider axis
- Positive prompt: the "more" description (e.g., "high detail, intricate designs, patterns, ornate, dense texture").
- Negative prompt: the "less" description (e.g., "low detail, simple, plain design, flat, minimal").
- Anchor class: a neutral baseline (e.g., "plain white background," "studio portrait, even lighting").
- Target class (optional): specify if you want the effect to focus on a subject, like "person" or "car."
Step 3 , Configure training parameters
- Rank: 4
- LR: 1e-3
- Steps: 300-500
- Resolution: 512×512
- Save/Sample every 25 steps
Step 4 , Configure sampling for evaluation
- Fix a seed to keep content identical across weights.
- Use a single test prompt relevant to your axis.
- Generate at weights: -2.0, -1.0, -0.5, 0.5, 1.0, 2.0.
- Keep other settings constant.
Step 5 , Train and watch
- Start the job.
- Inspect sample grids every 25-50 steps.
- Note unwanted shifts (color, contrast, composition). Plan corrective prompt edits.
Tips:
- Version your prompts. Save each change with a note about what you're correcting.
- Make one change at a time so you can attribute improvements to a single edit.
Sampling Strategy: Make the Slider Visible
The fastest way to diagnose a slider is to see the full spectrum at once. Use a fixed seed, the same prompt, and a set of weights from negative to positive. The image content should remain identical; only the concept should change. If other things change, that's a hallucination you can fix.
Examples:
- For a detail slider: Prompt "portrait of a woman, studio lighting, plain background." Weights -2.0, -1.0, -0.5, 0.5, 1.0, 2.0. Watch clothing texture, hair strand density, and accessory complexity change while lighting and color stay constant.
- For an age slider: Prompt "headshot of a person, neutral expression, even lighting." Look for wrinkles, hair color, and facial structure changes without shifts in exposure or hue.
Iterative Refinement: Observe, Identify, Correct
Perfect sliders are built through micro-iterations. After each sampling round, you do three things:
- Observe: Compare images across weights. Look for unexpected differences beyond your concept.
- Identify: Name the hallucination (contrast jump, color cast, composition drift, lighting shift, unintended texture changes).
- Correct: Add the hallucinated property to the opposite prompt to neutralize the association, or tune the anchor to hold the scene steady.
Examples of corrections:
- If +side is too dark, add "dark, high contrast" to the negative prompt to decouple detail from darkness.
- If -side is too yellow, add "sepia" to the negative prompt or "cool tones" to the positive prompt. Change one side at a time.
Case Study: Building a Detail Slider for the Quinn Model
Initial configuration
- Positive Prompt: "high detail, intricate designs, fancy clothing, extreme detail, patterns."
- Negative Prompt: "simple, dull, plain design, low detail, flat design."
- Anchor: "plain white background."
Problem 1 , Contrast drift
High-detail images became darker and high-contrast; low-detail images washed out. The model associated "high detail" with "high contrast."
Solution: Add "high contrast, dark" to the negative prompt. This counter-intuitive edit forces the model to decouple contrast from detail.
Problem 2 , Color bias
High detail skewed blueish; low detail skewed yellowish.
Solution: Add "sepia" to the negative prompt to trap the yellow association on the opposite side and pull color balance back to center.
Result
The final slider transitioned smoothly from -1.0 (flat, simple) to +1.0 (intricate, dense) with consistent contrast and color across the spectrum.
Concept Slider Components in Depth
Target Class
Use when you want the slider to act locally (e.g., "person," "car," "building"). Leave blank for global effects like detail or contrast across the entire image.
Examples:
- "person" for muscle size, age, or expression sliders,keeps backgrounds steady.
- "car" for gloss vs. matte paint,prevents the sky or road from being affected.
Positive and Negative Prompts
These define the axis. Write them like you're explaining it to a new hire who has to get it right on the first try. More descriptors are better than vague labels.
Examples:
- Photorealism slider: "sharp, realistic, natural lighting, true-to-life color, detailed skin texture" ↔ "stylized, painterly, simplified forms, soft edges, exaggerated color."
- Complexity slider: "busy, dense, ornate, intricate patterns, many small elements" ↔ "minimal, sparse, clean, few elements, large shapes."
Anchor Class
The seatbelt for your training. It tells the model what must not drift while you separate the concepts.
Examples:
- "bright, even studio lighting" when training skin tone or age to prevent global exposure shifts.
- "plain white background" to keep the background neutral while you adjust clothing complexity or pose dynamics.
Crafting the Conceptual Axis
Pick opposing prompts that the base model already understands well. If the model can't parse your words, your slider will be muddy. Aim for descriptors that are common in image datasets and widely used in generative prompts.
Examples:
- Age: "young, smooth skin, no wrinkles, vibrant" ↔ "elderly, wrinkles, age spots, gray hair."
- Mood: "joyful, smiling, upbeat, warm" ↔ "melancholic, frowning, somber, cool."
Best practices:
- Write more adjectives than you think you need; prune later.
- Avoid polar opposites that trigger major scene changes (e.g., "day" vs. "night") unless your anchor is strong enough to hold the rest constant.
Handling Tertiary Hallucinations
Side effects are part of the job. Expect them. Fix them in prompts.
Common hallucinations and fixes:
- Contrast drift: Add "high contrast, dark" to the opposite prompt; reinforce "even lighting" in the anchor.
- Color cast: Add "sepia," "cool tones," or "neutral color" strategically to the opposite prompt.
- Composition shift (camera angle, subject size): Add "centered composition, straight-on, medium shot" to the anchor.
- Sharpness/blur coupling: If +side adds sharpness and -side blurs, add "sharp detail" to the negative prompt or specify "consistent sharpness" in the anchor.
- Texture bleed: If +side adds busy background textures, constrain the anchor to "plain background, no patterns."
Examples:
- If a "happy ↔ sad" slider tilts the camera and widens the lens at +side, add "no tilt, 50mm lens equivalent" to the negative prompt and "neutral camera angle" to the anchor.
- If an "old ↔ young" slider darkens the scene on the old side, add "dark, moody" to the young (negative) prompt, and "bright, even lighting" to the anchor.
Training Methodology: Why Low Rank and High LR Work
A low-rank LoRA modifies a tiny subspace of the model's weights. For a single conceptual axis, that's perfect. High learning rates help the LoRA quickly carve out the difference between your prompts. Because you're not building a new style, you don't need a wide, expressive rank or long training schedules.
Examples:
- Rank 4 with LR 1e-3 reaches usable results in ~300 steps for a detail slider.
- Rank 4 with LR 5e-4 may be better for sensitive axes like skin tone or age to avoid overshooting.
Practical Walkthrough: Your First Slider in AI Toolkit
1) Define the axis
Pick something simple: detail, age, mood, or complexity.
2) Assemble 8 base-model images
Use the same base model you'll train. Keep scenes simple and consistent.
3) Set prompts
Positive, negative, anchor, and optionally target class. Write more adjectives than you think you need; you can refine later.
4) Hyperparameters
Rank 4, LR 1e-3, steps 400, resolution 512, sample/save every 25 steps.
5) Sampling grid
One prompt, fixed seed, weights: -2.0, -1.0, -0.5, 0.5, 1.0, 2.0.
6) Train and inspect
Open each sample grid. Compare left to right. Note issues.
7) Correct
Adjust prompts: add hallucinated property to the opposite side; strengthen anchor. Resume training or restart from a prior checkpoint.
Evaluating Slider Quality
A good slider changes exactly one thing along a spectrum and leaves everything else alone. Measure that visually and, when possible, with simple heuristics.
What to check:
- Consistency: Lighting, color, framing remain stable across weights.
- Monotonicity: The effect steadily increases/decreases as weights move from negative to positive.
- Reversibility: Negative and positive weights feel like opposites, not two different styles.
- Generalization: Works across different prompts and subjects within the target class.
Examples:
- For a detail slider, count pattern density on clothing at -1, 0, +1. It should increase smoothly.
- For an age slider, look for consistent background and lighting while facial features change predictably.
Advanced Prompt Engineering for Sliders
When a slider feels "entangled" (several things changing at once), tighten your prompts and anchor.
Strategies:
- Add disambiguators: Specify what must not change ("consistent lighting," "flat background," "straight-on view").
- Use controlled vocab: Favor common descriptors the model knows; avoid obscure adjectives.
- One change at a time: Edit only one of the three prompts between iterations to trace cause and effect.
Examples:
- If background patterns creep in at +side, add "plain background, no patterns" to the anchor, not the positive prompt.
- If saturation shifts with emotion, add "neutral saturation" to the negative prompt and "no color cast" to the anchor.
Additional Case Studies: From Concept to Control
Age Slider (Target Class: person)
- Positive (older): "elderly, wrinkles, gray hair, age spots, subtle sag, wisdom lines."
- Negative (younger): "youthful, smooth skin, no wrinkles, bright eyes, soft features."
- Anchor: "studio portrait, even lighting, plain background, centered composition."
Common hallucinations: Older becoming darker and more dramatic; younger becoming overexposed.
Fix: Add "dramatic, dark" to the younger side and reinforce "even lighting" in the anchor.
Emotion Slider (Target Class: person)
- Positive (happy): "smiling, joyful, lifted cheeks, warm presence."
- Negative (sad): "frowning, somber, downcast gaze, subdued."
- Anchor: "neutral camera angle, medium shot, consistent lighting."
Common hallucinations: "Happy" introduces Dutch angles; "sad" desaturates too much.
Fix: Add "no tilt, straight horizon" to the sad side; add "neutral saturation" to the anchor.
Style Slider (Global)
- Positive: "painterly, visible brush strokes, textured, artistic interpretation."
- Negative: "photorealistic, sharp edges, natural color, realistic shadows."
- Anchor: "consistent lighting, no background patterns."
Common hallucinations: Painterly adds sepia; photo adds blue cast.
Fix: Add "sepia" to the negative prompt and "cool tones" to the positive; then remove one if overcorrected.
Workflow Tips for Fast Iteration
- Short loops beat long marathons. Inspect every 25 steps and correct early.
- Keep a log. Note each change and the result. In a few iterations you'll see patterns you can reuse.
- Default to rank 4. Only increase if you truly need broader capacity (rare for a single axis).
- Try LR 1e-3 first. If the slider blows past the target (too strong, erratic), drop to 5e-4.
Examples:
- If after 150 steps you already have clean monotonic control, stop. Early checkpoints often generalize best.
- If after 300 steps the effect weakens, you may have regularized too hard. Loosen the anchor slightly.
Deployment: Using Your Slider in Production
At inference, load the LoRA and set the weight for the slider. Positive pushes toward the positive prompt concept; negative pushes toward the negative prompt. Zero removes the effect.
Integration tips:
- Name sliders descriptively: "detail-bidirectional-r4-s400."
- Document the tested weight range (e.g., -1.5 to +1.5) and known side effects outside that range.
- Combine with other LoRAs sparingly. Too many simultaneous adapters can create interference.
Examples:
- Creative app: Expose a UI slider from -2.0 to +2.0 for end users to dial detail, age, or mood in real time.
- Batch pipeline: For a product catalog, run a -0.5 detail to simplify backgrounds, or +0.7 to add texture to fabric shots.
Implications and Applications
Content creation
Artists and designers get granular control over elements like photorealism, age, emotion, and texture,without prompt gymnastics.
Examples:
- Create multiple on-brand styles from one base prompt by exposing sliders for detail, saturation, and texture.
- Rapid A/B testing: generate 5 variants at weights from -1.0 to +1.0 and let clients choose the exact feel.
User experience
Abstract complex prompt work into intuitive sliders so non-experts can steer outputs.
Examples:
- Add "mood" and "detail" sliders to a template-based generator so marketing teams can fine-tune assets quickly.
- In a photo editor, expose "realism ↔ illustration" as a single control that consistently keeps composition intact.
Research & development
Study how concepts live in latent space and how text encoders separate ideas.
Examples:
- Visualizing concept trajectories for "age," "texture," "lighting ratio."
- Stress-testing model biases by examining how sliders behave across demographic groups and scenes.
Education
Teach latent manipulation, LoRA fundamentals, and prompt engineering with hands-on sliders.
Examples:
- Classroom labs that compare high-rank style LoRAs vs. low-rank concept sliders.
- Demonstrations of iterative correction: students fix color and contrast drifts live.
Recommendations for Implementation
- Start with clear, opposing prompts; expect to iterate.
- Inspect samples every 25-50 steps; make small, deliberate edits.
- Use a constant seed across samples and weight sets (-2.0, -1.0, -0.5, 0.5, 1.0, 2.0) for clarity.
- Actively look for tertiary hallucinations and correct by adding counter terms to the opposite prompt.
- Default to rank 4 and LR 1e-3 for rapid cycles.
Examples:
- If a "texture" slider increases noise on backgrounds, add "clean background" to the anchor and "noise" to the negative prompt.
- For a "gloss ↔ matte" car paint slider, keep "studio lighting, neutral gray backdrop" in the anchor to stabilize reflections.
Troubleshooting Guide
Problem: The slider has little or no effect.
Causes: Prompts too vague; anchor overconstraining; LR too low.
Fix: Add stronger descriptors to positive/negative prompts; relax the anchor; increase LR to 1e-3; verify target class relevance.
Problem: The slider changes too many things at once.
Causes: Axis definitions entangled with color/lighting/composition.
Fix: Strengthen the anchor (add "consistent lighting, plain background, centered composition"); add hallucinated attributes to the opposite prompt.
Problem: The slider overshoots at high weights.
Causes: Aggressive LR or too many steps.
Fix: Use earlier checkpoint; cap UI range (e.g., -1.5 to +1.5); reduce LR or steps next time.
Problem: Color cast only appears on real photos, not model-generated samples.
Causes: Domain mismatch between training data (synthetic) and inference data (real).
Fix: Include a few real images in the dataset; reinforce "neutral color" in anchor; add opposite color terms to negative prompt.
Problem: Effect flips unpredictably across prompts.
Causes: Inconsistent anchors or prompts outside the model's vocabulary.
Fix: Use common descriptors; standardize anchor; reduce prompt complexity during evaluation.
Advanced Techniques
Multi-anchor stabilization
Use a composite anchor to lock several variables: "plain white background, even studio lighting, centered composition, medium shot."
Progressive anchoring
Start with a light anchor. If drift appears, strengthen the anchor. If the effect weakens, loosen it slightly.
Axis sharpening
If your slider feels mushy, add more discriminative descriptors to both sides. Make the axis clearer rather than increasing rank.
Weight calibration
Document safe ranges for each slider (-1.2 to +1.2 often feels natural). Expose a wider internal range for power users if needed.
Combining sliders
Chain a mood slider with a detail slider for rich control. Test interactions. Keep anchors compatible to avoid interference.
Examples:
- For a "texture density" slider that also increases contrast, set a second micro-slider (contrast control) or bake "even contrast" into the anchor.
- For a "vintage ↔ futuristic" slider, anchor composition and perspective so the effect focuses on materials, color, and UI elements.
Ethics and Bias Considerations
Sliders that touch human attributes (age, skin tone, facial features) can expose or amplify bias. Use anchors and prompts that preserve dignity, realism, and neutrality. Audit with diverse inputs and keep a record of what you tested.
Examples:
- For a skin tone slider, use "bright room, even lighting" as anchor so the scene doesn't get darker when skin tone changes.
- Evaluate with multiple demographics and backgrounds; ensure the slider modifies only the intended attribute.
Key Insights and Takeaways
- Concept Sliders shift existing knowledge; they don't teach new subjects. That's why they're fast and efficient.
- Training is an iterative prompt exercise more than a data exercise.
- Tertiary hallucinations are normal. Neutralize them by adding the undesired property to the opposite prompt.
- Low rank, small datasets, short runs, and frequent sampling are the practical defaults.
- Seeing the spectrum (-2 to +2) with a fixed seed is essential for diagnosing imbalances.
- If you can erase a concept, you can enhance it; invert the LoRA to enhance its opposite.
- You're not changing resolution or adding detail out of nowhere; you're moving bias along a conceptual axis.
Practice: Self-Check Questions
Multiple Choice
1) Why is a low LoRA rank (e.g., 4) suitable?
- A) To save disk space
- B) Because you're shifting existing knowledge, not learning complex new information
- C) To make training slower and more stable
- D) Because it only works on 512×512 images
Answer: B
2) What's the primary purpose of the anchor class prompt?
- A) Define the main subject
- B) Add extra detail
- C) Regularize training and prevent unwanted global changes
- D) Set the negative pole
Answer: C
3) You're training a "happy" slider. At +1.0 the image also gets brighter. How do you correct this?
- A) Add "bright lighting" to the happy prompt
- B) Add "bright lighting" to the sad prompt
- C) Increase LoRA rank to 128
- D) Decrease learning rate
Answer: B
Short Answer
- What's the difference in dataset requirements between a traditional character LoRA and a Concept Slider LoRA?
- How do positive and negative prompts work together to define a single axis?
Discussion
- Propose three novel sliders (e.g., "vintage ↔ futuristic," "serene ↔ chaotic," "matte ↔ glossy"). For one, write initial positive, negative, and anchor prompts.
- Why is a perfect antonym pair (like "day" vs. "night") often not enough for a clean slider without a strong anchor?
From Learning to Leverage: How to Use This Daily
- Build your first slider in under an hour: pick detail, prepare 8 images, set prompts, run 300 steps, fix two hallucinations, ship a v1.
- Add the slider to your workflow UI so teams can dial it in without prompt edits.
- Grow a library: detail, age, mood, realism, texture. Document tested ranges, known caveats, and best anchors.
Examples:
- Marketing workflow: A "realism ↔ illustration" slider for social graphics lets designers rapidly tune campaign creative for different channels.
- Product photography: A "texture density" slider creates subtle variations of fabric detail for ecommerce without re-shooting.
Comprehensive Checklist Before You Ship
- Axis clarity: Prompts clearly define opposite ends.
- Anchor stability: Lighting, background, and composition remain constant across weights.
- Monotonic effect: Changes increase smoothly in both directions.
- Bias audit: Tested across varied subjects and contexts.
- Range defined: Recommended min/max weights documented.
- Versioning: Model name encodes axis, rank, steps; prompt set logged.
Conclusion: Precision Beats Brute Force
A Concept Slider LoRA turns vague prompt wishes into a precise control you can hand to anyone. You train on the difference between two prompts, lock the rest of the scene with an anchor, and iterate until the spectrum is clean. Because you're pushing around knowledge that's already there, the process is light: a handful of images, a tiny rank, a few hundred steps, and constant sampling. The quality of your slider comes from your ability to diagnose and neutralize side effects,add the unwanted attribute to the opposite prompt, strengthen the anchor, and keep going.
Build one slider. Then build three. Create a small library of reliable controls that you can stack for complex art direction without prompt thrashing. This is how you move from guessing to directing. From hoping to deciding. And once you feel that control, you won't go back to wrestling with prompts again.
Final Reminder:
- Start with clear opposing prompts and a simple anchor.
- Train fast, sample often, iterate deliberately.
- Always visualize weights across the full range with a fixed seed.
- If you can erase it, you can enhance it. Invert to enhance the opposite. That's the slider mindset.
Frequently Asked Questions
This FAQ focuses on the most common questions about training a Concept Slider LoRA with AI Toolkit,from setup and prompts to troubleshooting and business use. It's built to reduce guesswork, help you ship useful sliders fast, and avoid pitfalls that waste compute and time.
Goal:
Give you clear, practical answers you can act on immediately.
What is a Concept Slider LoRA?
Definition:
A Concept Slider LoRA is a lightweight model add-on that lets you move an image along a conceptual axis by changing the LoRA weight from negative to positive. Rather than teaching a model a new subject or style, it shifts the model's existing understanding between two poles (e.g., low detail ↔ high detail).
How it feels in use:
Apply the LoRA at +1.0 and you get more of the positive concept; apply at -1.0 and you get more of the negative concept. One LoRA controls both directions, so you don't maintain two separate files.
Example:
Train a "detail" slider. Negative weights simplify; positive weights add intricacy. This gives you precise, reversible control during generation without re-prompting or swapping models.
How does a Concept Slider LoRA differ from a standard LoRA?
Purpose:
Standard LoRAs teach new subjects/styles; sliders shift what the model already knows along an axis (e.g., happy ↔ sad).
Data:
Standard LoRAs need curated examples of the new concept. Sliders use a small, general dataset because the learning target is the prompt-defined axis, not new visual features.
Training:
Slider training separates and amplifies prompt-defined concepts using internal predictions; it doesn't depend on labeled pairs.
Application:
Standard LoRAs are typically used with positive weights. Sliders are intended for both positive and negative weights to "slide" between poles.
What is AI Toolkit?
Purpose-built UI:
AI Toolkit is an application that streamlines training for AI models, including a dedicated interface for Concept Slider LoRAs. It handles prompt setup, target computations, and training mechanics so you can focus on the conceptual axis and results.
Why it helps business users:
Fewer moving parts and sensible defaults mean faster iteration cycles and less technical overhead. You can spin up sliders, sample them at multiple weights, and adjust prompts mid-training without writing code.
Outcome:
Reliable, repeatable slider training that your team can document, share, and reuse.
What AI models are compatible with Concept Slider training?
Model-agnostic:
Sliders work across diffusion models that use text conditioning, including Stable Diffusion 1.5, SDXL, Quinn Image, and similar architectures.
Why it generalizes:
The method manipulates text-driven internal predictions rather than image-specific labels, so it adapts well to different backbones and encoders.
Video note:
In principle, video diffusion models can also benefit, but this use case is less tested and may need extra temporal checks to avoid flicker.
What are the hardware requirements for training a Concept Slider?
Efficient by design:
A single modern GPU with around 24 GB VRAM is more than enough; typical usage for 512x512 sits near 13-14 GB. You can often go lower with smaller batch sizes or mixed precision.
Cloud option:
If your local hardware is limited, use services like RunPod to run AI Toolkit and train remotely.
Business tip:
Calculate cost per usable slider. Because training is quick and data-light, the ROI is usually favorable compared to large fine-tunes.
Do I need to build a large or specialized dataset?
No heavy dataset:
You don't need separate "high" and "low" folders. A small set of generic images (about 6-10) is enough.
Best practice:
Generate these images from the same base model you'll train on, with simple captions like "photo of a person." This keeps outputs aligned with the model's native style and avoids data mismatch.
Why it works:
The training focuses on shifting conceptual weights defined by prompts,not learning new visual features,so large datasets add little value.
Why is a low image resolution like 512x512 often sufficient for training?
Concept over pixels:
Sliders adjust high-level biases attached to text concepts. You don't need high-resolution samples to teach pixel-level detail.
Benefits:
Lower VRAM, faster iterations, and more frequent sampling. That pace lets you correct issues early, which matters more than extra resolution.
When to go higher:
If your axis depends on fine texture (e.g., micro-patterns in fabrics), test 768+ once the core axis is clean at 512.
How does the training process for a Concept Slider work?
Multi-prediction targeting:
At each step, the system makes internal predictions for your Target Class, Positive Prompt, Negative Prompt, and Anchor Class (without updating weights) to compute a "target" direction.
Two-way learning:
The LoRA is updated to move images toward the Positive side at positive weights and toward the Negative side at negative weights by inverting the update. This builds a smooth trajectory between poles.
Result:
One LoRA file controls both directions of change, giving you flexible, reversible control in generation.
What are the key components of the Slider configuration?
Four fields:
Target Class, Positive Prompt, Negative Prompt, and Anchor Class.
Roles:
Target Class sets where the slider applies; Positive and Negative define the conceptual axis; Anchor stabilizes unrelated properties (lighting, composition, palette).
Tip:
Write prompts as clear descriptions, not just keywords,especially for models with strong text encoders like T5.
How do I use the Target Class field?
Scope control:
Target Class defines the subject the slider should affect (e.g., "person"). It generalizes to related terms (man, woman, child) the model already understands.
Global effect:
Leave it blank for global axes like "detail" or "contrast."
Example:
For an emotion slider that should only affect people, set Target Class to "person" so backgrounds and objects stay stable.
What is the purpose of the Positive Prompt and Negative Prompt?
Define the axis:
The Positive Prompt describes the + side; the Negative Prompt describes the - side. Training separates them so the LoRA weight can slide between both states.
Be descriptive:
Use phrases that fully express each pole (e.g., "high detail, intricate, ornate" vs. "low detail, simple, plain").
Outcome:
Clear prompts yield a cleaner, more controllable slider with fewer side effects.
How does the Anchor Class work and when should I use it?
Stability guardrail:
Anchor Class is a regularizer that preserves unrelated attributes while your slider moves between poles.
Example:
If a skin tone slider also darkens the whole image, add an anchor like "well-lit room" to hold lighting steady.
When to omit:
For global axes (e.g., overall detail), a neutral anchor like "plain white background" works,or leave it blank to anchor to the model's default bias.
What is a good Rank for a Concept Slider LoRA?
Keep it small:
Rank 4 is a strong default. You're shifting existing knowledge, not learning complex new features, so higher ranks add bloat and risk leakage into unrelated attributes.
Benefits:
Small files, faster training, easier sharing, and better compatibility with other LoRAs you may stack at inference.
What training settings (steps, learning rate) are recommended?
Fast loop:
Steps: 300-500 to start. Learning rate: around 1e-3 works well because you want decisive shifts, not slow fine-tuning.
Frequent checks:
Save and sample every ~25 steps to spot side effects early and adjust prompts. This feedback loop is where most of the quality gains happen.
Rule of thumb:
If the samples look right by 200-300 steps, you're on track. If not, adjust prompts rather than just adding steps.
How should I configure sample generations to evaluate the slider?
Control variables:
Use the same prompt and fixed seed for every sample. Only vary the LoRA weight.
Weight sweep:
Test across -2.0, -1.0, -0.5, 0.5, 1.0, 2.0 to visualize the full spectrum. This reveals where the slider is stable and where it breaks.
Decision use:
Pick a checkpoint where the -1.0 to +1.0 range looks clean and predictable.
What is the typical effective weight range for using a Concept Slider?
Safe zone:
Most sliders perform best between -1.0 and +1.0. Beyond that, images may become chaotic or drift from the subject.
Why it matters:
Design your prompts so the intended effect is clear in that range. Extreme weights are for testing, not production.
What are "tertiary hallucinations" and how can they be identified?
Unintended extras:
Tertiary hallucinations are side effects correlated with your prompts in the base model's training (e.g., "high detail" dragging in "high contrast").
How to spot:
Look for consistent color shifts, lighting changes, or composition warps across the weight sweep that aren't part of your axis.
Next step:
Balance them by editing prompts on the opposite side of the effect.
How can I fix unwanted changes in image properties like brightness or contrast?
Counterbalance in prompts:
Add the hallucinated property to the opposite prompt to decouple it from your axis.
Example:
If positive weights become high-contrast and dark, add "high contrast, dark" to the Negative Prompt. This teaches the model that contrast isn't the divider.
Iterate:
Adjust one side at a time and review every 25-50 steps.
My slider is causing unwanted color shifts. How do I correct this?
Rebalance color associations:
Add color terms to the opposite side where the shift appears. If negative looks blue and positive looks yellow, add "sepia" to the Negative Prompt or "cool tones" to the Positive Prompt,choose one at a time.
Goal:
Make color a non-factor so the axis focuses on your intended change.
Why is the training process for sliders considered an "iterative process"?
Observe → Adjust → Resume:
Perfect sliders rarely emerge in one pass. You'll catch side effects in early samples, adjust prompts, and continue training.
Feedback cadence:
Sampling every 25-50 steps gives you fast feedback without wasting compute. This prompt-first workflow is the real "secret sauce."
Outcome:
A clean, predictable slider that's easy to use in production.
Who should use Concept Slider LoRAs in a business setting?
Ideal users:
Marketing teams, content studios, product design, and R&D groups that need controlled variation without rebuilding models.
Why it fits:
Sliders let non-technical teammates adjust a single weight to hit brand, mood, or complexity targets instantly.
Example:
A brand team uses a "vibrant ↔ muted" slider for seasonal campaigns, keeping subject and style consistent while adjusting tone.
What are practical business use cases for Concept Sliders?
Common wins:
Brand tone (vibrant ↔ muted), product polish (raw ↔ premium), age progression (youthful ↔ mature), emotion for ads (serene ↔ energetic), realism (illustrative ↔ photoreal).
Workflow impact:
Run A/B tests by sweeping weights, export the best variants, and standardize the chosen weight in your content pipeline.
Example:
E-commerce team uses a "simple ↔ intricate" slider to match different marketplace guidelines with one base prompt.
How do I choose a good conceptual axis?
Pick opposites the model already knows:
Think in clear, separable traits (simple ↔ intricate, warm ↔ cool, happy ↔ sad).
Test prompts first:
Generate a few images using each side's phrasing to ensure the base model responds. If the base model can't show the difference, slider training won't fix it.
Scope it:
Keep one attribute per slider for precision and easier troubleshooting.
How many images do I need, and can I reuse them across sliders?
Small is fine:
Typically 6-10 images are enough for most axes at 512 resolution.
Reuse strategy:
You can reuse a generic dataset (e.g., neutral portraits) across multiple sliders (detail, emotion, age). Consistency helps comparison and cuts prep time.
Tip:
Match the dataset to your Target Class; if your sliders focus on people, use people.
Can I stack multiple sliders at inference?
Yes, with care:
You can combine sliders if their axes don't conflict. Keep individual weights modest (e.g., within -0.8 to +0.8) and test combinations with a fixed seed.
Example:
Use "detail" (+0.6) and "vibrance" (-0.4) together. If you see interference (e.g., color swings), reduce one weight or adjust prompts in retraining.
How do I apply a Slider LoRA during generation?
Basic flow:
Load the base model, attach the LoRA, and set the LoRA weight. Keep the same base prompt and seed while testing weight changes.
UI note:
In AI Toolkit or common UIs, you'll typically select the LoRA and set the weight per generation or node. Use a grid to compare multiple weights side-by-side.
How should I name and version my sliders for team workflows?
Make it searchable:
Use a convention like axis_baseModel_rank_lr_steps (e.g., "detail_sdxl_r4_1e-3_400").
Document behavior:
Include a short README with: intended axis, effective weight range, known side effects, and sample images. This reduces onboarding time for teammates and clients.
How do I prevent overfitting or drift during training?
Signals to watch:
If the slider only works at extreme weights or starts altering unrelated features, you're drifting.
Fixes:
Lower steps slightly, add/adjust Anchor Class, rebalance prompts to remove unintended cues, or reduce rank if you increased it. Frequent sampling helps you stop early before overfitting sets in.
Certification
About the Certification
Get certified in Concept Slider LoRA for AI image generation. Prove you can train bidirectional low-rank sliders from tiny datasets, anchor scenes, steer models by detail/age/mood/style, and deploy via AI Toolkit to speed production.
Official Certification
Upon successful completion of the "Certification in Training and Applying Concept Slider LoRA for Image Generation", you will receive a verifiable digital certificate. This certificate demonstrates your expertise in the subject matter covered in this course.
Benefits of Certification
- Enhance your professional credibility and stand out in the job market.
- Validate your skills and knowledge in cutting-edge AI technologies.
- Unlock new career opportunities in the rapidly growing AI field.
- Share your achievement on your resume, LinkedIn, and other professional platforms.
How to complete your certification successfully?
To earn your certification, you’ll need to complete all video lessons, study the guide carefully, and review the FAQ. After that, you’ll be prepared to pass the certification requirements.
Other AI Video Courses

Video Course: What is Generative AI and how does it work?

Video Course: How to Use ChatGPT from Beginner to Professional

Video Course: How to Use Google Gemini for Google Workspace to Boost Productivity

Video Course: How to Use Claude 3.7 AI - Tips for Beginners!

Video Course: ChatGPT for Data Analytics: Full Course - from Beginners to Professional

Video Course: Generating Images and photos With ChatGPT?

Video Course: Generating Images & Photo's with MidJourney

Video Course: Generating Design's with Microsoft Designer and AI

Video Course: Generating Design's with Canva.com and AI
Join 20,000+ Professionals, Using AI to transform their Careers
Join professionals who didn’t just adapt, they thrived. You can too, with AI training designed for your job.


