Claude Code Course: Autonomous Dev, MCP Tools & VS Code Setup (Video Course)
Imagine handing a goal to an AI that reads your files, writes the code, runs the commands, and ships the app. That's Claude Code. This course gets you from setup to autonomous goals, MCP, and VS Code,no engineering background needed.
Related Certification: Certification in Building Autonomous Dev Workflows with Claude Code
Also includes Access to All:
What You Will Learn
- Install and configure Claude Code in the terminal and Visual Studio Code
- Choose and manage permission modes (Plan, Accept Edits, Auto, Bypass) safely
- Run autonomous goals with /goal and iterate via evaluator feedback
- Create, install, and manage reusable skills and plugins
- Monitor and manage context windows and use core slash commands (/compact, /clear, /resume)
- Use Git/GitHub and connect external tools via MCP and CLI for deployment
Study Guide
Introduction: Why This Course Changes Everything
You're about to learn something that feels like a superpower. Not because it's complicated or exclusive, but because it's so intuitive that once you see it in action, you'll wonder how you ever worked without it. This course is about Claude Code,an AI-powered coding assistant that lives right inside your terminal, your IDE, and your workflow. It's not just another tool that spits out code snippets. It's a full-blown agent that can read your files, write new ones, execute commands, deploy applications, manage your Git repositories, and connect to a massive ecosystem of external services like GitHub, Vercel, Slack, and Jira,all through natural language instructions.
Here's the thing. Most people think AI coding tools are just autocomplete on steroids. They're not. Claude Code represents a fundamental shift in how software gets built. You don't just ask it for a function and copy-paste the result. You hand it a goal, give it access to your environment, and it works autonomously until the job is done. It iterates, evaluates its own output, fixes its mistakes, and delivers a finished product. That's not a tool. That's a collaborator.
And the best part? You don't need to be a software engineer to use it. If you can type a clear sentence, you can build, deploy, and manage applications. This course is designed for absolute beginners and seasoned developers alike. We'll start from the very beginning,installation,and work our way up to advanced topics like autonomous goal execution, reusable skills, context management, version control, and integrating external tools through MCP and CLI. Every concept is broken down, explained in plain language, and paired with practical examples you can try yourself.
By the end of this course, you'll have a complete mental model of how Claude Code works, why it matters, and how to use it to accelerate your projects, automate repetitive tasks, and bring ideas to life faster than you thought possible. Let's get started.
1. Getting Started: Installation and Environment Setup
Before you can harness the power of Claude Code, you need to get it running on your machine. The installation process is straightforward, but the environment you choose to work in makes a huge difference in your experience. Let's break it all down.
Installing Claude Code
The installation is done through your terminal using a native installation command. The exact command depends on your operating system,macOS, Windows, or Linux. The official Claude Code documentation is the source of truth here. You'll find a quick start section with the command tailored to your OS. Copy it, open your terminal, paste it, and hit enter. That's it. The installer handles everything else.
For Mac users, you can open the terminal by pressing Command + Space and typing "terminal." For Windows, you'll use PowerShell or the Command Prompt. Once the installation completes, you're ready to choose your environment.
Three Ways to Use Claude Code
Claude Code isn't locked into a single interface. You have three options, and each one serves a different purpose.
The Desktop App is the simplest route. It's a standalone application with a graphical interface. If you're non-technical and just want to experiment without touching a terminal, this is your starting point. But here's the trade-off: it offers limited customization and doesn't expose the full feature set.
The Terminal is where Claude Code truly lives. You get complete control over every feature, every command, and every setting. The downside? It's not the most user-friendly experience if you're not comfortable with command-line interfaces. You're typing blind, so to speak, without a visual representation of your files.
The IDE,specifically Visual Studio Code,is the sweet spot. It combines the power of the terminal with a visual file explorer. You can see your project structure, watch files get created and modified in real time, and still have full access to the terminal. This is what I recommend for most people, and it's what we'll focus on throughout this course.
Setting Up Visual Studio Code
If you don't have VS Code installed, head to the official website and download the version for your operating system. Installation is a standard next-next-finish affair. Once it's open, you'll want to create a project folder. This is where all your work will live. Think of it as a dedicated workspace for each project you're building.
Inside VS Code, you'll use the built-in terminal. You can toggle it with Control + Backtick (the key above Tab). This terminal is your command center. Type claude and press Enter. A prompt will appear, showing the active model and your current context usage. You're now in a Claude Code session.
One thing I love about VS Code is the ability to customize the look. You can change the color theme by clicking the gear icon in the bottom-left corner, navigating to Themes, and selecting Color Themes. Solarized Light is a popular choice, but pick whatever feels good to your eyes. You'll be spending a lot of time here.
Session Management
When you're done working, you can terminate the session by clicking the trash icon or pressing Control + C twice. If your session gets interrupted,say your computer crashes or you accidentally close the terminal,you can pick up right where you left off. Type /resume and you'll see a list of previous sessions. Select the one you want, and Claude Code restores the entire conversation context. This is a lifesaver for long, multi-day projects.
2. Permission Modes: Balancing Autonomy and Safety
Claude Code is powerful, and with power comes responsibility. That's why the tool includes a layered permission system. You decide how much autonomy the AI has over your files and your system. There are four modes, and understanding when to use each one is critical.
Plan Mode
This is the strategic thinker. In Plan Mode, Claude Code analyzes your files, reads your project structure, and creates a detailed plan of action. But it doesn't execute anything. No file edits, no script execution. It's purely analytical. You review the plan, make changes if needed, and only when you're satisfied do you switch to a more active mode and let it execute. This is perfect for complex refactoring, understanding a new codebase, or planning a feature before touching a single line of code.
Accept Edits Mode
This mode gives Claude Code the ability to create and edit files. It can write new code, modify existing code, and restructure your project. However, it cannot run terminal commands without your explicit approval. Every time it wants to execute a script or run a command, it pauses and asks for permission. This is a great middle ground for when you want the AI to do the heavy lifting but you still want to keep a tight leash on system-level actions.
Auto Mode
This is the balanced workhorse. In Auto Mode, Claude Code automatically accepts code edits and can run bash scripts. But here's the safety net: a separate AI safety classifier reviews every script before it executes. If the script looks dangerous or touches sensitive areas, it's flagged for human intervention. This mode is ideal for standard development workflows where you want efficiency without completely letting go of the reins.
Bypass Permissions Mode
This is the full autonomy mode. No approvals, no safety classifier, no restrictions. Claude Code edits files and runs scripts without asking. This is only appropriate in isolated test environments where there's no sensitive data and no risk of causing real damage. You activate it with the command claude --dangerously-skip-permissions. The word "dangerously" is there for a reason. Use it sparingly, and only when you know exactly what you're doing.
Choosing the Right Mode
For beginners, start with Plan Mode or Accept Edits. Get comfortable with how Claude Code thinks and works. As you gain confidence, move to Auto Mode for most of your development work. Reserve Bypass Permissions for sandboxed environments or throwaway test projects. The key is to be intentional. Don't just leave it on the highest permission setting because it's convenient. Match the mode to the task and the environment.
3. Autonomous Goals: The /goal Command
This is where Claude Code stops being a tool and starts being an agent. The /goal command initiates an autonomous execution loop. You give it a high-level objective, and it works in a continuous cycle until that objective is met. This isn't a single prompt-response interaction. It's a self-improving loop.
How the Loop Works
Here's the anatomy of a goal execution. You submit a prompt with your requirements. Claude Code generates an output,code, files, configurations, whatever the task demands. Then, a separate evaluator assesses that output against your initial requirements. If the output doesn't meet the criteria, the evaluator sends feedback back to the AI. The AI takes that feedback, regenerates the output, and the cycle repeats. This continues until the evaluator is satisfied, and only then is the final result presented to you.
This is a game-changer because the accuracy is significantly higher than a regular one-shot prompt. The AI isn't just guessing what you want. It's iterating toward a defined standard of quality.
Practical Example: Cloning an Existing Application
Let me walk you through a real scenario. Say you want to clone an existing web application. You provide Claude Code with a screenshot of the app and the URL. You instruct it to extract the features, the image assets, and the overall functionality. Claude Code will ask you clarifying questions. What tech stack do you prefer? NestJS with React, or a vanilla clone? Should it include an email subscription gate? What level of fidelity are you aiming for,functional or pixel-perfect with a difference of less than two percent?
You answer these questions, and Claude Code generates a detailed plan. It outlines the design tokens, the data models, the build strategy. You review the plan and request modifications. Maybe you want all images pulled locally first. Maybe you want a specific color palette. You refine the plan until it matches your vision.
Then comes the execution phase. You enable the appropriate permission mode,often Bypass Permissions in a test environment,and the goal loop begins. Claude Code builds the application, evaluates its work, fixes discrepancies, and iterates until the evaluator confirms it matches the reference. The result is a fully functional clone of the original app, built entirely through autonomous AI execution.
Key Decisions During Goal Execution
During this process, you'll make several decisions that shape the outcome. The tech stack you choose determines the framework and language. The features you include define the scope. The content you provide,text, images, data,gives the AI raw material to work with. And the fidelity target sets the quality bar. Each of these decisions feeds into the plan, and the plan feeds into the execution loop.
4. Skills: Reusable Workflows and Standard Operating Procedures
Imagine teaching Claude Code how to do something once, and then being able to trigger that exact process with a single command, forever. That's what skills are. A skill is a structured set of instructions,essentially a Standard Operating Procedure,that tells Claude Code how to execute a specific task. Skills are written in Markdown and contain the name, description, and rules for the workflow.
The Anatomy of a Skill
Let's look at a practical example. There's a skill called "Fix Ticket" that automates the entire bug-fixing pipeline. It has three stages. First, the understanding stage. The AI reads a ticket from Jira, Linear, or GitHub, then replicates the issue using browser automation to see it firsthand. Second, the fixing stage. The AI researches the root cause, implements a solution, and reviews the code with multiple agents to ensure quality. Third, the shipping stage. The AI verifies the fix with QA, commits to GitHub, deploys to production, and moves the ticket to the QA column for human review.
That's a complete workflow,from ticket to deployment,packaged into a single skill. You just say "fix ticket" and the entire pipeline runs.
Installing Skills
There are two primary ways to install skills. The first is through the plugin discovery interface. Type /plugins in Claude Code, and a browser-based interface opens up. You can browse available plugins, select the ones you want using the Space Bar, and choose your installation scope. You have three options. User scope installs the skill globally on your machine, available in every project. Project scope for collaborators installs it in the current repository, so anyone who clones the project gets access. Project scope for self only limits it to just you in the current project.
After installation, type /reload-plugins to activate the new skills. The second method is through the skills repository. Sites like skills.sh host a collection of community-contributed skills. You find one you like, copy the URL, and paste it into Claude Code with the instruction to install it. The AI handles the rest.
Popular Skills You Should Know
Anthropic has published a front-end design skill that dramatically improves the quality of user interfaces generated by Claude Code. It adjusts typography, backgrounds, component styling, and spacing while preserving functionality. You trigger it with a natural language request or the slash command /front-end-design.
There's also the Vercel React Best Practice skill, which enforces over seventy rules for performance optimization in React and Next.js applications. This is invaluable if you're building for the web and want your apps to be fast and efficient.
Managing Skills
Skills are stored in hidden folders like .claude or .agents. You can delete a skill by removing its folder. You can customize a skill by editing its Markdown file. And you can reload skills after any changes with /reload-plugins. The beauty of skills is that they're portable. You can share them with your team, version them in Git, and build a library of workflows that codify your organization's best practices.
5. Understanding the Project File Structure
When Claude Code builds a project, it creates a specific file structure. Understanding this structure helps you navigate, maintain, and troubleshoot your applications. Let's walk through the key components.
Markdown Files
Files ending in .md are Markdown documents. They're used for documentation, system prompts, and configuration instructions. Markdown uses simple syntax,hash symbols for headings, asterisks for emphasis,making it easy to read and write plain-text documentation.
Package Files
The package.json file is the manifest for your project. It lists all the dependencies and defines the commands you can run. The package-lock.json file is auto-generated and locks the exact versions of every dependency. You rarely need to touch this file manually. It's there to ensure consistency across installations.
The Public Folder
This folder contains static assets that are publicly accessible. Logos, images, downloadable files,anything that needs to be served directly to the user's browser. If you add a file here, it's available at the root URL of your application.
The Node Modules Folder
This is where all your installed libraries live. It's generated automatically when you install dependencies, and you should never modify it manually. The contents are determined by your package.json file. This folder is also excluded from version control via a .gitignore file, because it can be regenerated at any time.
The Components Folder
This is the heart of a component-based architecture. It contains reusable UI components,cards, buttons, info panels, modals. Think of them as Lego blocks. You build each block once, then assemble them in different combinations to create pages. This modularity makes your code cleaner and easier to maintain.
The App Folder
This folder contains the core pages of your application. For example, a file called page.tsx renders the homepage. These pages orchestrate the composition of your components. They define the layout, the data flow, and the overall structure of each route.
The Library Folder
This holds reusable utility functions and configuration modules. It's not component-specific. It's general-purpose code that can be imported and used anywhere in the project.
Hidden Dot Folders
Folders prefixed with a dot are hidden by default to keep the main directory clean. The .claude folder contains Claude Code-specific configurations and skills. The .agents folder holds universal configurations for all AI agent frameworks. There's also .next for Next.js build artifacts, .playwright for test data, and .git for version control data.
System Prompts vs. Skills
Here's an important distinction. The agents.md file contains system prompts that apply to all AI agents working in the project. The claude.md file contains system prompts specific to Claude Code. These prompts are loaded every time you send a message. They define the behavior, tone, and rules for the AI. For example, if you add "respond in emojis" to claude.md, every future response will include emojis until you remove that instruction. It's a powerful way to set persistent behavior across your entire project.
6. Context Window Management: Keeping AI Sharp
Every conversation with Claude Code has a context window,the total token capacity available. The standard window is one million tokens. A token is roughly three to four characters or about three-quarters of a word. This is the AI's working memory, and managing it is essential for maintaining performance.
Why Context Matters
Here's the problem. The longer you talk to Claude Code, the more input tokens accumulate in the context. And as the context fills up, the performance of the language model degrades. This isn't unique to Claude. It happens with every large language model. The accuracy drops, responses become less coherent, and the AI starts making mistakes it wouldn't make with a fresh context. This phenomenon is often called "context rot."
Monitoring Your Context
You need to know how much context you're using. The status bar at the bottom of the Claude Code interface shows your current context percentage and token count. You can also type /context to see a detailed breakdown. This shows you how many tokens are being consumed by system prompts, skills, memories, and messages. Understanding this breakdown helps you identify what's eating your context.
Mitigation Strategies
The most effective strategy is to start new sessions regularly. If your context usage exceeds fifty percent, it's time to compact or clear. The /compact command summarizes the conversation to free up context. For example, if you're at nineteen percent context, compacting might bring you down to seven percent. But here's the trade-off: summarization can lose important details. The AI condenses the conversation, and some nuance gets lost in the process.
The /clear command is more drastic. It resets the conversation entirely, bringing context back to zero percent. You lose all current conversation history, so use this when you're starting a new task or when the conversation has become too unwieldy.
The /rewind command is a middle ground. It reverts both the code and the conversation to a previous checkpoint. This is useful when you want to undo a series of changes and start over from a known good state.
Best Practices
Make context management a habit. Check your context percentage before starting a complex task. Compact when you're above fifty percent. Clear when you're switching to a completely different project. And always be aware that a longer conversation doesn't mean a better conversation. Sometimes, a fresh start is the best thing you can do for the AI's performance.
7. Slash Commands: Your Control Panel
Slash commands are the shortcuts that make Claude Code efficient. They're prefixed with a forward slash and trigger specific functions. Some are built-in, and some are user-created skills. Let's explore the essential ones.
Core Commands
The /clear command resets your session with an empty context. The /compact command summarizes older parts of the conversation to free up space. The /context command displays a detailed map of your context usage. The /model command lets you switch between available AI models,Opus for maximum power, Sonnet for balanced performance, and Haiku for speed and efficiency.
The /mcp command manages your Model Context Protocol connections. The /plugins command opens the plugin discovery interface. The /resume command restores previous conversations. And the /rewind command reverts code and conversation to an earlier checkpoint.
Model Switching
The ability to switch models is incredibly useful. If you're working on a simple task, you don't need the most powerful model. Switch to Haiku for speed and cost savings. If you're tackling a complex architectural problem, switch to Opus for maximum reasoning capability. Sonnet is the balanced default for most tasks.
Rewind in Action
The rewind command creates checkpoints at various stages of your conversation. If you make a series of changes and then decide you want to go back to how things were before, you can rewind to the appropriate checkpoint. This reverts both the code and the conversation state, giving you a clean slate without losing everything.
Plugin Management
Through the plugins interface, you can browse available plugins from Anthropic and the community. You can install plugins relevant to your work, uninstall unused ones, and access expert skills covering advanced topics like hooks and MCP configuration. The plugin ecosystem is one of the things that makes Claude Code so extensible.
8. Version Control with Git and GitHub
Version control is non-negotiable in modern software development. It gives you a complete historical record of every change, enables collaboration without conflicts, and provides the ability to revert to previous states. Claude Code integrates natively with Git and GitHub, making version control as simple as asking.
Why Version Control Matters
Imagine working on a project for weeks, then accidentally deleting a critical file. Without version control, that work is gone forever. With version control, you can roll back to any previous commit and restore your project to a working state. It's a safety net that every developer needs.
Setting Up a Repository
GitHub offers free repository hosting. You can create public repositories visible to anyone or private repositories with restricted access. Claude Code can handle the entire setup. Just say, "Create a private repository for this project and commit the changes." Claude Code initializes Git, creates the repository on GitHub, stages all the files, and pushes an initial commit.
Understanding Commits
Each commit is a snapshot of your project at a specific point in time. It has a commit message that describes what changed, a unique commit ID, and a visual diff showing the additions and deletions. Green lines represent content being added, and red lines represent content being deleted. This history is invaluable for understanding how your project evolved.
Excluded Files
Not everything should be committed to version control. The node_modules folder contains generated dependencies and should be excluded. Hidden folders like .next and .playwright contain build artifacts and test data. Environment files like .env contain sensitive credentials. The .gitignore file tells Git which files to ignore. Claude Code respects this file automatically, ensuring sensitive and unnecessary files stay out of your repository.
Managing Collaborators
GitHub makes team collaboration easy. In the repository settings, you can add collaborators and assign permissions. Team members can then work on the same codebase simultaneously without overwriting each other's work. Git handles the merging, and conflicts are resolved through the commit process.
Reverting Changes
If you need to roll back to a previous version, you have options. You can copy the commit ID from the GitHub commit tree and ask Claude Code to revert to that specific commit. The AI restores the project to the state it was in at that commit. This is a powerful safety net that gives you the freedom to experiment without fear of breaking things permanently.
9. Connecting External Tools: MCP and CLI
This is where Claude Code transforms from a standalone coding assistant into the center of your entire development ecosystem. It can connect to external applications and services through two primary methods: the Model Context Protocol (MCP) and Command Line Interface (CLI) tools.
Understanding MCP
MCP is often described as a "USB port for artificial intelligence." It's a standardized bridge that connects AI agents to external tools and data sources. The architecture has two components. The MCP client is the AI application,in this case, Claude Code. The MCP server is a lightweight program that provides access to a specific tool or service.
MCP servers can connect to local file systems, databases, web search capabilities, payment processors like Stripe, communication platforms like Slack, project management tools like Jira, and even social media platforms like Facebook. The possibilities are vast.
Understanding CLI Tools
CLI tools are command-line programs that execute shell commands to interact with third-party services. The Vercel CLI and Stripe CLI are common examples. When Claude Code uses a CLI tool, it generates and executes terminal commands directly.
MCP vs. CLI: The Trade-offs
Here's where you need to make strategic decisions. CLI tools are highly token-efficient. They don't load large tool schemas into the context window, which means they use fewer tokens and are faster. This makes them ideal for individual developers who want speed and cost savings.
MCP, on the other hand, offers stronger security and governance. It has standardized authentication boundaries, audit trails, and centralized server management. Exposed tools are restricted to authorized agents, making it the better choice for team environments and organizations that need strict access control.
Practical Implementation: Deploying to Vercel
Let me walk you through a real deployment scenario. First, you create a Vercel account,there's a free tier. Then you ask Claude Code, "Do you have Vercel CLI or MCP in your current system?" If it doesn't, you provide the relevant documentation link and instruct the AI to connect it. Next, you log in to your Vercel account through the CLI.
Then you say, "Create a brand new project in my Vercel account using the CLI tool to deploy this application." Claude Code creates the project, deploys the application, and provides you with a live URL. The entire process takes minutes, not hours.
If you need to remove the deployment, just say, "Delete this project." Claude Code identifies the correct project, confirms with you, and removes it while preserving your other projects.
Available Integrations
The ecosystem is extensive. Stripe supports both CLI and MCP. Vercel supports both as well. Google Workspace integrates through CLI. Go HighLevel uses MCP. Jira and Slack both connect via MCP. The choice between CLI and MCP depends on your specific needs,token efficiency versus security governance.
10. Frequently Asked Questions
Let's address the questions that come up most often when people start working with Claude Code.
What's the difference between skills, MCPs, and agents?
This confuses a lot of people. Skills are reusable workflows or standard operating procedures. They're instruction manuals for how to execute a task. MCPs are tools and connections to external services. They're the toolbox. Agents are specialized AI components with specific rules, personalities, or expertise areas. They're the specialists. The relationship is hierarchical. Agents follow skills, and skills call MCPs or CLIs to access external tools.
Is Claude Code suitable for beginners?
Absolutely. You don't need prior programming experience. With proper guidance, you can install VS Code, open the terminal, type "claude," and start building. The terminal version offers substantially more customization than the desktop app, and the learning curve is manageable if you start with the basics.
How does Claude Code compare to Codex or Gemini?
Claude Code, Codex, and Gemini CLI are all frameworks,the shells that orchestrate the AI. The models,Claude, GPT, Gemini,are the engines that power them. Claude Code is considered feature-rich, with plugins, orchestration, and dynamic workflows. And it's flexible. You can pair it with different models through routers like OpenRouter, giving you access to alternatives beyond Anthropic's models.
Do I need Cursor?
No. VS Code, Cursor, or any IDE with a terminal is sufficient. VS Code is recommended for beginners because it's simple, free, and widely supported. Cursor offers additional AI features, but they're not necessary to get the full Claude Code experience.
Is the $20 subscription plan enough?
For beginners, yes. It's more than sufficient to learn and experiment. For daily professional use, the five-hour usage limit can be restrictive. But there are budget solutions. You can use local models if your hardware supports them, or connect to OpenRouter for cheaper alternatives like DeepSeek. Reserve the premium models for critical tasks and use cost-effective options for routine work.
Is Claude Code safe to run on personal machines?
Yes, provided you use the appropriate permission mode. Plan Mode is the safest because it only plans. Accept Edits adds controlled file modification. Auto Mode includes an AI safety classifier for scripts. Bypass Permissions should only be used in isolated test environments without sensitive data. The safety system is designed to protect you, but you have to use it correctly.
Will this knowledge become obsolete?
The fundamentals are enduring. Permission modes, skills, context management, version control, MCP,these concepts remain relevant even as the platform evolves. Models will get better, features will be added, but the core architecture and best practices will stay consistent. Mastering the fundamentals now future-proofs your skills.
Conclusion: Putting It All Together
You now have a comprehensive understanding of Claude Code. You know how to install it, configure it, and choose the right environment. You understand the permission modes and when to use each one. You've seen how the /goal command enables autonomous execution through an evaluative feedback loop. You know how to install and create reusable skills that package complex workflows into simple triggers.
You understand the file structure that Claude Code generates, and you can navigate it with confidence. You know how to monitor and manage your context window to maintain AI performance. You're familiar with the essential slash commands that give you control over sessions, models, and plugins. You've learned how to leverage Git and GitHub for version control, collaboration, and rollback capabilities.
And you've explored the integration ecosystem,MCP for secure, governed connections and CLI for token-efficient speed. The trade-offs are clear, and you can make informed decisions based on your needs.
Here's the thing to remember. Claude Code isn't just a code generator. It's an autonomous agent that can manage the entire software development lifecycle. From reading tickets and replicating bugs to implementing fixes, reviewing code, deploying to production, and updating project boards,it can handle it all. This is the future of software development, and it's available right now.
The most important takeaway is this: autonomy requires structure. The /goal command works because of its evaluative feedback loop. Skills work because they provide clear standard operating procedures. Permission modes work because they balance autonomy with safety. Context management works because it prevents performance degradation. Version control works because it provides a safety net. And external integrations work because they connect the AI to the tools you already use.
Start small. Install VS Code and Claude Code. Create a project folder. Run your first session. Experiment with Plan Mode. Try the /goal command on a simple project. Install a skill or two. Monitor your context. Set up Git. Connect one external tool. Each step builds on the last, and before you know it, you'll be building, deploying, and managing applications at a speed you never thought possible.
The skills you've learned here are foundational and enduring. As models improve and features evolve, the principles of permission management, structured workflows, context awareness, and tool connectivity will remain essential. Master these fundamentals, and you'll be ready for whatever comes next.
Now go build something amazing.
Frequently Asked Questions
Introduction
This FAQ section addresses the questions that surface most frequently when people begin working with Claude Code. You'll find direct answers covering installation, permission modes, autonomous goal execution, skills, context management, version control, and MCP integrations. The questions move from foundational setup to advanced workflows, so you can reference this at any stage of your learning. Each answer focuses on practical application rather than theory, giving you actionable guidance you can apply immediately in your own projects.
What exactly is Claude Code?
Claude Code is an AI agent that runs inside your terminal or an IDE like Visual Studio Code.
Instead of simply generating text, it takes real actions in your file system: reading code, creating files, editing existing ones, executing Bash commands, running tests, committing changes to Git, deploying applications, and calling external services. Because it operates directly inside a project folder, Claude Code handles practical software development tasks rather than just answering questions. It can also work autonomously, breaking large goals into steps and looping until requirements are met, producing a working result like a fully built web application.
What do I need to get started with Claude Code?
You need a working computer, a Claude subscription with Claude Code access, a terminal, and optionally a code editor.
Terminals come built into macOS, Linux, and Windows. Visual Studio Code is recommended as the editor because it combines a visual file browser with a built-in terminal, but it's not strictly required. No prior programming experience is necessary since you communicate in plain English. A basic mental model of files, folders, and projects will help you work more effectively, but the tool handles the technical details for you.
How do I install Claude Code on my local machine?
The recommended method is using the native installer.
Open a terminal window, copy the installation command from the official Claude Code documentation for your operating system, and run it. On macOS, the command resembles curl https://claude.ai/install.sh | bash. Wait for the installer to complete, restart your terminal or run the refresh command, then type claude to verify installation. Once installed, typing claude inside any project folder starts a new Claude Code session.
What are the different environments for running Claude Code?
There are three primary ways to use Claude Code.
The Claude desktop app lets you enable Claude Code with no technical setup, but it offers fewer customization options. Running Claude Code directly in a terminal gives you full functionality, though command-line navigation can feel less friendly. Using an IDE like VS Code and launching Claude Code inside its built-in terminal provides both a visual file browser and complete functionality, making it the best balance for most users. Advanced features, plugins, and skills are easiest to use when Claude Code runs inside a full IDE or terminal.
How do I set up and open a project folder in VS Code?
Download and install Visual Studio Code, then create a project folder.
Open VS Code, click Open Folder on the welcome screen, and create a new folder on your computer. Use the Explorer sidebar to view all files in the folder. To open the built-in terminal, click the Toggle Panel icon at the top right, or press Ctrl + ` on Windows/Linux or Cmd + ` on macOS. Type claude in the terminal and press Enter. You'll see Claude Code's prompt window, where you can type natural-language instructions, drag-and-drop files or screenshots, and watch created files appear instantly in the Explorer.
How do I start, exit, and resume a Claude Code session?
Type claude in the terminal to start a new session.
To exit, click the trash-can icon or press Ctrl + C twice. Type clear to clear the terminal when not in Claude Code. To resume a previous session, start a new session, type /resume, select the session you want from the list, and press Enter. This works even if your computer shut down between sessions, making it useful for long or repeated projects where you need to restore an important state.
Is Claude Code suitable for beginners?
Yes. You don't need to be a developer to make Claude Code work.
The tool operates through natural language, and the AI can set up folders, generate full applications, deploy them, and manage version control on your behalf. Basic familiarity with opening a terminal and creating folders helps, but the depth of technical knowledge is not reserved for engineers. Choosing VS Code with its visual file explorer and built-in terminal makes the experience easier than a plain terminal, though the terminal alone works perfectly fine.
Do I need Cursor to use Claude Code?
No. Cursor is just one IDE option, not a requirement.
You can use VS Code, Cursor, or any terminal to run Claude Code. VS Code is recommended because it's free, clean, and beginner-friendly. The important thing is that you have a shell and a place to view files. Choosing your IDE comes down to personal preference rather than technical necessity.
What are the different permission modes in Claude Code?
Claude Code includes four main permission modes, cycled with Shift + Tab.
Plan mode reads files and produces plans without modifying anything. Accept edits allows automatic file edits but requires permission before running sensitive Bash commands. Auto mode automatically accepts edits and runs Bash commands, with a safety classifier deciding whether a command needs human confirmation. Bypass permissions runs everything without review, best used in isolated test environments. You can start a session in this mode with claude --dangerously-skip-permissions. Choosing the right mode is essential for both security and reducing interruptions.
What is the Plan mode and how do I use it?
Plan mode lets Claude Code inspect your project and reason about the best approach before making changes.
When you give it a task, it reads your current files, may ask clarifying questions about tech stack or features, and then outputs a structured plan including file structure, design decisions, data models, and build order. You can review the plan, request modifications, or toggle for higher-fidelity implementation. Only when you approve the plan and switch out of Plan mode does Claude Code begin executing changes. This mode is ideal for large or ambiguous tasks where you want to think before acting.
How do I choose the right permission mode for different tasks?
Match the mode to the risk level of your task.
For beginners or sensitive data, use Plan mode or Accept Edits to maintain control. Auto mode offers balanced efficiency for standard development work, letting the safety classifier handle routine decisions. Bypass permissions should only be used in isolated environments like virtual machines or containers where no critical or destructive action can cause harm. Consider what you're working on: if a mistake could delete important files or expose secrets, err toward more restrictive modes.
What are autonomous goals, and how do /goal work?
The /goal command drives Claude Code to work autonomously until a goal is satisfied.
Instead of responding with a one-time answer, Claude Code receives a request with high-level requirements, enters a loop of generating work, evaluating it against the original requirements, and refining the output. The loop repeats until the evaluator confirms requirements are met. For example, if you want to clone an existing tier list application, you provide a screenshot or URL plus instructions. Claude Code reverse-engineers the app, asks for decisions on tech stack and fidelity, and iterates until the final product matches the target. The /goal command is especially useful for quality objectives requiring a fixed-point target rather than a single attempt.
What is the evaluation loop in autonomous goal execution?
The evaluation loop is the feedback cycle that makes /goal self-correcting.
After Claude Code generates output, an evaluator assesses it against your original requirements. If the output falls short, feedback returns to the AI for correction, and the process repeats. This loop continues until the evaluator confirms all requirements are met. The evaluator checks for functional completeness, design fidelity, and feature coverage. This is why /goal produces more polished results than a single-pass request, especially for complex applications with many interacting parts.
How do I prepare a good prompt for the /goal command?
Provide reference materials and clear requirements.
Attach screenshots, URLs, or detailed descriptions of what you want to build. Specify the tech stack if you have a preference, or let Claude Code recommend one. Be explicit about features you need and features you don't want. Set expectations for fidelity, whether functional or pixel-perfect. Answer the clarification questions Claude Code asks, since these decisions shape the final output. Review the generated plan before execution and request modifications if anything looks off.
What are skills, and how do they relate to Claude Code?
A skill is a reusable workflow or Standard Operating Procedure that guides an AI agent through a task.
Skills are stored in markdown files or folders with optional scripts. They teach Claude Code how to approach tasks consistently. For example, a "fix ticket" skill might include steps to read a ticket from Jira, reproduce the bug with browser automation, research the root cause, implement the fix, verify with automated QA, commit to Git, deploy to production, and move the ticket to a QA column. Skills are reusable and can be triggered manually via slash commands or automatically when mentioned in natural language.
Where can I find and install skills?
Many skills are available through skills.sh, a library of AI agent skills.
In a Claude Code session, run /plugins to browse the Discovery tab. Select a skill with the spacebar, press Enter, and choose an installation scope: user scope for global access, project scope for collaborators, or project-only scope. Run /reload-plugins after installation. You can also copy a skill URL from skills.sh and paste it into Claude Code with the instruction to install it. Popular skills include front-end design improvements and Vercel React best practices.
How do I create my own custom skills?
Create a markdown file or folder in the .claude or .agents directory.
Write step-by-step instructions in markdown format, breaking the workflow into clear stages. Include checklists, guidelines, and decision points. You can add optional scripts for automation. Save the skill in .claude/skills/ for Claude-specific use or .agents/ for universal agent compatibility. After creating or editing a skill, run /reload-plugins to load it. Test the skill with a sample task to verify it produces the expected results, then refine the instructions based on what you observe.
What is a sub-skill and how does it differ from a master skill?
A sub-skill is a focused workflow step, while a master skill chains multiple sub-skills together.
Using the ticket-fix example, "read ticket," "reproduce bug," and "deploy to production" are each sub-skills. The master skill ticket-fix orchestrates them in sequence. This modular approach lets you reuse sub-skills across different workflows. If you have a "deploy" sub-skill, you can include it in both a "ticket-fix" master skill and a "new-feature" master skill. This keeps your instructions DRY and maintainable.
Certification
About the Certification
Become certified in Claude Code for autonomous development, MCP tools, and VS Code integration. You'll prove you can direct AI to read files, write code, run commands, and ship apps,no engineering background required.
Official Certification
Upon successful completion of the "Certification in Building Autonomous Dev Workflows with Claude Code", you will receive a verifiable digital certificate. This certificate demonstrates your expertise in the subject matter covered in this course.
Benefits of Certification
- Enhance your professional credibility and stand out in the job market.
- Validate your skills and knowledge in cutting-edge AI technologies.
- Unlock new career opportunities in the rapidly growing AI field.
- Share your achievement on your resume, LinkedIn, and other professional platforms.
How to complete your certification successfully?
To earn your certification, you’ll need to complete all video lessons, study the guide carefully, and review the FAQ. After that, you’ll be prepared to pass the certification requirements.
Other AI Video Courses
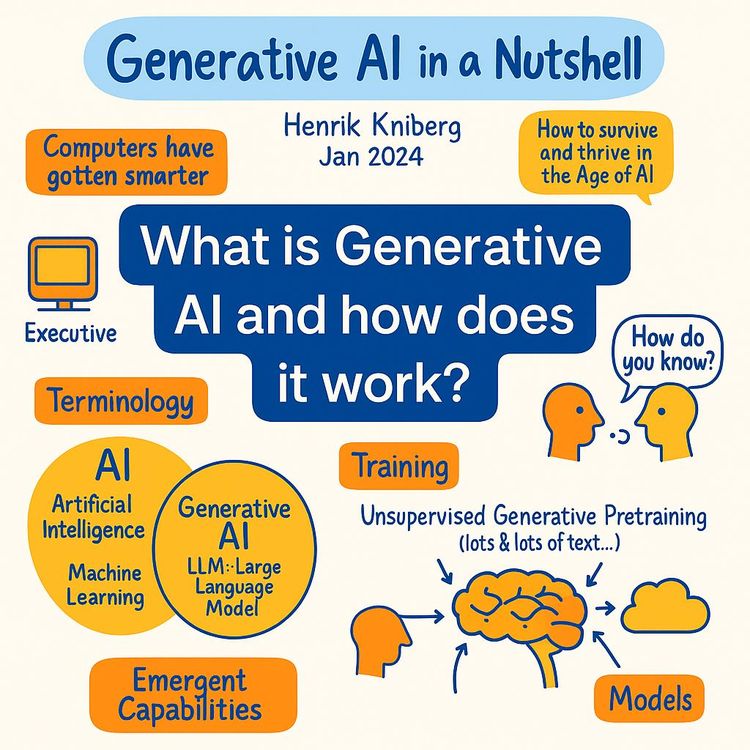
Video Course: What is Generative AI and how does it work?

Video Course: How to Use ChatGPT from Beginner to Professional
Video Course: How to Use Google Gemini for Google Workspace to Boost Productivity

Video Course: How to Use Claude 3.7 AI - Tips for Beginners!

Video Course: ChatGPT for Data Analytics: Full Course - from Beginners to Professional

Video Course: Generating Images and photos With ChatGPT?
Video Course: Generating Images & Photo's with MidJourney

Video Course: Generating Design's with Microsoft Designer and AI

Video Course: Generating Design's with Canva.com and AI
Join 20,000+ Professionals, Using AI to transform their Careers
Join professionals who didn’t just adapt, they thrived. You can too, with AI training designed for your job.