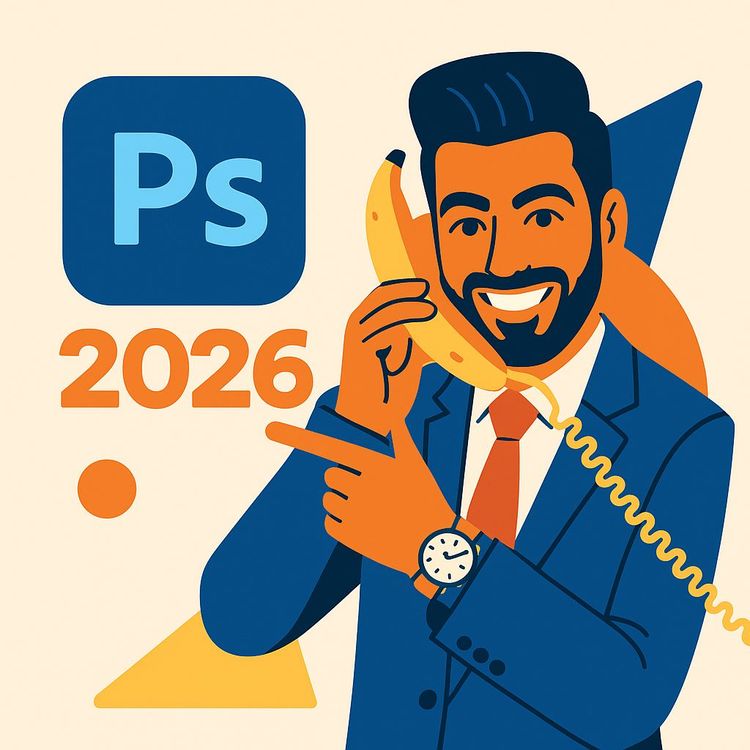
Photoshop AI: 12 New Features, Generative Fill & the Credit Catch (Video Course)
Photoshop 2026 just changed the game: 12 new features, some tied to AI credits. You'll learn what's worth using, when to go local vs. cloud, and how to keep costs in check,plus pro tips, examples, and ready-to-use workflows.
Related Certification: Certification in AI-Powered Image Editing with Photoshop Generative Fill
Also includes Access to All:
What You Will Learn
- Master the 12 new Photoshop features and when to use each
- Choose the right AI model (Gemini, Flux, Firefly, Topaz) for specific edits
- Manage generative credits: estimate, track, and minimize costs
- Design cost-efficient workflows and team playbooks for real projects
- Create tight selections, prompts, and masks to produce reliable AI results
Study Guide
Photoshop 2026: 12 New Features, One Big Catch! , Complete Learning Guide
Let's be honest: Photoshop just turned a corner. It's no longer only about layers, masks, and blend modes. It's become a hybrid creative workstation powered by multiple AI engines under one roof. Some live on your device. Others live in the cloud and bill you in credits. That's the big catch. Incredible power, with a meter running in the background.
In this course, you'll learn every new feature worth your time, when to use which model, how to control costs without sacrificing quality, and how to build a workflow that doesn't surprise your budget. We'll go from foundational upgrades to premium AI tools, then into beta features that hint at what's coming next. You'll also get practical examples, pro-level tips, and team-ready guidelines so you can implement this in real projects right away.
By the end, you'll know how to leverage the 12 most important new features and navigate the credit system with confidence. Let's dive in.
The Big Catch: Credits, Tiers, and the New Photoshop Economy
Photoshop now runs on a two-tier access model with a credit system. That means some features are always available; others are gated behind premium plans and consume more credits per use. Your creative decisions now have a cost curve. Good news: you can still do a ton locally for free. Even better news: you can get stunning results with cloud models. The trick is knowing when to use which.
Key terms you need to know:
- Standard features: Available to all subscribers. Some of these still use credits (typically fewer), especially when cloud processing is involved.
- Premium features: Require a higher-tier plan or premium credits. They often use partner AI models such as Gemini and Topaz.
- Generative credits: Tokens that get consumed when you use cloud-based AI. Costs vary by feature and output resolution.
- Partner models: Third-party AI engines integrated directly into Photoshop (e.g., Gemini, Topaz).
- On-device processing: Runs locally. Faster. Private. No credits.
- Cloud processing: Runs on Adobe's servers. More powerful. Uses credits.
The punchlines that matter:
- The credit amount depends on the output resolution, not the resolution you started with.
- Harmonize is not a premium feature, but it costs five credits every time you hit the generate button.
- The newest Remove Tool model uses generative AI, but does not use generative credits.
Example:
You upscale a 2 MP social photo to a 24 MP print poster with Generative Upscale. The cost is based on the 24 MP output, not the 2 MP input. Bigger outputs = more credits.
Example:
You add a cut-out product onto a new background and click Harmonize three times to get a look you like. That's 15 credits (5 credits per generation), even though it's considered a standard feature.
Practical cost math you can use:
- Premium Generative Fill (Gemini "Nano Banana" or Flux): ~10 credits per generation.
- Harmonize: 5 standard credits per pass.
- Generative Upscale: Variable by final resolution (more megapixels = more credits).
- AI Denoise: 10-20 premium credits per use.
- AI Sharpen: 10-20 premium credits per use.
- Next-gen Firefly Fill (in beta): 1 standard credit per generation.
- On-device Select Subject: Zero credits.
- Remove Tool 3 (beta): Zero credits.
Pro tip:
Keep a simple spreadsheet per project: task, feature used, expected output size, estimated credits, actual credits. You'll get quick at forecasting and you'll avoid end-of-month surprises.
Standard vs. Premium: How Access Works and What It Means for You
Think of Standard as your default toolkit, with occasional credit taps for cloud tasks. Premium is where the specialized horsepower lives. If it's a partner model or a cutting-edge generation engine, it's probably Premium. That's not a negative; it just means you're paying for speed, realism, and edge-case handling.
Standard examples:
- Improved on-device Select Subject (local, no credits).
- Harmonize (standard but consumes 5 credits per generate).
- Color & Vibrance adjustment layer (no credits).
- Next-gen Firefly Fill in beta (1 credit per generation).
Premium examples:
- Generative Fill using Gemini "Nano Banana" or Flux (10 credits per pass).
- Generative Upscale using Topaz Gigapixel or Topaz Bloom (variable; output-size based).
- AI Denoise and AI Sharpen (10-20 credits each per use).
Example:
A portrait retoucher can run Select Subject locally (free), refine hair by hand, then run one pass of Gemini Generative Fill to remove braces (10 credits). The local work reduces how often you need the premium pass.
Example:
A designer comping product shots into lifestyle scenes can use free Adobe Stock images (no credits), Harmonize the product to the background (5 credits per pass), and avoid multiple premium fills by starting with a clean local selection.
Pro tip:
Default to on-device tools first. If you can get 80% of the way there for free, then one premium pass is more than enough.
Feature 1: Generative Fill with Gemini "Nano Banana" (Premium)
The Gemini-backed option inside Generative Fill is built for detailed, realistic edits. Think high-stakes precision: skin, fabric, reflections, and anything where tiny errors ruin the shot. Each generation typically costs 10 premium credits.
Where it shines:
- Removing complex objects without smudges or repeats.
- Dental corrections like removing braces while reconstructing accurate teeth.
- Clothing edits that respect folds, fibers, and lighting.
How to use:
- Make a tight selection around the target area.
- Click Generative Fill, select the Gemini model option, and describe the change.
- Generate, compare variations, and mask in the best bits.
Example:
Remove braces from a close-up portrait. Prompt: "Remove braces and restore natural teeth." The model reconstructs enamel, gums, and shape with believable detail.
Example:
Replace a patterned blouse with a plain silk top while keeping the folds and highlights. Prompt: "Plain silk blouse, soft sheen, same color."
Pro tip:
Stay conservative with your prompts. Precise, minimal guidance beats flowery descriptions. The selection quality sets the ceiling for the output.
Feature 2: Generative Fill with Flux (Premium)
Flux is your alternate premium model when Gemini doesn't nail it. It often excels at glass, glare, and tricky edges. Same credit profile as Gemini: roughly 10 per generation.
Where it shines:
- Removing reflections on glasses while preserving eye detail.
- Organic transitions in tricky lighting situations.
How to use:
- Make a selection over the reflective areas or unwanted glare.
- Choose Flux in the Generative Fill model menu.
- Prompt with clarity about what to keep and what to remove.
Example:
Remove harsh window reflections on eyeglasses while keeping catchlights in the subject's eyes. Prompt: "Remove reflections on glasses. Preserve eyes."
Example:
Clean up glare on a glossy product photo without losing the product's edges. Prompt: "Reduce glare. Keep product edges crisp."
Pro tip:
Try both models. Save the best variation from each. Blend them with a soft mask for a "best of both worlds" result.
Feature 3: Generative Upscale (Firefly, Topaz Gigapixel, Topaz Bloom) , Premium
Generative Upscale boosts resolution while adding or preserving detail. You choose between three engines. Credit cost scales with the final output size. The larger the output, the more credits you'll burn.
Model options and when to use them:
- Firefly Upscale: More natural, slightly softer. Great for portraits and lifestyle images where realism matters.
- Topaz Gigapixel: Maximum sharpness. Great for product and architecture. Can look a bit artificial if pushed too far.
- Topaz Bloom (Creative Upscaling): Adds new detail. Best for abstract or AI-generated art where extra texture is a plus.
Example:
Turn a 1200 px portrait into a print-ready poster without crunchy skin. Choose Firefly Upscale and keep it conservative on the enlargement factor.
Example:
Scale a logo mockup for a billboard. Choose Topaz Gigapixel for crisp edges on type and packaging. Check for halos and dial back if needed.
Pro tip:
The cost is tied to your final megapixels. If you're testing, upscale to a smaller size first to evaluate quality, then commit to the big output once you're confident.
Feature 4: Harmonize (Standard, 5 Credits per Generate)
Harmonize adjusts color, tone, and lighting of a subject layer to match the background. It's a dream for quick composites. Even though it sits in the standard tier, each click costs 5 credits.
When to use:
- Dropping a studio-lit subject into an outdoor scene.
- Matching product cutouts to lifestyle backgrounds.
How to use:
- Place your subject on its own layer over the background.
- Select the subject layer, look for Harmonize in the contextual taskbar, and generate.
Example:
Place a model shot with cool studio light into a warm sunset scene. Harmonize shifts the subject to warm tones and adjusts contrast to fit the environment.
Example:
Composite a shoe product onto a wood table scene. Harmonize blends the color cast and micro-contrast for a believable match.
Pro tip:
Run Harmonize once, then fine-tune with the new Color & Vibrance layer. That combo reduces repeat generations and saves credits.
Feature 5: AI Denoise (Premium)
AI Denoise removes luminance and chroma noise. It's integrated from a Topaz model. It works, but results can be inconsistent compared to the standalone Topaz Denoise AI app. Expect a 10-20 credit cost per use.
When to use:
- High-ISO indoor events.
- Night scenes with color blotching.
How to use:
- Filter menu > AI Denoise. Preview and apply. If it over-smooths, reduce the effect via layer opacity or masking.
Example:
Clean a dimly lit concert photo where skin shows color speckling. Denoise, then mask out fine hair regions to preserve texture.
Example:
Reduce noise in a real estate interior shot taken at a fast shutter speed. Keep detail on edges by painting the effect in selectively.
Pro tip:
Duplicate your layer before denoising, then blend selectively. You'll get the best of both worlds: cleaner areas where you want them and detail where it matters.
Feature 6: AI Sharpen (Premium)
AI Sharpen improves detail and mitigates mild blur. It can be impressive on eyes and edges but may create net-like artifacts in hair or fabric. No intensity slider yet. Plan on 10-20 credits per pass.
When to use:
- Slight motion blur in candid shots.
- Product edges that need extra bite.
How to use:
- Filter menu > AI Sharpen. Apply to a duplicate layer. Mask in eyes, lips, jewelry, and edges; mask out hair if it looks artificial.
Example:
Sharpen a bridal portrait where the subject turned her head mid-shot. Apply lightly to facial features and jewelry. Avoid hair regions if artifacts appear.
Example:
Make a watch face pop for an e-commerce thumbnail. Sharpen bezel edges, numerals, and hands. Leave the leather strap less affected to prevent plastic-looking textures.
Pro tip:
If you see artifacts, back off. There's no medal for maximum sharpness. Subtlety looks more expensive.
Feature 7: Color & Vibrance Adjustment Layer (No Credits)
This is a new non-destructive adjustment layer that adds Temperature, Tint, and Vibrance right where you work. It's fast, simple, and doesn't cost credits.
Why it's useful:
- Quick global color grading without opening Camera Raw.
- Smart vibrance that boosts muted colors more than already saturated areas.
How to use:
- Add a Color & Vibrance adjustment layer above your image. Nudge Temperature warmer or cooler, refine Tint, then add a modest Vibrance lift.
Example:
Warm up a cool-toned portrait to match the mood of a golden-hour background. Use a gentle Temperature bump and +10 to +20 Vibrance.
Example:
Balance a green color cast in a fluorescent-lit office photo. Slide Tint toward magenta, then fine-tune Vibrance to avoid oversaturation.
Pro tip:
Use a soft black brush on the layer mask to protect skin tones when heavy Vibrance starts to get aggressive on faces.
Feature 8: Improved On-Device Select Subject (No Credits)
The on-device model is faster and more precise, especially with edges like hair and fur. No cloud calls. No credits. No waiting.
Why it matters:
- Privacy and speed.
- Better masks mean fewer premium generations later.
How to enable:
- Settings > Image Processing > Select Subject Processing > Device. Use Refine Edge after selection for perfection.
Example:
Cut out a curly-haired subject from a busy background. On-device Select Subject gets you most of the way there; refine the hairline and you're done.
Example:
Remove a background on a furry pet portrait. The new edge detection keeps whiskers and fine hairs intact without muddy halos.
Pro tip:
Always refine the mask. Even 30 seconds spent cleaning up edges saves credits downstream.
Feature 9: Free Adobe Stock Integration (No Credits)
Search and place free, commercially licensed images without leaving Photoshop. It's frictionless and free.
Where to find it:
- Toolbar icon, File menu, or contextual taskbar.
Example:
Comp a lifestyle background behind a product in seconds by placing a free stock image. Harmonize afterward if needed.
Example:
Use free stock textures (paper, concrete, gradients) to give your design depth without leaving your document.
Pro tip:
Use free stock as a staging area for client approvals. If they love it, you can later replace it with a licensed premium asset of similar composition.
Feature 10 (Beta): Next-Generation Firefly Fill & Expand (1 Standard Credit)
The beta model generates higher-quality content at up to 2K resolution. It's noticeably better at people and animals. And it's only 1 standard credit per generation.
Where it shines:
- Canvas expansions that blend seamlessly.
- Filling in missing areas with realistic detail, especially for living subjects.
How to use:
- Switch to the beta build. Use Generative Fill or Generative Expand. Keep prompts short and specific.
Example:
Extend a portrait into a magazine cover format. The expanded background matches grain, lighting, and color naturally.
Example:
Fill in missing fur on a cropped pet photo. The new model generates believable texture and directionality.
Pro tip:
Use this for concepting and comps even if you'll finalize in the main app. The low credit cost makes iteration cheap.
Feature 11 (Beta): Improved Reference Image for Generative Fill
Guide your generation with a reference image. Photoshop will match lighting, perspective, and scale more accurately than before.
Two modes:
- Place Object: Insert a new object guided by a reference image.
- Swap Object: Replace an existing object using details from a reference while keeping scene integrity.
Example:
Swap a model's jacket with a brand-approved design. Use the client's photo as a reference to match texture and color precisely.
Example:
Place a specific chair model into a living room scene and have Photoshop match the perspective and lighting automatically.
Pro tip:
Choose reference images with clean lighting and clear detail. Garbage in, garbage out applies here more than ever.
Feature 12 (Beta): Remove Tool 3 (No Credits)
The upgraded Remove Tool reconstructs complex backgrounds with surprising accuracy,stairs, railings, repeating textures,without using credits. Yes, really.
How to access it:
- Choose the Remove Tool from the toolbar. In the top options bar, pick Model 3. Avoid the contextual "Remove" button; it may use an older model.
Example:
Remove a person in front of a patterned tile wall. The tool recreates the tiles convincingly with minimal manual cleanup.
Example:
Erase a sign blocking a stairway and watch the steps reconstruct with proper perspective.
Pro tip:
Work in multiple small strokes instead of one giant swipe. It increases the odds the model nails texture continuity.
Choosing the Right Model: A Practical Playbook
Picking the right engine is half the game. Here's a fast heuristic so you don't waste time,or credits.
If you need realism in faces, skin, or fabric:
Start with Gemini "Nano Banana." If it's off by a hair, try Flux. Keep prompts minimal and selections tight.
If you need optical cleanup (glass, reflections, glare):
Flux often has the edge. Combine with careful masking for precise control.
If you need resolution boosts:
- Firefly Upscale for natural images, especially people.
- Topaz Gigapixel for technical sharpness (logos, products, architecture).
- Topaz Bloom for creative or AI art where added detail is a feature, not a bug.
If you're comping multiple elements:
Harmonize once, then finish with Color & Vibrance. Avoid repeated Harmonize runs unless absolutely necessary.
If you need removals on structured backgrounds:
Try Remove Tool 3 first (beta). No credits, and it's surprisingly good.
Example:
Building a product hero: cut the product locally, place on a free stock background, Harmonize once, use Firefly Upscale to reach the required resolution. You've saved on premium fills and reached deliverable size cleanly.
Example:
Retouching portraits for an album: remove braces with Gemini, reduce noise lightly in shadow regions, add a touch of AI Sharpen to the eyes only. Keep everything else local and subtle.
Credit Management: Keep Quality High and Costs Predictable
Creativity is fun. Billing surprises are not. Here's how to keep the balance.
1) Conduct a plan review
Know your credit allotment and what's standard vs. premium on your plan. If your work leans on premium models, upgrade intentionally rather than drip-paying through overages.
2) Develop usage guidelines
Decide when premium is justified. Example rules: "Use Gemini for faces," "Use Flux for glass/glare," "Use on-device selection for all cutouts," "One Harmonize pass max per composite."
3) Prioritize on-device and zero-credit tools
Use improved Select Subject, the new Remove Tool model (beta), and Color & Vibrance to move the needle before spending credits.
4) Advocate for transparency
Ask for an in-app credit counter and a single, stable pricing reference. Until that exists, maintain your own simple tracker per project.
Example:
Agency workflow: designer preps comps with free stock + on-device selections; retoucher does one premium Gemini pass per hero image; producer tracks credits per job in a spreadsheet. Billing stays clean.
Example:
Freelancer workflow: set a per-project credit cap and communicate it in the proposal. "This scope includes up to 200 credits for premium AI. Additional credits billed at cost." Clients appreciate the clarity.
Pro tip:
Batch your premium operations. Iterate locally, then commit to one premium pass at the end. It's cheaper and usually better.
Professional, Education, and Enterprise Considerations
The tools are amazing. The economics make planning essential. Here's how different users can adapt.
Creative professionals:
- Build a price model that factors credits into your scope.
- Maintain before/after layers to justify premium usage to clients when needed.
Educational programs:
- Teach both technique and cost-awareness. Students should know which actions consume credits and why their output resolution choices matter.
- Assign projects with credit budgets to build healthy habits.
Enterprise & teams:
- Write internal guidelines for when premium tools are approved.
- Centralize tracking (even a shared sheet is better than nothing).
- Periodically audit credit usage versus outcomes to refine policy.
Example:
A university course assigns a magazine cover project with a 50-credit cap. Students plan, iterate locally, and learn to reserve premium for the make-or-break moments.
Example:
A production studio tags each deliverable with "credits used per asset." Over a quarter, they discover that Harmonize iterations are the biggest sink and adjust their process accordingly.
Workflow Recipes You Can Steal
Below are plug-and-play workflows that balance quality and spend.
Portrait retouch
- On-device Select Subject for hair-safe masks (0 credits).
- Local frequency separation or simple dodge/burn.
- Gemini Generative Fill for braces removal (10 credits).
- Light AI Sharpen on eyes only (10-20 credits).
- Color & Vibrance for final harmony (0 credits).
Product composite for social
- Place free stock background (0 credits).
- Local cutout with on-device Select Subject (0 credits).
- Harmonize once (5 credits).
- Firefly Upscale to platform-required resolution (credits vary by output size).
E-commerce rescue (low-res supplier image)
- Topaz Gigapixel upscale to required dimensions (variable credits).
- Flux to remove glare on packaging (10 credits).
- Minimal Color & Vibrance to balance cast (0 credits).
- Optional: AI Sharpen on edges (10-20 credits, use sparingly).
Event photo cleanup
- AI Denoise on shadow regions only (10-20 credits; mask in).
- Remove Tool 3 (beta) for background distractions (0 credits).
- Firefly Upscale for large prints if needed (variable credits).
Prompts, Selections, and Masking: The Skill That Makes AI Look Good
AI models are sensitive to your prep. Your selection quality dictates your output quality.
Selections
- Use on-device Select Subject as your first pass.
- Refine edges, especially hair and semi-transparency.
- Tight selections = cleaner generations = fewer re-runs.
Prompts
- Use clear, minimal language: "Remove braces and restore natural teeth."
- Avoid contradictions and long adjectives.
- Let the pixels speak. If it's obvious visually, you often don't need to say it.
Masking
- Blend the best parts from different variations.
- Preserve critical textures (hair, fabric grain) by masking out AI overreach.
Example:
For a jacket swap: Select the jacket tightly, prompt: "Navy blazer, matte fabric, keep folds." Mask the best variation in along seams and edges to preserve realism.
Example:
For removing reflections: Select only the glare areas, prompt: "Remove reflections; preserve eyes and frame highlights," then feather masks to avoid banding.
Model Quality Varies: Know the Strengths and Weaknesses
Different engines have different priorities. Use that to your advantage.
Firefly
Natural and safe. Great for upscaling people and lifestyle photos.
Gemini "Nano Banana"
Accuracy and detail for high-stakes edits,faces, teeth, fabric, subtle surfaces.
Flux
Reflections, tricky edges, glare reduction. A very useful second option for optical challenges.
Topaz Gigapixel
Razor detail. Best for products, objects, and type. Can look artificial if overused.
Topaz Bloom
Creative enhancement. Use when you want extra detail, not exact fidelity.
Example:
Architecture shot for print: Topaz Gigapixel for edges, then light Color & Vibrance to keep it real. Avoid Bloom here unless you want stylization.
Example:
AI artwork for large display: Topaz Bloom to add complexity, then Firefly Upscale for a balanced finish.
Budgeting and Forecasting: From Guesswork to Control
The biggest frustration right now is scattered cost info and no in-app credit counter. So, control what you can.
Build a simple internal pricing guide:
- List the features you actually use.
- Add typical credit costs per output size (for upscales).
- Update it monthly with your real usage data.
Set team rules:
- Limit Harmonize passes to one per asset unless approved.
- Use Remove Tool 3 first for object removal.
- Only use premium fills for hero images.
Example:
An agency creates a one-page PDF with "When to Use Which Model" and "Expected Credits." They train interns on it in one afternoon. Overnight, costs drop and quality goes up because decisions are consistent.
Example:
A solo creator sets a personal rule: "Never upscale to final size until the client approves the comp." That avoids paying for massive outputs twice.
Ethics, Privacy, and Client Expectations
On-device tools give you privacy. Cloud tools may process content externally. Make sure clients know how their media is handled and ask for permission when needed.
Ethical workflow tips:
- Use free stock responsibly and verify licensing.
- Keep original layers. If a client asks what was changed, you can show them.
- For sensitive subjects (faces, medical, minors), default to on-device whenever possible.
Example:
Medical practice portraits: Use on-device selections and local corrections. Avoid cloud generations unless explicitly approved.
Example:
Brand product shots: Clarify that upscales and premium fills may run through partner models. Include it in your SOW so everyone's aligned.
Practice and Self-Assessment
Multiple-choice
1) Which new adjustment layer adds Temperature and Tint sliders to the layers panel?
A. Curves B. Color and Vibrance C. Selective Color D. Gradient Map
2) Which Generative Upscale model is best for adding new creative details to an abstract image?
A. Firefly Upscale B. Topaz Gigapixel C. Topaz Bloom D. On-Device Upscale
3) How many credits does Harmonize consume per use?
A. 1 B. 5 C. 10 D. It is free
4) To use the most advanced Remove Tool 3 model in the beta, you must:
A. Click Remove in the contextual taskbar B. Select it from the filter menu C. Choose Model 3 in the Remove Tool options bar D. It is applied automatically
Short answer
1) Describe the difference between on-device processing and cloud processing in Photoshop.
2) Explain when you'd choose Firefly Upscale over Topaz Gigapixel.
3) Name the two main capabilities of the improved Reference Image feature in Generative Fill (beta).
4) What's the primary criticism of the current AI Denoise integration?
Discussion prompts
1) Weigh the pros and cons of a credit-based system. How will hobbyists, freelancers, and agencies adapt differently?
2) Given the leap from earlier to newer AI models, what capabilities do you expect to see next?
3) Why might the integrated Topaz Denoise underperform compared to the standalone app? What does this suggest about big-platform integrations?
Additional Resources
Explore and stay current:
- Adobe Firefly: firefly.adobe.com (test models early).
- Search "Adobe Generative Credits FAQ" for the latest credit policies.
- Topaz Labs standalone apps for comparison (Topaz Photo AI, Gigapixel, etc.).
- Topics worth studying: AI ethics in visual work, cloud vs. edge AI, prompt craft for photorealism.
Everything Covered: The 12 Features at a Glance
The list you can keep handy:
1) Generative Fill , Gemini "Nano Banana" (premium, ~10 credits per gen).
2) Generative Fill , Flux (premium, ~10 credits per gen).
3) Generative Upscale , Firefly, Topaz Gigapixel, Topaz Bloom (premium, output-size based credits).
4) Harmonize , standard feature, 5 credits per generate.
5) AI Denoise , premium, ~10-20 credits per use.
6) AI Sharpen , premium, ~10-20 credits per use.
7) Color & Vibrance adjustment layer , no credits.
8) Improved on-device Select Subject , no credits.
9) Free Adobe Stock integration , no credits.
10) Next-gen Firefly Fill & Expand (beta) , 1 standard credit per gen.
11) Improved Reference Image guidance (beta).
12) Remove Tool 3 (beta) , no credits.
And the one big catch:
The credit-based system turns creative actions into variable costs. Plan your tool use, track your outputs, and you'll keep your quality high without burning your budget.
Step-by-Step: Two Complete Project Walkthroughs
Walkthrough 1: Fashion Portrait Cleanup
1) On-device Select Subject for clean hair edges (0 credits).
2) Remove background locally; add free stock scene (0 credits).
3) Harmonize once to match lighting (5 credits).
4) Gemini Fill to remove braces (10 credits).
5) AI Sharpen on eyes and accessories (10-20 credits).
6) Color & Vibrance to balance tones (0 credits).
7) Firefly Upscale to final size (credits depend on output).
Total: Cost-efficient, premium where it counts.
Walkthrough 2: Product Hero for E-commerce
1) Free Adobe Stock lifestyle background (0 credits).
2) On-device Select Subject to isolate the product (0 credits).
3) Flux Generative Fill to remove packaging glare (10 credits).
4) Harmonize once for color cast match (5 credits).
5) Topaz Gigapixel to required resolution (credits depend on output).
6) Optional AI Sharpen on edges and type (10-20 credits).
Total: Crisp, believable, and priced predictably.
Common Pitfalls and How to Avoid Them
Over-relying on premium iterations
Problem: Burning credits with repeated generations. Fix: Do your selections and color groundwork locally first.
Ignoring output size
Problem: Upscaling too early, then redoing it later. Fix: Get client approval on comps. Upscale once, at the end.
Sharpening hair and fabrics too aggressively
Problem: Plastic or net-like artifacts. Fix: Mask out hair and non-critical fabrics. Sharpen only edges and focal points.
Sloppy prompts
Problem: Vague results forcing multiple re-runs. Fix: Write short, specific prompts that match your selection.
Example:
Instead of "Make this better," write "Remove glare on glasses; keep eyes and frame highlights." You'll spend fewer credits and get cleaner results.
Example:
Instead of "Change outfit," write "Swap to navy blazer, matte fabric, keep folds and buttons." Better input, better output.
Team Playbooks and Governance
Teams need rules. Not to slow you down, but to keep you consistent and profitable.
Recommended policies:
- Credit caps per project with approval thresholds.
- A shared model-selection guide for common scenarios.
- A quarterly review of credits used vs. results achieved.
- Clear approval for premium-heavy tasks (mass upscaling, heavy retouching).
Example:
Set a rule: "Use Remove Tool 3 first for object cleanup. If it fails, switch to premium Fill." You'll save credits across hundreds of images with zero quality loss.
Example:
Institutional labs can define "core curriculum" tasks that must be on-device only, reserving credits for advanced courses and senior projects.
Fast Reference: When You Want the Most Natural Result
Portraits
- Firefly Upscale, Gemini Fill, light AI Sharpen on eyes only.
Lifestyle composites
- Harmonize once, Color & Vibrance, Select Subject on-device.
Product/Type/Architecture
- Topaz Gigapixel, Flux for optical cleanup, gentle Color & Vibrance.
Creative/AI art
- Topaz Bloom + Firefly Upscale for pleasing texture without overcooking.
Example:
A lifestyle ad with a person holding a product: Harmonize to match lighting, then Firefly Upscale for delivery size. Skip Sharpen unless the product label needs a touch more clarity.
Example:
UI mockups or app store previews: Topaz Gigapixel for crisp type, then mild Vibrance to keep it pleasing, not neon.
Conclusion: Master the Tools, Master the Meter
Photoshop just grew up. You've got a bench of AI models,Adobe's and partners,living alongside the classic tools you already know. You can remove braces, match lighting automatically, upscale to massive sizes, and cleanly reconstruct backgrounds that would've taken hours by hand. It's all within reach.
The trade-off is new: some of the best features run on credits, and the costs vary. That doesn't have to be scary. When you lead with on-device tools, tighten your selections, write clean prompts, and reserve premium passes for make-or-break moments, you'll create top-tier work without draining your balance.
Here's your next move: pick one real project and run it using the playbooks in this guide. Track your credits. Note where you saved time. Dial in your model preferences. Once you do that a few times, you'll have your own system,reliable, profitable, and calm. That's how you turn these 12 features and one big catch into a competitive edge.
Frequently Asked Questions
This FAQ is built to answer the most common and the most nuanced questions about Photoshop's newest AI features and the credit-based "catch" that sits behind many of them. You'll find clear explanations, practical workflows, and business-focused guidance, from quick wins to advanced use cases. Each answer highlights what matters, how to use it, and where the costs show up,so you can plan budgets, reduce rework, and deliver consistent results.
Core Concepts: AI Models & The Credit System
What is the new credit system in Photoshop?
Core idea:
Certain AI features now deduct "generative credits" when you use them, especially those that run in the cloud or rely on partner models. Features are labeled as either "standard" or "premium," and the credit cost varies by tool and output size. You'll see this most with Generative Fill, Upscale, and partner-powered filters.
Why it matters:
You can forecast costs per project and choose lower-credit paths when quality allows (e.g., on-device features for selections). For example, minor edits with the built-in Firefly models often cost less than premium partner models. For teams, plan credit allocation per role or project to avoid stalls mid-delivery. A simple rule: if the feature sends pixels to the cloud for heavy processing, expect credits to be used.
What is the difference between "standard" and "premium" features?
Standard:
Included with a Photoshop subscription. Some standard tools still use credits (e.g., Harmonize, certain Firefly generations) but typically at lower rates. Many local features (like improved on-device selections) use no credits.
Premium:
Advanced capabilities, often via partner models (e.g., Topaz), with higher-quality outputs in certain cases and higher credit costs. Access may require a plan that includes premium credits.
Practical example:
Use standard Firefly Fill for simple background extensions; switch to a premium model (Nano Banana or Flux) when you need high-fidelity edits like complex reflection removal or hyper-realistic facial edits.
What are the new premium AI models available for Generative Fill?
Two key options:
Nano Banana (Gemini 2.5) excels at difficult, realistic edits (e.g., removing braces, photoreal clothing swaps). Flux can outperform others in tricky scenarios like removing intricate reflections on glasses or highly specular surfaces.
How to choose:
If realism on faces and fabrics matters, start with Nano Banana. If your issue involves glass, reflections, or fine repetitive textures, try Flux. Always compare a few variations before committing. For client work, save the best two for review and feedback.
How many credits do the new premium Generative Fill models cost?
Cost:
Using Nano Banana or Flux typically costs 10 credits per generation (per click of Generate). Each variation set is a chargeable event.
Budget tip:
Pre-select a tight region to reduce re-generations. Use on-device selections first to refine edges. For multiple related edits, stage them and generate in fewer, larger passes rather than many small ones. This reduces total clicks,and credits.
New Features in the General Photoshop Release
What is the "Color and Vibrance" adjustment layer?
What it does:
Adds Temperature, Tint, and Vibrance controls directly to the Layers panel for non-destructive grading. It mirrors the core color controls many know from Camera Raw, but now it sits inside your compositing workflow.
Use cases:
Quickly warm a product photo, neutralize a green cast from office lighting, or boost muted colors without clipping skin tones. Stack multiple instances on groups or smart objects to keep client revisions simple. Because it's an adjustment layer, you can mask it to target skies, skin, or brand elements with precision.
How have the on-device "Select Subject" and "Remove Background" tools been improved?
What's new:
On-device models now produce much cleaner edges (hair, fur, fabric) without sending data to the cloud. They're faster, private, and ideal for batch selection work.
How to enable:
Go to Settings > Image Processing > Select Subject Processing and choose "Device."
Real-world example:
E-commerce teams can isolate dozens of product shots locally, then apply a consistent backdrop, all without consuming credits or waiting on uploads.
What is "Generative Upscale"?
Purpose:
Upscales low-resolution images using AI to add plausible detail and reduce artifacts. Access via Image > Generative Upscale. You'll choose a model and an upscale factor; Photoshop outputs a new, larger document.
When to use it:
Rescuing older product shots for larger placements, upscaling social images for print, or enhancing AI-generated art for high-res outputs. Keep in mind there's a maximum input size, and credit usage is tied to the final output resolution.
What are the differences between the Firefly and Topaz upscaling models?
Firefly Upscale:
Produces natural, softer detail,great for portraits and lifestyle images where "too sharp" looks fake.
Topaz Gigapixel (premium):
Extremely sharp and detail-preserving, but can overcook hair or fine textures. Includes optional Face Recovery that may subtly change identity features.
Tip:
For skin and textiles, start with Firefly; for packaging, typography, or hard edges, try Topaz. Always check hairlines, logos, and eyes at 100% zoom before exporting.
What is "Creative Upscaling" with the Topaz Bloom model?
Intent:
Instead of preserving exact original detail, Bloom generates new detail that matches the image's essence. It's ideal for stylized art, illustrations, or AI art where "cleaner, richer detail" beats strict fidelity.
Example:
A low-detail chain in concept art becomes a more ornate chain in the upscale. Great for moodboards, covers, and marketing visuals where impression matters more than forensic accuracy.
How are credits calculated for upscaling features?
Key point:
Credit cost is tied to output resolution, not just the input size or upscale factor. Larger final pixel dimensions cost more, and premium models tend to cost more than standard ones.
Planning tip:
If you only need a social-size output, choose a smaller upscale. For print, estimate your target size and run a single upscale to that spec, rather than stacked upscales that cost more and compound artifacts.
What does the "Harmonize" feature do?
Function:
Harmonize analyzes the background and adjusts your subject layer's color and lighting to match,helping composites feel believable in one click. You'll see multiple variations to choose from.
Use case:
Place a studio-shot product into a warm café scene; Harmonize shifts highlights and tint so it "belongs." Follow with manual refinements (shadows, reflections) for client-ready realism.
Is the "Harmonize" feature free to use?
Cost:
Harmonize is categorized as a standard feature but consumes 5 credits per generation. Variations count as a single generation per click of Generate.
Tip:
Pre-balance your subject with the Color and Vibrance layer first. If you're close before Harmonize, you'll need fewer re-renders,and fewer credits.
What are the new AI Denoise and AI Sharpen features?
What they do:
These partner-powered filters aim to reduce noise (AI Denoise) and correct blur/add crispness (AI Sharpen). They run as integrated filters with minimal controls and consume premium credits (often 10-20 per use).
Reality check:
AI Sharpen often helps eyes and edges but can create a net-like texture in hair. AI Denoise may underperform compared to standalone tools in some images. Test on a duplicate layer, review at 100%, and keep layer masks to limit impact to the areas that need it.
How can I add free Adobe Stock images directly within Photoshop?
Access:
Use the toolbar icon, File > Place Free Adobe Stock Images, or the contextual taskbar on a blank document. You'll get commercially usable assets without leaving your canvas.
Workflow tip:
Build a "starter scene" with Stock, then drop in your product or hero subject. Use Harmonize to match, Color and Vibrance to grade, and Select Subject to refine. This speeds mockups, ad concepts, and landing page visuals.
New Features in Photoshop Beta
What new Generative Fill model is available in the Beta version?
What's improved:
The Beta includes a new Firefly Fill and Expand model with higher resolution generation (up to 2K) and better realism for people and animals. It's a standard feature and typically costs 1 credit per generation.
Why use it:
When you need more believable skin, hair, or fur than past models could deliver. It's also great for comp expansions where you want exact texture continuity.
What improvements have been made to the "Generative Expand" feature?
What you'll notice:
Seamless blending with original content,textures, light direction, and patterns carry through, making the boundary hard to spot.
Example:
Expanding a fashion photo's canvas for a taller ad placement. The floor pattern, fabric folds, and edge lighting continue smoothly into the newly generated margins.
How has the "Reference Image" feature been improved in the Beta?
Two modes:
Place lets you bring an object from a reference into your selection; Swap replaces an existing object while keeping perspective and lighting consistent. The AI matches scale and tone automatically.
Use case:
Replace a product colorway with a reference SKU, or swap a prop to align with brand guidelines,without manually re-lighting or warping.
Certification
About the Certification
Become certified in Photoshop AI features and Generative Fill. Prove you can choose local vs cloud, control AI credits, build cost-efficient workflows, and deliver client-ready composites, extensions, and edits at speed.
Official Certification
Upon successful completion of the "Certification in AI-Powered Image Editing with Photoshop Generative Fill", you will receive a verifiable digital certificate. This certificate demonstrates your expertise in the subject matter covered in this course.
Benefits of Certification
- Enhance your professional credibility and stand out in the job market.
- Validate your skills and knowledge in cutting-edge AI technologies.
- Unlock new career opportunities in the rapidly growing AI field.
- Share your achievement on your resume, LinkedIn, and other professional platforms.
How to complete your certification successfully?
To earn your certification, you’ll need to complete all video lessons, study the guide carefully, and review the FAQ. After that, you’ll be prepared to pass the certification requirements.
Join 20,000+ Professionals, Using AI to transform their Careers
Join professionals who didn’t just adapt, they thrived. You can too, with AI training designed for your job.
